I was recently lucky enough to participate in a multi-player PBEM game organised and umpired by Norm, of Battlefields and Warriors fame. The battle was Germantown, the game published by Decision Games, and the report is up on Norm's blog here.
Before I got into miniatures gaming I was involved in the PBEM Diplomacy scene. It was huge fun, though a little too demanding of time and attention to continue for very long. Norm's game - well conceived and very efficiently run - was a lovely reminder of how enjoyable multi-player PBEM play can be.
If Norm ever runs something similar again, I would advise anyone with the remotest interest in it to jump at the chance to join in.
Prufrock's Wargaming Blog

Showing posts with label PBEM. Show all posts
Showing posts with label PBEM. Show all posts
Saturday, June 20, 2020


Thursday, February 26, 2015
Ukraine '44 game wrapped up
Preamble
Over the last couple of months, Kevin over at the Zhodani Commando blog and I have had a game of MMP's Ukraine '44 on the go. We played using the VASSAL engine and the Ukraine '44 module (which Kevin performed a bit of magic on to make more user-friendly), taking turns recording our respective moves in a VASSAL logfile and then sending them to the other fellow to roll dice, take casualties, etc. It's a brilliant way to play over distance, and the way the turns are broken up means that you don't need too large a chunk of time to do your moves. The most time-consuming thing is working out how you want to approach the board situation.
The game is based on Hube's pocket, in which the surrounded German 1st Panzer Army managed to break out of the encirclement and rejoin their comrades. I deliberately didn't read up on the historical action because I wanted to work out things for myself, so apologies for going light on that aspect!
One interesting thing about the game is that all unit strengths are hidden and strength is only revealed during combat. Consequently, there is a fair bit of guesswork going on early in the game as one gets a feel for where the enemy has concentrated his strength.
The objective for the German player is to break out of the pocket or, failing that, to prevent the Soviets from taking three victory cities while also destroying more Soviet strength points than he loses himself.
The Germans have a number of advantages, including that they get better movement rates than the Soviets, and that their mechanised units get to move again after combat, allowing these to attack from an exposed position and then retreat back to the relative safety of the main lines. They also have force multipliers in the form of two units of tiger tanks which can be attached to any armoured unit and give a very useful 1-3 modifier to the combat die roll on both attack and defence. The Germans also have 'combat superiority', meaning that should they convincingly destroy an enemy formation in any attack, the German force involved is able to ignore the combat attrition that it would normally have suffered.
The Soviets can win by preventing a breakout and by killing off German strength points, with any German strength points out of supply at the end of the game also counting as eliminated. The Russian player can also claim an auto victory if at any time he controls three of the game's four victory cities.
In their favour the Soviets have three things: the number of units, the strength of their tank divisions, and the +2 artillery combat modifier that applies if they elect to do their attacks before they do any movement. But most of the Soviet infantry units are relatively weak in defence, and are therefore susceptible to being monstered by determined German attacks, provided that the German attacks the right units (which, given hidden unit strengths, is not always certain!).
Each side must therefore play quite differently.
Anyway, I took the Germans, Kevin took the Soviets, and we were at it.
The action
This is how things started off after Kevin's first move.
 |
| Opening moves (note that my units' strengths can be seen because the module is showing the game from my perspective) |
You can see that Soviet armour (red units) has already seized the key road junctions between the German forces and safety to the west.
Over the next few turns Kevin attempted to complete the encirclement, squeeze the Germans back towards the river, and reduce the German garrison in the victory city of Ternopol in the North.
 |
| Turn 3 |
The Germans tried to kill as many front-line Soviet units as possible, first by giving the armoured units a bloody nose and then, once they were cautious and wary, by directing attacks against the weaker infantry units. Meanwhile, the Soviets attacked a second victory city in the north and threatened a third in the south.
 |
| Turn 5 |
It was only now that I saw Kevin's plan - suck up losses elsewhere, and aim to take the victory cities for the auto win. I did not have enough troops to do much about this; I had not seriously considered this strategy on his part. The cunning blighter had me!
 |
| Turn 6 |
By now the troops in the pocket were relying on supply from the air and were operating at reduced effectiveness. When combined with the advance against my victory cities, the situation looked hopeless. I was ready to call the game at this point, but Kevin encouraged me to continue, and he was right - I had misread the reinforcement entry hexes, and with a bit of luck a counterattack was launched using said reinforcements, keeping the Soviet advance units isolated and out of supply and enabling the recapture of the second of the northern victory cities
 |
| Turn 7 |
 |
| Victory! |
But it was not to be. Although almost at the limits of their strength in the north the Soviets retook Berezheny, and with Chernovtzy in the south falling in the same turn, Kevin had the three victory cities he needed to triumph. A mighty success - well done sir!
Conclusion.
The game was, for me, a lot of fun, even though I badly misread Soviet intentions. From the German player's perspective, the actions needed to try to weaken the encircling cordon were great fun to play out, but I don't think Kevin enjoyed the Soviet infantry units being so weak! Nevertheless, despite the desperate efforts of 1st Panzer Army, clever planning and nerves of Red Steel saw Kevin through to his thoroughly deserved win.
I would certainly play this again, but my German strategy needs a bit more work, I think!
Aside from being a strong player, Kevin was an excellent sport and a lot of fun to play against. VASSAL is a great tool, and if any readers like boardgames but lack for local players, I would encourage you to look into it.
Wednesday, January 16, 2013
Ancient and Medieval Wargaming (AMW) with John
For me, one of the great delights of the internet age is the ease with which one can meet like-minded wargame enthusiasts from around the world and not only share ideas and a bit of humour but also actually get to play a bit.
VASSAL is so far the best tool I've encountered for play by email games, but Cyberboard does a good job as well.
One gamer I've been lucky enough to have a bit to do with over the past few years is John Acar, and the latest in our long line of VASSAL matches was concluded just recently. What follows is a brief report. All of the screenshots included here are from John's VASSAL module for the game, which can be found in the file section of the AMW yahoo group.
This rules used were Neil Thomas's Ancient and Medieval Wargaming, in this instance pitting Macedonians vs Classical Indians.
I set up first as the Macedonians, putting my heavy infantry in the centre, cavalry on the wings, and light infantry on the left ready to take up a defensive position in the wood. John responded by putting his heavy chariotry on the wings - those on the left supported by his two elephants - and the weaker bow-armed infantry in the centre.
In AMW the first side to eliminate six of the eight enemy units wins, so my plan was to close as quickly as possible in the centre and trust that my phalanx could defeat his bow quickly. I hoped to beat him on one wing with an outflanking move and hold him as long as possible on the other. I felt that there was not much I could do to counter the elephants except pray for really good dice.
Heavy chariots are superior to my companion cavalry in AMW, so I imagined that John's plan would be to use that superiority to his advantage, try to win on the flanks, and unleash the jumbos onto my poor unsuspecting heavy infantry.

Over the next few turns the Indians got into bow range and fired off a volley or two, but without conspicuous success. My cavalry held back on both flanks, daring his chariotry to advance. On his left, they did.

The Indian shooting improved dramatically as the turns clicked over, and John's chariots charged in on the left. My hypaspists promptly responded with a charge of their own into the flank of the chariots, and then the hypaspists in their turn were smacked into by an elephant.
Confused? Hopefully the screenshot below will help.
In the centre the phalangites continued their slow advance, peeling off the rightmost unit to guard against the attack by the second elephant. On my left, nothing much happened except for the light infantry accepting that they were on the wrong wing and trying to get to the other as quickly as they could.

It was now my turn to charge, and the phalangites piled in. They managed to rout the unit opposing the left of the line, but the bowmen in the centre put up strong resistance and the struggle turned attritional.
On my right the horse and chariots traded blows, with the supporting hypaspists disappearing rapidly thanks to the attention of the elephant on their flank.

The fight continued, with the leftmost unit of Indian foot swinging round to outflank my phalanx. The chariots of his right also turned and gave every indication that they would come down off their hill and engage my infantry line.

As the elephants got more into their work, both the hypaspists and flank guard decided they'd had enough. They broke, and my right centre abruptly collapsed.
It was still slow going in the centre, and (to coin a phrase...) it became apparent that the battle was 'going ill with us'.

John seized his chance to get the other chariots involved, and they charged into the line as well. The elephants re-positioned themselves to inflict more carnage on the exposed infantry, and my light infantry flung javelins for all they were worth.
In the centre, the second unit of bowmen finally gave way.

The chariots were by now carving up my phalanx, but I hoped that my cavalry's belated arrival on that wing would take care of that. The freed-up phalanx ploughed into the third unit of bow infantry who continued to put up a brave fight.

Unfortunately (but not unpredictably!) my centre now gave way, and the clever plan I'd had of holding back the companions on my left was shown for what it really was - rubbish!
Ignoring the javelins coming their way, the elephants began feasting on the light infantry.

We were in even graver difficulties now, and, barring some extremely good fortune, it seemed to be just a matter of time before John's men ground me down beneath their remorseless attacks.

My cavalry charge was a failure, and the elephant slammed into my last unit of infantry before we could see off the final unit of enemy bow. "All is lost," we cried, "especially honour!"
The chariots of the Indian left then roused themselves to finish off my companion cavalry and the rout was complete.

In the end it was a comfortable victory for John and his Indians. He outplayed and outclassed me here, steamrollering my unfortunate troops with good deployment choices and strong play.
I'm afraid to say that if I were a Carthaginian they'd have hanged me after this performance!
So well done John; and all going well we'll attempt to get a rematch in at some stage this year.
VASSAL is so far the best tool I've encountered for play by email games, but Cyberboard does a good job as well.
One gamer I've been lucky enough to have a bit to do with over the past few years is John Acar, and the latest in our long line of VASSAL matches was concluded just recently. What follows is a brief report. All of the screenshots included here are from John's VASSAL module for the game, which can be found in the file section of the AMW yahoo group.
This rules used were Neil Thomas's Ancient and Medieval Wargaming, in this instance pitting Macedonians vs Classical Indians.
I set up first as the Macedonians, putting my heavy infantry in the centre, cavalry on the wings, and light infantry on the left ready to take up a defensive position in the wood. John responded by putting his heavy chariotry on the wings - those on the left supported by his two elephants - and the weaker bow-armed infantry in the centre.
 |
| Deployment with Macedonians up top and Indians below. |
In AMW the first side to eliminate six of the eight enemy units wins, so my plan was to close as quickly as possible in the centre and trust that my phalanx could defeat his bow quickly. I hoped to beat him on one wing with an outflanking move and hold him as long as possible on the other. I felt that there was not much I could do to counter the elephants except pray for really good dice.
Heavy chariots are superior to my companion cavalry in AMW, so I imagined that John's plan would be to use that superiority to his advantage, try to win on the flanks, and unleash the jumbos onto my poor unsuspecting heavy infantry.

Over the next few turns the Indians got into bow range and fired off a volley or two, but without conspicuous success. My cavalry held back on both flanks, daring his chariotry to advance. On his left, they did.

The Indian shooting improved dramatically as the turns clicked over, and John's chariots charged in on the left. My hypaspists promptly responded with a charge of their own into the flank of the chariots, and then the hypaspists in their turn were smacked into by an elephant.
Confused? Hopefully the screenshot below will help.
In the centre the phalangites continued their slow advance, peeling off the rightmost unit to guard against the attack by the second elephant. On my left, nothing much happened except for the light infantry accepting that they were on the wrong wing and trying to get to the other as quickly as they could.

It was now my turn to charge, and the phalangites piled in. They managed to rout the unit opposing the left of the line, but the bowmen in the centre put up strong resistance and the struggle turned attritional.
On my right the horse and chariots traded blows, with the supporting hypaspists disappearing rapidly thanks to the attention of the elephant on their flank.

The fight continued, with the leftmost unit of Indian foot swinging round to outflank my phalanx. The chariots of his right also turned and gave every indication that they would come down off their hill and engage my infantry line.

As the elephants got more into their work, both the hypaspists and flank guard decided they'd had enough. They broke, and my right centre abruptly collapsed.
It was still slow going in the centre, and (to coin a phrase...) it became apparent that the battle was 'going ill with us'.

John seized his chance to get the other chariots involved, and they charged into the line as well. The elephants re-positioned themselves to inflict more carnage on the exposed infantry, and my light infantry flung javelins for all they were worth.
In the centre, the second unit of bowmen finally gave way.

The chariots were by now carving up my phalanx, but I hoped that my cavalry's belated arrival on that wing would take care of that. The freed-up phalanx ploughed into the third unit of bow infantry who continued to put up a brave fight.

Unfortunately (but not unpredictably!) my centre now gave way, and the clever plan I'd had of holding back the companions on my left was shown for what it really was - rubbish!
Ignoring the javelins coming their way, the elephants began feasting on the light infantry.

We were in even graver difficulties now, and, barring some extremely good fortune, it seemed to be just a matter of time before John's men ground me down beneath their remorseless attacks.

My cavalry charge was a failure, and the elephant slammed into my last unit of infantry before we could see off the final unit of enemy bow. "All is lost," we cried, "especially honour!"
The chariots of the Indian left then roused themselves to finish off my companion cavalry and the rout was complete.

In the end it was a comfortable victory for John and his Indians. He outplayed and outclassed me here, steamrollering my unfortunate troops with good deployment choices and strong play.
I'm afraid to say that if I were a Carthaginian they'd have hanged me after this performance!
So well done John; and all going well we'll attempt to get a rematch in at some stage this year.
Saturday, September 15, 2012
A Victory Lost with Piero, first turn
An email buddy and I have just started a play-by-email game of A Victory Lost, the brilliant Eastern Front operational game by Tetsuya Nakamura. This is Piero's first attempt at AVL, so it will likely be a learning game; but as I've been experimenting with taking screenshots before and after every activation, I'm going to post these here as a record of how events progress.
To get a general overview of the rules and feel of AVL you can take a look at an earlier post, found here, that I wrote on it back in February.
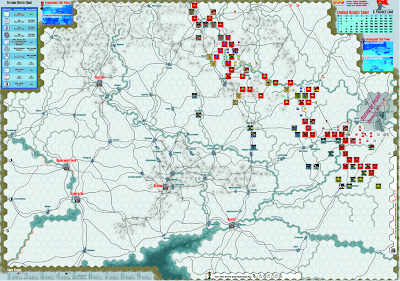
The screenshot below shows the positions at game start. The Soviets have strong forces present in the vicinity of 1st Guard Army, 2nd Guard Army and 5th Shock and 5th Tank Armies. The German line is weakly held in the centre, but there are powerful panzer divisions scattered about the south.

The Soviet attack commences: 6th Army attacks across the Don, dislodging elements of the Italian 8th Army from their positions and establishing bridgeheads for exploitation.

2nd Guard Army advances in the south, but unfortunate circumstances allow 7th Landwehr and 336th Division to hold their positions. Stalin will have something to say to the random number generators...

STAVKA is drawn from the chit cup, and the whole of the Soviet line activates. The Germans are under pressure everywhere. They are in danger of being overrun in the south, but again the line holds firm. Grave fears are held for the future of 4th Panzer Army.

The Rumanian 3rd Army HQ authorises a pull-back towards Millerovo and Morozovsk which gives the Germans some breathing space.

5th Tank Army breaks through north of Tsimlinskaia, destroying 8th Landwehr in place and threatening to outflank 7th Landwehr next activation.
4th Panzer Army at last gets the order to withdraw. The bulk of the panzer divisions are ordered north, crossing the Don to support Hollidt against 5th Tank and 5th Shock Armies. 15th Landwehr falls back to Proletarsk to hold the Manych River crossing and bar the way to Rostov.

1st Guards Army closes in on the German troops in position at Rossosh in the north, driving back one division and cutting the other off in the town. The centre of the German line has been blown open and the north is in tremendous difficulty.

In the south, Hollidt orders a local counterattack north of Tsimlinskaia, giving 7th Tank and 5th Mechanised Corps a bloody nose and driving them back. The line is briefly restored.

German reinforcements arrive - Kempf rushes north with two infantry divisions while Fretter-Pico sets up headquarters at Voroshilovgrad on the Donets.
Soviet 28th Army is due to arrive on the south-eastern flank of the German position, and elsewhere another tank corps makes its way to support the offensive.

To get a general overview of the rules and feel of AVL you can take a look at an earlier post, found here, that I wrote on it back in February.
Turn 1, December 17 to December 27, 1942.
The screenshot below shows the positions at game start. The Soviets have strong forces present in the vicinity of 1st Guard Army, 2nd Guard Army and 5th Shock and 5th Tank Armies. The German line is weakly held in the centre, but there are powerful panzer divisions scattered about the south.

The Soviet attack commences: 6th Army attacks across the Don, dislodging elements of the Italian 8th Army from their positions and establishing bridgeheads for exploitation.

2nd Guard Army advances in the south, but unfortunate circumstances allow 7th Landwehr and 336th Division to hold their positions. Stalin will have something to say to the random number generators...

STAVKA is drawn from the chit cup, and the whole of the Soviet line activates. The Germans are under pressure everywhere. They are in danger of being overrun in the south, but again the line holds firm. Grave fears are held for the future of 4th Panzer Army.

The Rumanian 3rd Army HQ authorises a pull-back towards Millerovo and Morozovsk which gives the Germans some breathing space.

5th Tank Army breaks through north of Tsimlinskaia, destroying 8th Landwehr in place and threatening to outflank 7th Landwehr next activation.

4th Panzer Army at last gets the order to withdraw. The bulk of the panzer divisions are ordered north, crossing the Don to support Hollidt against 5th Tank and 5th Shock Armies. 15th Landwehr falls back to Proletarsk to hold the Manych River crossing and bar the way to Rostov.

1st Guards Army closes in on the German troops in position at Rossosh in the north, driving back one division and cutting the other off in the town. The centre of the German line has been blown open and the north is in tremendous difficulty.

In the south, Hollidt orders a local counterattack north of Tsimlinskaia, giving 7th Tank and 5th Mechanised Corps a bloody nose and driving them back. The line is briefly restored.

German reinforcements arrive - Kempf rushes north with two infantry divisions while Fretter-Pico sets up headquarters at Voroshilovgrad on the Donets.
Soviet 28th Army is due to arrive on the south-eastern flank of the German position, and elsewhere another tank corps makes its way to support the offensive.

As things are - but dependent on how the chits come out of the cup - the Soviets are primed for success both north and south this turn as there are vulnerable German units at both ends of the line. That said, the Germans will have 4 chits in the cup this turn, giving them more options and a better chance to fall back to better defensive positions. Turn 2 will be very important (but they all are, really!).
Stay tuned for more...
(BTW, at the time of writing there are about 300 hits to go before the blog reaches the magic 50,000. If you want to enter the celebratory thank-you giveaway, go to this link and follow the instructions there.)
Wednesday, September 12, 2012
Case Yellow
I am currently enjoying a play-by-email game of Ted Raicer's Case Yellow: the German Blitzkrieg in the West with my email buddy Andrea.
Andrea is controlling the Germans (with razor-sharp precision!) and I am bumbling about as the Allies. Things are looking pretty grim. It would have been a lot worse but Andrea has managed to roll a ridiculous number of 1s in his attacks these last two turns, and his terrible luck has been considerably more influential in preventing catastrophic losses than have the actions of this Allied commander!
The panzers have reached the channel coast, so I've now declared Operation Dynamo in an attempt to salvage some formations by embarking them from Oostende and in so doing perhaps gain enough victory points to stave off a German game victory.
I don't think this is a game that I would want to play every week, but it has been very impressive so far to see the Germans in action.
Here's a clickable screenshot of the situation on May 21st (end of turn 3). To concentrate on the positives, the Maginot line is holding up pretty well!

Andrea is controlling the Germans (with razor-sharp precision!) and I am bumbling about as the Allies. Things are looking pretty grim. It would have been a lot worse but Andrea has managed to roll a ridiculous number of 1s in his attacks these last two turns, and his terrible luck has been considerably more influential in preventing catastrophic losses than have the actions of this Allied commander!
The panzers have reached the channel coast, so I've now declared Operation Dynamo in an attempt to salvage some formations by embarking them from Oostende and in so doing perhaps gain enough victory points to stave off a German game victory.
I don't think this is a game that I would want to play every week, but it has been very impressive so far to see the Germans in action.
Here's a clickable screenshot of the situation on May 21st (end of turn 3). To concentrate on the positives, the Maginot line is holding up pretty well!

Wednesday, February 29, 2012
A Victory Lost with Andrea, Turn 5
Turn 5: January 28th - February 5th.

Carrying on from the earlier report (which can be found here) the current situation sees the Germans trying to do three things at once: keep a supply line open through Rostov for 1st Panzer Army's arrival from the south; set up a defensive line in the north; and prevent the fall of Stalino.
The first objective is achieved by virtue of a limited counterattack north of Rostov which holds off the 2nd Guards Army, but further north 5th Shock Army and 1st Guard army isolate and eliminate two divisions.
In the far north 6th Army and Popov's tank force destroy resistance east of Valuyki and take the city itself, but cannot dislodge the 268th infantry division from its position covering the road to Belgorod and thence Kharkov. The infantry in this sector have, through their sacrifices, bought enough time for Kharkhov to be reinforced and have kept the armies in the north from advancing as quickly as the Soviet command would have wished.
Kempf is unable to extricate himself from a precarious position around Starobilsk, where the 7th and 19th Panzer divisions find themselves subject to a series of attacks by 3rd and 5th Tank Armies resulting in 7th Panzer being destroyed and 19th Panzer forced to fall back on the infantry support. To compound the difficulties, elements of Popov's command turn south from Valuyki to put Kempf's three remaining divisions out of supply.
Towards the end of the first week of February, 13th Tank liberates Stalino from German control, but strong German reinforcements arrive in preparation for a counter attack.
The Germans will have six chits in the cup next turn - two of which will be the magic Manstein chits - but it will be a difficult task to hold off the Soviets long enough to get 1st Panzer Army and Kempf's men out of danger while still be able to form a front capable of holding Kharkov and recapturing Stalino.
9 German infantry divisions eliminated.
4 German panzer divisions flipped.
4 German panzer divisions eliminated.
1 Victory city liberated.
1 Soviet tanks division eliminated. VPs 21-26
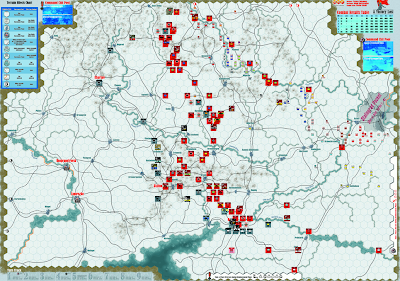

Carrying on from the earlier report (which can be found here) the current situation sees the Germans trying to do three things at once: keep a supply line open through Rostov for 1st Panzer Army's arrival from the south; set up a defensive line in the north; and prevent the fall of Stalino.
The first objective is achieved by virtue of a limited counterattack north of Rostov which holds off the 2nd Guards Army, but further north 5th Shock Army and 1st Guard army isolate and eliminate two divisions.
In the far north 6th Army and Popov's tank force destroy resistance east of Valuyki and take the city itself, but cannot dislodge the 268th infantry division from its position covering the road to Belgorod and thence Kharkov. The infantry in this sector have, through their sacrifices, bought enough time for Kharkhov to be reinforced and have kept the armies in the north from advancing as quickly as the Soviet command would have wished.
Kempf is unable to extricate himself from a precarious position around Starobilsk, where the 7th and 19th Panzer divisions find themselves subject to a series of attacks by 3rd and 5th Tank Armies resulting in 7th Panzer being destroyed and 19th Panzer forced to fall back on the infantry support. To compound the difficulties, elements of Popov's command turn south from Valuyki to put Kempf's three remaining divisions out of supply.
Towards the end of the first week of February, 13th Tank liberates Stalino from German control, but strong German reinforcements arrive in preparation for a counter attack.
The Germans will have six chits in the cup next turn - two of which will be the magic Manstein chits - but it will be a difficult task to hold off the Soviets long enough to get 1st Panzer Army and Kempf's men out of danger while still be able to form a front capable of holding Kharkov and recapturing Stalino.
9 German infantry divisions eliminated.
4 German panzer divisions flipped.
4 German panzer divisions eliminated.
1 Victory city liberated.
1 Soviet tanks division eliminated. VPs 21-26
Below is a screenshot of the map showing units in place.

Thursday, February 16, 2012
My Favourite Games: A Victory Lost
One of my favourite boardgames is MMP's A Victory Lost. Designed by Tetsuya Nakamura, its subject matter is the Soviet counter-offensive launched as Paulus' 6th Army was in its death throes at Stalingrad. The game starts on Dec 17th, 1942, goes through nine turns, each lasting about 10 days, and finishes on around March 18th, 1943. It thus includes Manstein's famous 'backhand blow' that stabilized the German front.
The game is very simple: blind pull HQ chit from cup, activate units within range of the HQ, move, fight if desired, pull next chit. The Germans start the first turn with only 3 chits in the cup while the Soviets always have 4. As the game goes on and German reinforcements arrive, the German chit count goes up, 4 per turn in turns 2 and 3, 5 in turns 4 and 5, 6 in turns 6 and 7, and then they reduce again to 5 and 4 for the final two turns. They are also aided by Manstein, whose chit, when pulled, can activate any German HQ. By turn 6 there are two Manstein chits in play, so they can get quite a bit of momentum going.
The Soviets also have some special rules for their chits. They have STAVKA, which activates all Soviet HQs at once and is obviously very powerful; but to balance this, at the start of the game the Soviets must secretly select 6 of the 12 HQ chits they have available, with the others being discarded. The discarded HQs stay on the map but cannot be put into the chit cup. This means that the Soviet player may only put combinations of these 6 chits into the cup. One of them of course will be STAVKA, but as you can imagine, deciding which of the others to ready for action makes for some interesting choices. You will often find that you'd like to have x HQ chit in the cup, but if you didn't choose that one early on, tough luck! The later game can become a nightmare if you are unable to activate the HQs you'd like.
The game is won by controlling territory and eliminating enemy units. The five victory cities are worth 5 VPs for whoever controls them. The Soviets get 1VP for each German (not allied) infantry unit eliminated and 3VP for each panzer or motorized division knocked out. The Germans get 1VP for each Soviet tank unit they destroy.
The Germans have the advantage of interior lines, greatly superior mobility, powerful panzer divisions and more flexible commands, but the Soviets have numbers and surprise on their side. It's a very different game depending on which side you play, and even though the rules are simple there is great depth to the strategy. The usual pattern is for the Germans to get pounded for the first three or four turns, but if they can survive that early stage their powerful reinforcements and increasing chit count will allow them to launch some fearsome counterattacks without the Soviets being able to do very much about it.
The game I'm playing now is with my Italian play-by-email buddy, Andrea. No matter what game we play, not only is he a thorough gentleman, but he's also a tough and determined opponent. Although this is his first time playing the Germans (and it really helps to have had experience with them before to be able to play the Germans well) he has handled the situation with no little skill.
This is the set up. The Soviets' main strength is in the 1st Guard Army, 5th Shock Army and 2nd Guard Army regions. The Germans have to decide which three HQs they will put in the cup. Do they try to pull back in the north or concentrate on getting their panzer divisions out of danger in the south? It can be a tricky choice.

Cities in red type are VP cities. It's also worth checking out the roadways (crucial for fast movement) and the railway lines (which bring reinforcements). Bridges across the river are of course very important, as are the supply sources (see symbols in the north for the Soviets; in the west for the Germans).
You can find the report on turns one to four here. Hope you enjoy!
The game is very simple: blind pull HQ chit from cup, activate units within range of the HQ, move, fight if desired, pull next chit. The Germans start the first turn with only 3 chits in the cup while the Soviets always have 4. As the game goes on and German reinforcements arrive, the German chit count goes up, 4 per turn in turns 2 and 3, 5 in turns 4 and 5, 6 in turns 6 and 7, and then they reduce again to 5 and 4 for the final two turns. They are also aided by Manstein, whose chit, when pulled, can activate any German HQ. By turn 6 there are two Manstein chits in play, so they can get quite a bit of momentum going.
The Soviets also have some special rules for their chits. They have STAVKA, which activates all Soviet HQs at once and is obviously very powerful; but to balance this, at the start of the game the Soviets must secretly select 6 of the 12 HQ chits they have available, with the others being discarded. The discarded HQs stay on the map but cannot be put into the chit cup. This means that the Soviet player may only put combinations of these 6 chits into the cup. One of them of course will be STAVKA, but as you can imagine, deciding which of the others to ready for action makes for some interesting choices. You will often find that you'd like to have x HQ chit in the cup, but if you didn't choose that one early on, tough luck! The later game can become a nightmare if you are unable to activate the HQs you'd like.
The game is won by controlling territory and eliminating enemy units. The five victory cities are worth 5 VPs for whoever controls them. The Soviets get 1VP for each German (not allied) infantry unit eliminated and 3VP for each panzer or motorized division knocked out. The Germans get 1VP for each Soviet tank unit they destroy.
The Germans have the advantage of interior lines, greatly superior mobility, powerful panzer divisions and more flexible commands, but the Soviets have numbers and surprise on their side. It's a very different game depending on which side you play, and even though the rules are simple there is great depth to the strategy. The usual pattern is for the Germans to get pounded for the first three or four turns, but if they can survive that early stage their powerful reinforcements and increasing chit count will allow them to launch some fearsome counterattacks without the Soviets being able to do very much about it.
The game I'm playing now is with my Italian play-by-email buddy, Andrea. No matter what game we play, not only is he a thorough gentleman, but he's also a tough and determined opponent. Although this is his first time playing the Germans (and it really helps to have had experience with them before to be able to play the Germans well) he has handled the situation with no little skill.
This is the set up. The Soviets' main strength is in the 1st Guard Army, 5th Shock Army and 2nd Guard Army regions. The Germans have to decide which three HQs they will put in the cup. Do they try to pull back in the north or concentrate on getting their panzer divisions out of danger in the south? It can be a tricky choice.

Cities in red type are VP cities. It's also worth checking out the roadways (crucial for fast movement) and the railway lines (which bring reinforcements). Bridges across the river are of course very important, as are the supply sources (see symbols in the north for the Soviets; in the west for the Germans).
You can find the report on turns one to four here. Hope you enjoy!
Friday, February 4, 2011
Zama page created to record our play-by-email game
I've set up a page on the old blog here to record the details of our second Lost Battles play-by-email game. It occurred to me that it's probably neater to keep the details of this refight all in one place and update the same page rather than clog up the main page with lots of posts. For anyone interested the page link is here. It can also be found by clicking the 'Zama' page underneath the title of the blog.
In other news, I ordered another 64 foot and 19 cavalry figures from Strategia e Tattica to allow me to fill out me SeT legions. The package arrived yesterday, and includes a nice-looking Scipio Africanus. Will look forward to getting them painted up at some stage, but am not yet sure where they sit in the queue. Having an Africanus on the table is, however, a motivating factor!
In other news, I ordered another 64 foot and 19 cavalry figures from Strategia e Tattica to allow me to fill out me SeT legions. The package arrived yesterday, and includes a nice-looking Scipio Africanus. Will look forward to getting them painted up at some stage, but am not yet sure where they sit in the queue. Having an Africanus on the table is, however, a motivating factor!
Friday, December 17, 2010
Raphia multiplayer PBEM: part three
This is the third post in a series on our multiplayer PBEM refight of Raphia. The first post is here and the second is here.
By the end of the fourth turn the Seleucids had swept away the Ptolemaic left and turned in to attack the centre while Antiochus with his cavalry had galloped around to attack the reserve. On their own left, the Seleucids were under considerably more pressure. With their leftmost zone reduced to two units, one of which was spent, and their centre reduced to five units with only one fresh, they were beginning to look a little fragile in this quarter of the field.
With time running out, the Ptolemies needed a quick victory in the centre and on the right to allow them to turn to deal with Antipater's rampaging elephants and Antiochus' veteran heavy cavalry. The question is, would it happen, and if so, would it happen in time?
Here is the board situation at the start of turn 5:

Turn 5.
The Ptolemies rolled a one for command, giving them five command points to use. Ephecretes began on the left, attacking Themison in his left rear zone. Three hits were scored, shattering all the units there and clearing the zone. With his last order Ephecretes sent his average light cavalry in to take the enemy camp and in so doing threaten the morale of the Seleucid centre.
Andromachus used his two commands to attack Nicarchus' phalangites, scoring two hits and causing a unit to shatter. In the morale test that followed the entire Seleucid centre gave way and Andromachus advanced one spent levy unit into the now cleared zone.
Things had gone very well for the Ptolemies to this point.
After the Ptolemaic turn the board looked like this:

With the battle now at a crucial stage, all depended on whether the Ptolemaic morale could remain steady in the face of the Seleucid counter blow.
The Seleucids had 9 commands to play with and these were pumped into as many bonuses as possible.
First, Antipater's zone was activated for a total of 5 commands. A unit of the Indian elephants was put into the lead and given a command bonus; the phalangites were paired and also given a command bonus; finally, the other elephants were to attack last and at a minus for going over the attack limit.
Antipater's attack:

The lead elephant, needing a 6 to hit, rolled a 6. As it was spent, it could not all-out attack and so no hit was made.
The paired phalangites, also needing a 6 to hit, rolled a 4.
The remaining elephant needed a 9 to hit but rolled a 7.
No hits scored!
The second zone activated was the Seleucid key zone. With 1 command the light infantry was ordered to turn and attacked the spent levy phalanx unit. For 2 more commands it was given a combat bonus.
The light infantry attack:


By the end of the fourth turn the Seleucids had swept away the Ptolemaic left and turned in to attack the centre while Antiochus with his cavalry had galloped around to attack the reserve. On their own left, the Seleucids were under considerably more pressure. With their leftmost zone reduced to two units, one of which was spent, and their centre reduced to five units with only one fresh, they were beginning to look a little fragile in this quarter of the field.
With time running out, the Ptolemies needed a quick victory in the centre and on the right to allow them to turn to deal with Antipater's rampaging elephants and Antiochus' veteran heavy cavalry. The question is, would it happen, and if so, would it happen in time?
Here is the board situation at the start of turn 5:

Turn 5.
The Ptolemies rolled a one for command, giving them five command points to use. Ephecretes began on the left, attacking Themison in his left rear zone. Three hits were scored, shattering all the units there and clearing the zone. With his last order Ephecretes sent his average light cavalry in to take the enemy camp and in so doing threaten the morale of the Seleucid centre.
Andromachus used his two commands to attack Nicarchus' phalangites, scoring two hits and causing a unit to shatter. In the morale test that followed the entire Seleucid centre gave way and Andromachus advanced one spent levy unit into the now cleared zone.
Things had gone very well for the Ptolemies to this point.
After the Ptolemaic turn the board looked like this:

With the battle now at a crucial stage, all depended on whether the Ptolemaic morale could remain steady in the face of the Seleucid counter blow.
The Seleucids had 9 commands to play with and these were pumped into as many bonuses as possible.
First, Antipater's zone was activated for a total of 5 commands. A unit of the Indian elephants was put into the lead and given a command bonus; the phalangites were paired and also given a command bonus; finally, the other elephants were to attack last and at a minus for going over the attack limit.
Antipater's attack:

The lead elephant, needing a 6 to hit, rolled a 6. As it was spent, it could not all-out attack and so no hit was made.
The paired phalangites, also needing a 6 to hit, rolled a 4.
The remaining elephant needed a 9 to hit but rolled a 7.
No hits scored!
The second zone activated was the Seleucid key zone. With 1 command the light infantry was ordered to turn and attacked the spent levy phalanx unit. For 2 more commands it was given a combat bonus.
The light infantry attack:

The light infantry needed 8 to hit and shatter the levy phalanx. The roll? 2!
This left it all up to Antiochus, who put his own guard unit in the lead and attacked using his exemptions.
Antiochus' attack:

The lead veteran heavy cavalry with two combat bonuses going up against levy phalangites in an edge zone required a 4 to hit once or an 8 to hit twice. The result was a 10, shattering the unit in one grand charge and causing a morale test!
With another high morale roll needed by the Ptolemies, the die finally failed to oblige. On a score of 1 all but three units ran away, with those remaining three counted as withdrawn (as a mercy - technically we should have kept going).
So, a magnificent victory for the Seleucids! The pressure they put on the Polycrates' left told, and despite the best efforts of Andromachus and Ephecretes, Nicarchus and Themison stuck it out for long enough for Antiochus and his men to carry the day.
The final points tallies were 116 to 65, giving Antiochus and friends a victory by 51 points, which equates to a major victory. Antiochus will surely be feasting in Alexandria very soon!
Thanks to all of the fellows involved for making this such a great game to be a part of and hopefully there will be many more battles to follow.
(BTW, if anyone is curious about Lost Battles and might be interested in taking part in another such game, do join the Lost Battles yahoo group at this link and ask for more information there.)
Sunday, December 12, 2010
Raphia multiplayer PBEM: part two.
It's time for an update on our multiplayer PBEM game of Raphia. Much has happened since the first installment here. To quickly recap, the second turn finished with the Seleucids having made an impressive attack on their left through Antipater and having pulled a fast move in turning their central phalanx left to bring as much force to bear as possible on Ephecretes' fragile wing. This made it even more urgent for the Ptolemaic centre under Andromachus to push on with the attack.
Here is the board at the commencement of turn 3 (Seleucids in Black; Ptolemies in Red):

The command roll for the Ptolemies was favourable - a four. This gave enough commands to activate all the command groups for attack and also to remedy some poor initial communication from the commander-in-chief on the subject of keeping a central reserve.
The action began on the right with Ephecretes launching an attack on Themison's wing using four commands. The first attack by the phalangites scored a hit on Indian elephant. The attack by the flanking light cavalry finished off the job and shattered it, but the other units survived unscathed.
In the centre, Andromachus was alloted five commands. One was used to about-face a levy phalanx unit and send it into the rear zone as a reserve; the others were used to mount an attack on Nicarchus' centre, now facing away from the attack. The leading unit prosecuted the with with zest, shattering Nicarchus' lead unit of levies, but despite having things in their favour the rest of the phalangites were reluctant to take the attack to the enemy with vigour and no more hits were scored.
Polycrates commenced his attack on the left by ordering his heavy cavalry to charge at Antiochus' zone, but the assault was not a success. The attack with the centre left was similarly ineffective, with the troops perhaps understandably unwilling to close with the Indian elephants. Nonetheless, with two units shattered this turn the Seleucid fighting value was reduced by 6, taking them into the 50s and reducing the commands available to them by 1.
It came now to the Seleucids to respond and their command roll was also four, giving them a total of nine commands.
Themison began on the left, using two commands and leading off with his heavy cavalry. They were perhaps all a little dismayed by the loss of their (totemic?) elephants because neither the cavalry not the infantry were able to inflict any hits.
Nicarchus in the centre fared a little better, using four commands and managing to displace the lead unit of phalangites. Unfortunately, they were not able to make any further inroads. Ephecretes no doubt heaved a sigh of relief, but Antiochus would surely not have been so pleased had he been aware.
Perhaps happily for Antiochus, he was in the thick of things himself. Antipater's zone again attacked Ptolemy and his men, and again the elephants performed with distinction. The first unit scored a double hit, and Ptolemy, in attempting to rally his men, was killed. The morale of the men held up, but the second elephant unit, determined not to be outdone, also scored a double hit, clearing the zone entirely!
Although morale held up again, Antiochus swept away the remnants of the Ptolemaic left by personally leading a wild charge which immediately shattered the heavy cavalry opposing him.
What seemed only moments before to have been an opportunity lost by the unwillingness of the left and centre to press home their attacks had now become a triumph due to the inspired charge of the elephants and of Antiochus himself. Somehow, the Ptolemies had lost 22 points of fighting value - fully a third of their army (and our gallant Phillip G) - in one turn!
With their fighting value reduced to forty, much gritty work was needed.
"And then there were two..."
Here is the board at the commencement of Turn 4. Observers may notice the absence of a Ptolemaic left!

The command roll for turn four was not a disaster, for which the shaken Ptolemaic commander-in-chief was immensely grateful (I have this on very reliable authority!). Eight command points did not seem too bad a tally given what could have been.
The right led off, with Ephecretes' phalangites launching an attack on Themison's zone. Using 4 commands, they managed three hits, including a double hit which shattered one of the units of levy phalangites. The light cavalry worried the flanks, but did no real damage.
In the centre, and not before time, Andromachus inspired his men to great deeds, with four hits made at a cost of two to themselves. This redressed the balance somewhat, steadied the centre and disordered the enemy phalanx enough that they would not be able to pair their units in attack.
With a command roll of one, the Seleucids did not begin the turn auspiciously, and that was how it remained. Themison's weakened zone again failed failed to make any headway against the enemy, and Nicarchus in the centre (now mostly spent) was unable to coordinate the attacks of the phalangites as well as he would have liked. The elephant was hit, but the anticipated decisive push against an outflanked Ephecretian phalanx did not come.
Antipater's command in the centre left now wheeled about to tear into the flank of Andromachus' phalangites, but turning to the attack reduced the force of the manoeuvre and only one hit was scored. In the meantime, Antiochus and his strike force of picked cavalry raced from the scene of their second triumph on the left into contact with the Ptolemaic reserve.
So, with four turns finished and the Ptolemies in grave difficulties, the the final blow has still not yet fallen. There is a faint glimmer of hope for the Ptolemies: if they can pull out another big turn they might still be able to win the field, but one feels that it's now or never for them.
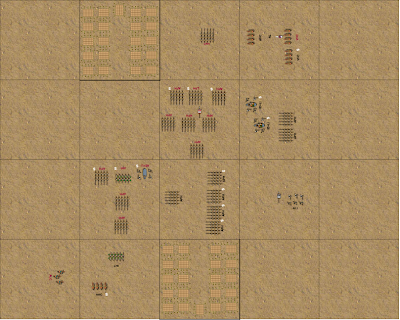
Here is the board after turn 4:
Stay tuned for the next installment (which can be now be found here).
Here is the board at the commencement of turn 3 (Seleucids in Black; Ptolemies in Red):

The command roll for the Ptolemies was favourable - a four. This gave enough commands to activate all the command groups for attack and also to remedy some poor initial communication from the commander-in-chief on the subject of keeping a central reserve.
The action began on the right with Ephecretes launching an attack on Themison's wing using four commands. The first attack by the phalangites scored a hit on Indian elephant. The attack by the flanking light cavalry finished off the job and shattered it, but the other units survived unscathed.
In the centre, Andromachus was alloted five commands. One was used to about-face a levy phalanx unit and send it into the rear zone as a reserve; the others were used to mount an attack on Nicarchus' centre, now facing away from the attack. The leading unit prosecuted the with with zest, shattering Nicarchus' lead unit of levies, but despite having things in their favour the rest of the phalangites were reluctant to take the attack to the enemy with vigour and no more hits were scored.
Polycrates commenced his attack on the left by ordering his heavy cavalry to charge at Antiochus' zone, but the assault was not a success. The attack with the centre left was similarly ineffective, with the troops perhaps understandably unwilling to close with the Indian elephants. Nonetheless, with two units shattered this turn the Seleucid fighting value was reduced by 6, taking them into the 50s and reducing the commands available to them by 1.
It came now to the Seleucids to respond and their command roll was also four, giving them a total of nine commands.
Themison began on the left, using two commands and leading off with his heavy cavalry. They were perhaps all a little dismayed by the loss of their (totemic?) elephants because neither the cavalry not the infantry were able to inflict any hits.
Nicarchus in the centre fared a little better, using four commands and managing to displace the lead unit of phalangites. Unfortunately, they were not able to make any further inroads. Ephecretes no doubt heaved a sigh of relief, but Antiochus would surely not have been so pleased had he been aware.
Perhaps happily for Antiochus, he was in the thick of things himself. Antipater's zone again attacked Ptolemy and his men, and again the elephants performed with distinction. The first unit scored a double hit, and Ptolemy, in attempting to rally his men, was killed. The morale of the men held up, but the second elephant unit, determined not to be outdone, also scored a double hit, clearing the zone entirely!
Although morale held up again, Antiochus swept away the remnants of the Ptolemaic left by personally leading a wild charge which immediately shattered the heavy cavalry opposing him.
What seemed only moments before to have been an opportunity lost by the unwillingness of the left and centre to press home their attacks had now become a triumph due to the inspired charge of the elephants and of Antiochus himself. Somehow, the Ptolemies had lost 22 points of fighting value - fully a third of their army (and our gallant Phillip G) - in one turn!
With their fighting value reduced to forty, much gritty work was needed.
"And then there were two..."
Here is the board at the commencement of Turn 4. Observers may notice the absence of a Ptolemaic left!

The command roll for turn four was not a disaster, for which the shaken Ptolemaic commander-in-chief was immensely grateful (I have this on very reliable authority!). Eight command points did not seem too bad a tally given what could have been.
The right led off, with Ephecretes' phalangites launching an attack on Themison's zone. Using 4 commands, they managed three hits, including a double hit which shattered one of the units of levy phalangites. The light cavalry worried the flanks, but did no real damage.
In the centre, and not before time, Andromachus inspired his men to great deeds, with four hits made at a cost of two to themselves. This redressed the balance somewhat, steadied the centre and disordered the enemy phalanx enough that they would not be able to pair their units in attack.
With a command roll of one, the Seleucids did not begin the turn auspiciously, and that was how it remained. Themison's weakened zone again failed failed to make any headway against the enemy, and Nicarchus in the centre (now mostly spent) was unable to coordinate the attacks of the phalangites as well as he would have liked. The elephant was hit, but the anticipated decisive push against an outflanked Ephecretian phalanx did not come.
Antipater's command in the centre left now wheeled about to tear into the flank of Andromachus' phalangites, but turning to the attack reduced the force of the manoeuvre and only one hit was scored. In the meantime, Antiochus and his strike force of picked cavalry raced from the scene of their second triumph on the left into contact with the Ptolemaic reserve.
So, with four turns finished and the Ptolemies in grave difficulties, the the final blow has still not yet fallen. There is a faint glimmer of hope for the Ptolemies: if they can pull out another big turn they might still be able to win the field, but one feels that it's now or never for them.
Here is the board after turn 4:

Stay tuned for the next installment (which can be now be found here).
Wednesday, December 1, 2010
Raphia multiplayer PBEM: background and first turn
The Battle of Raphia, fought in 217 BC between the Seleucid Empire and the Ptolemaic Kingdom, saw Ptolemy IV (Philopater) meet Antiochus III (the Great) to decide who would have control of the region of Coele-Syria. The map below shows the geopolitical situation in the Mediterranean at 218 BC. (except for VASSAL screenshots, all the following images are courtesy of wikimedia commons).

Our multiplayer email game of the battle sees the redoubtable Patrick W. acting as the commander-in-chief of the Seleucids, with Antipater's wing under his personal command. He is supported by Nicarchus (Padraig L.) in the centre, Themison (John A.) on the left, and Theodotus (Iden H.) as a counsellor.
Antiochus was not a man to be trifled with....

Under the Lost Battles rules, The Seleucid forces are represented thus:
The Right (commanded by Antipater):
2 units of Indian elephants equating to 80 beasts and 4000 men.
1 unit of veteran heavy cavalry with an average leader (Antiochus and his guard) for 1000 men.
A second veteran and an average unit of heavy cavalry representing 3000 men.
1 unit of average light infantry for 4000 men.
2 units of average phalangites equating to 8000 men.
The Centre (commanded by Nicarchus):
5 units of average phalangites and 1 unit of levy phalangites for 28,000 men.
The Left (commanded by Themison):
1 unit of Indian elephants representing 40 pachyderms and 2000 skirmishers.
2 units of levy heavy infantry equalling 16,000 troops.
1 unit of average heavy cavalry for 2000 men
The Ptolemies have myself as the commander-in-chief, Ephecretes (Yuri K.) taking the right, Andromachus (Chris G.) commanding the centre, Polycrates (Phillip G.) commanding the left, and Sosibius (Ian H.) providing wisdom.
In contrast to the steely Antiochus, Ptolemy looks as if he might prefer a good lunch to a battle...
 The Ptolemaic forces come out like this in Lost Battles:
The Left (commanded by Polycrates):
1 average commander (Ptolemy).
1 unit of veteran heavy cavalry and a unit of average heavy cavalry for 3000 men.
1 unit of African elephants representing 40 beasts and 2000 men.
1 veteran and 2 average phalanx units equating to 10,000 men.
The Centre (commanded by Andromachus):
6 units of average and 2 units of levy phalangites for a total of 40,000 men.
The Right (commanded by Ephecretes):
1 unit of African elephants representing 40 beasts and 2000 men.
1 unit of average light cavalry for 2000 men.
3 units of average phalangites equating to 12,000 men.
1 unit of average heavy infantry for 4000 men.
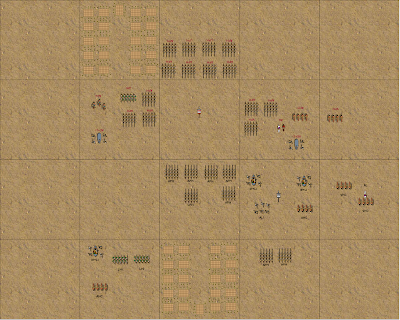
We used the historical set up, which is shown in the VASSAL screenshot below. Red units are Ptolemaic, black units are Seleucid. The Ptolemies move first in this scenario and the attack limit is 4.


So, an eventful second turn of the battle! Go here to read part two of the report.

Our multiplayer email game of the battle sees the redoubtable Patrick W. acting as the commander-in-chief of the Seleucids, with Antipater's wing under his personal command. He is supported by Nicarchus (Padraig L.) in the centre, Themison (John A.) on the left, and Theodotus (Iden H.) as a counsellor.
Antiochus was not a man to be trifled with....

Under the Lost Battles rules, The Seleucid forces are represented thus:
The Right (commanded by Antipater):
2 units of Indian elephants equating to 80 beasts and 4000 men.
1 unit of veteran heavy cavalry with an average leader (Antiochus and his guard) for 1000 men.
A second veteran and an average unit of heavy cavalry representing 3000 men.
1 unit of average light infantry for 4000 men.
2 units of average phalangites equating to 8000 men.
The Centre (commanded by Nicarchus):
5 units of average phalangites and 1 unit of levy phalangites for 28,000 men.
The Left (commanded by Themison):
1 unit of Indian elephants representing 40 pachyderms and 2000 skirmishers.
2 units of levy heavy infantry equalling 16,000 troops.
1 unit of average heavy cavalry for 2000 men
The Ptolemies have myself as the commander-in-chief, Ephecretes (Yuri K.) taking the right, Andromachus (Chris G.) commanding the centre, Polycrates (Phillip G.) commanding the left, and Sosibius (Ian H.) providing wisdom.
In contrast to the steely Antiochus, Ptolemy looks as if he might prefer a good lunch to a battle...

The Left (commanded by Polycrates):
1 average commander (Ptolemy).
1 unit of veteran heavy cavalry and a unit of average heavy cavalry for 3000 men.
1 unit of African elephants representing 40 beasts and 2000 men.
1 veteran and 2 average phalanx units equating to 10,000 men.
The Centre (commanded by Andromachus):
6 units of average and 2 units of levy phalangites for a total of 40,000 men.
The Right (commanded by Ephecretes):
1 unit of African elephants representing 40 beasts and 2000 men.
1 unit of average light cavalry for 2000 men.
3 units of average phalangites equating to 12,000 men.
1 unit of average heavy infantry for 4000 men.
We used the historical set up, which is shown in the VASSAL screenshot below. Red units are Ptolemaic, black units are Seleucid. The Ptolemies move first in this scenario and the attack limit is 4.
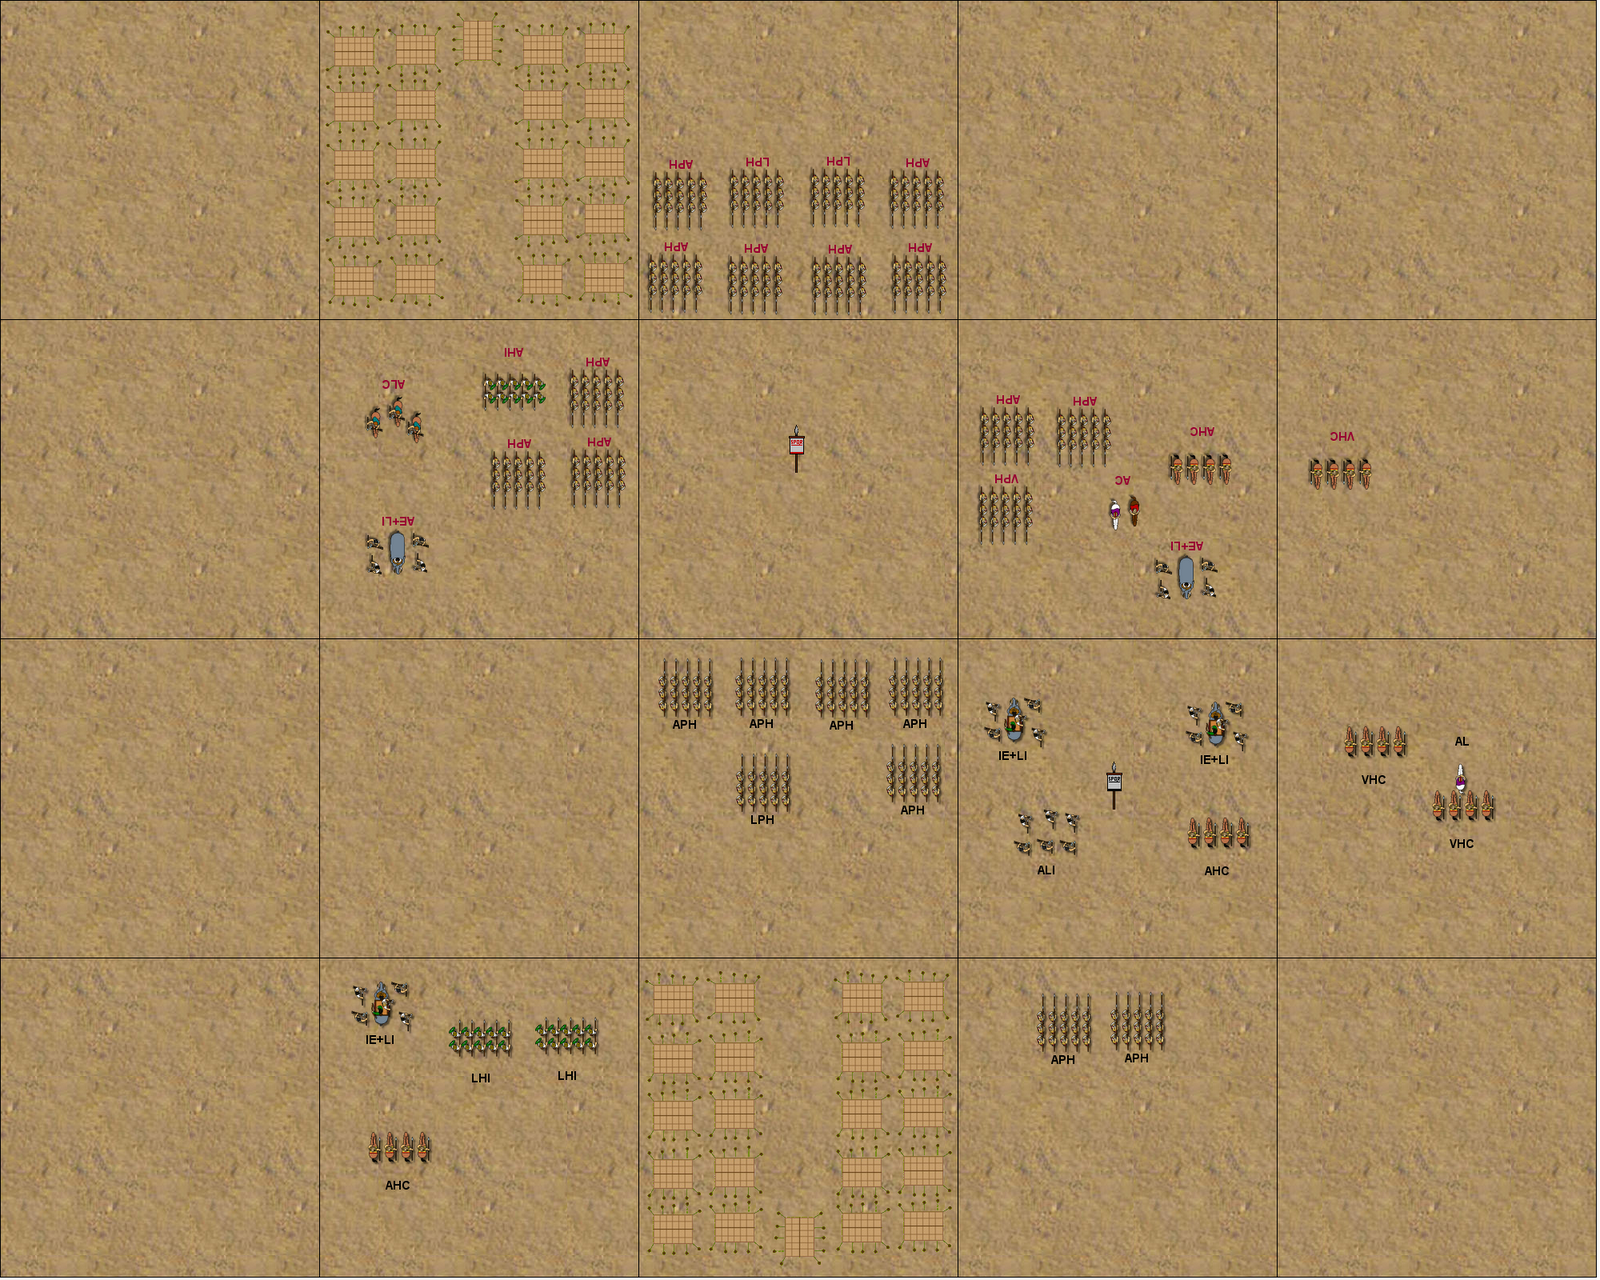
A quick note on rules...
We are using the normal Lost Battles rules with a few changes to cope with the PBEM and multiplayer nature of the battle. Players have been allowed a strategy session in which the battle plans are discussed, but once the moves start players are not permitted to discuss strategy or to share information about intentions (though we have been a little more relaxed about this first time around).
Commanders-in-chief allocate commands to the subordinate commanders (and some to himself, in Patrick's case) and the on-table commanders use those commands as they see fit. Orders are sent to the umpire who then resolves the turn, sending out a report and screenshot to all players.
This will continue until the battle is won or the ten turn limit is reached.
Second Turn.
The first turn of battle (actually the second turn of the game as deployment counts as a turn) saw a 6 rolled for commands, giving the Ptolemies a total of 12. Polycrates activated first with 6 commands and Ptolemy's exemptions, attacking with his veteran cavalry and scoring a hit with an all out attack which also left the Ptolemaic cavalry spent. This cost 2 commands.
Next he double-moved the average heavy cavalry into position behind the veteran cavalry, in the left wing zone. This also cost 2 commands.
Finally, he attacked the Seleucid right centre, leading off with phalangites. Two hits were scored, one on each elephant unit. This cost 2 commands and all of Ptolemy's exemptions.
Next, Andromachus activated in the centre rear, moving all his troops forward one zone at a cost of 2 commands.
Finally, Ephecretes double-moved his light cavalry to outflank the enemy wing and advanced his main line one zone, putting the average heavy infantry in the lead unit position. This cost 4 commands in total. The screenshot below denotes moves with black arrows, attacks with red arrows and hits with blue diamonds:

It was now the Seleucid turn. They rolled a 5 for commands, giving them a total of 11.
Themison activated first on the left, attacking with his elephants and the infantry in support. He scored one hit and used 3 commands.
Nicarchus in the centre used 1 command to wheel to the left to allow the Seleucids to concentrate their strength against Ephecretes' command in the following turn.
Antiochus attacked on the right, and although he fluffed his own attack the supporting cavalry didn't. The Ptolemaic veterans were shattered and Antiochus advanced into the now vacant zone, with only the AHC between him and the rear of the Ptolemaic army.
The average heavy cavalry now double-moved to join Antiochus for 2 commands, and the rest of the zone attacked Polycrates and friends. In their attack the elephants inflicted some terrible wounds with both scoring double hits, which left all the units in the Ptolemaic left centre spent and the battle only just begun. A glorious charge indeed!
To cement the advantage, the phalangites in reserve moved up to join Antipater in the centre right. This is a screenshot showing the situation at the end of the Seleucid turn:

So, an eventful second turn of the battle! Go here to read part two of the report.
Subscribe to:
Posts (Atom)
