Prufrock's Wargaming Blog

Prufrock's Wargaming Blog

Wednesday, April 29, 2015

A cluttered paint table is a happy paint table!

Somehow over the last few days the blog has ticked over to 200,000 views. Appropriately enough, this has been my best ever month for blog hits, down largely to a new but deeply committed spam bot fan base in Russia!

Anyway, all joking aside, thanks to those of you that do drop by to take a look here or leave the odd comment. It's much appreciated. 


Right, back to the work table.

Paint and game on!

Cheers,
Aaron

Speed Painting results

Here's a bit of a follow up to an earlier post inspired by the very talented  Monty, who blogs at 'Twin Cities Gamer', on experimenting with priming troops in a useful undercoat shade.

To recap, I'm painting up thorakitai (who I will also use as eastern levied Roman legionaries when needed) and went with a spray-primed brown - rather than my usual gray or white - as the base colour.

First step post priming was to colour the armour with dark iron and dry brush with silver (figures are Old Glory 15s, for reference).


Next I blocked in the base coats for the tunics (cream here) and the helmet plumes (a darkish red). Other figures in the unit use different colours, but I'm showing this one lot for consistency.


Next up was flesh (a mixture of peach and raw umber) and then the greening of the bases.


After this the scabbards and the baldricks were done and the helmets gone over with bronze and a Devlan Mud wash. 


Spear shafts were tidied up, shields drybrushed with both a base and a highlight, and the helmet plumes highlighted. The shields shown here are a muted brown, but others are done in purples, reds, yellows and greens.


It's now time for the finishing touches: spears are tipped with old silver and highlights are applied to tunics.


The lot is given a wash of Klear and Devlan Mud on the shields, tunics and flesh areas.


As a last step the spear support struts are cut off and the figures put onto their bases. A final coat of Klear and matt varnish will follow prior to flocking.


So, how did it go?

Well, I do like the results. I don't know if I saved a huge amount of time with this batch because there was a bit of trial and error - especially with the metallic areas - that I haven't shown in the write up. The key for me (as a very limited painter) is to pick a couple of things to emphasise and try to make them pop with highlights. I chose plumes and tunics for this bunch, and I reckon they came out all right. Another important thing for me is to think about the overall effect. I'm not sure that I got the shields quite right in this respect, but the predominantly white tunics and predominantly red helmet plumes will hopefully do enough to unify the lot as a group.

I was worried over the first wee while that they were looking a bit boring, but once the washes did their job and the highlights were on I was converted; so thoroughly in fact that I quickly sprayed up my next batch of figures in brown before the sun set!

Thanks to Monty for the example, and while I've a fair way to go to match his mastery of the technique I hope to use this method a few more times yet.

Saturday, April 18, 2015

A new job and other carryings on

Well, I've just finished the first week of a new job, and it was great fun.

Late last year, with an eye on the future, I decided to quietly scale back our own business and look to introduce supplementary work so that when the time comes for us to return home to my own country there will be fewer loose ends to tie up.

So this week I started a new job, going to four different elementary schools as an assistant language teacher, meaning that I entertain classes of Japanese school kids in English all day and hope that something sticks. In most cases I also have to come up with the curriculum, so over the course of the year we'll be covering ABCs as well as things like animals, numbers, food, colours, shapes, places around town, occupations, etc.

I'd not really taught large groups of students very much at all (I'm used to smaller classes of 1-6 students), so this week has been quite a change, but a very pleasant one. I didn't realise how much like minor royalty foreign teachers are treated in country area schools. The kids all know your name before you even arrive, want to shake your hand, give you a high five, shout hello or otherwise show their interest in the foreigner.

It does mean that I'm working more hours in the day (I leave home at seven, return at three or four, and then teach classes at our own school until nine), but there's a bit of extra money coming in and, as they say, a change can be as good as a holiday.

Anyway, to celebrate a good week, I've ordered in a final 60 or so figures to properly finish off my Roman Civil War project and am returning to plans I have of sending a batch of Greeks and Macedonians off to Sri Lanka.

But in the meantime, I must stop and pop into class for another lesson!

Saturday, April 11, 2015

Roman progress

Well, it's been more than the week originally envisaged, but we're starting to see a bit of progress on the Roman Civil War figures.

It's a bit of a tricky project, because most of the figures were purchased off ebay some time ago, but the paint jobs are of quite wildly varying colours and quality, which means that to standardize the look I'm having to repaint everything on those figures except for flesh and armour. I've also expanded the project by around 200 figures, so these have had to be painted and integrated into the units as well.

On top of this, I settled on a basing scheme which sees each unit comprised of 18 figures (2 or 3 of these being command) arranged in two 40x30 bases (6 figures each) and 2 40x15 bases (3 figures each). This may seem like a pointless exercise, but there is reason behind it: I like my Romans to be in at least two ranks, and this way I can play Lost Battles scenarios with veteran units of 12 figures and non-veterans of 18. Thus it will be easy to see at a glance which units are which, while still having the smaller units look decent. One thing I don't like about the look of Lost Battles when played with my DBx basing is that the 8 man veteran units just don't look like they could stand up against Geoffrey Boycott's old mum, much less a 32 figure block of levy phalangites!

The basing shouldn't be a problem in a larger sense either: these armies will be fairly self-contained, only really fighting each other, or my Gauls, who are based quite similarly.

And what's left to do?  I still need to finish off painting the command figures, and then bring the remained 80 or so painted types into line with my own standards and style. Then it will be get all the shields looking more or less compatible, do some unifying highlights, dip where necessary, give a couple of coats of Klear, spray varnish, and then flock.

There's still a bit to do, but we're getting there - and it's feeling good to see progress.

We're trying to go to this:


From this:


There were some figures that were rather easier to get sorted. These ones were sent over by Simon "To the Strongest!" Miller, and are 'Roman Argyraspides' from the Isaurus line, I believe, with command figures and artillery from Donnington. All I've had to do to these is green their stands.

These likely lads will come into play as eastern recruits.


Wednesday, April 8, 2015

Speed painting ancients experiment (1)

I'm trying out a new painting technique espoused rather convincingly by Monty of "Twin Cities Gamer" fame. Basically, the technique involves undercoating the figures in a useful shade that will form a decent proportion of their final colour.

I've done this before, but only for horses; this will be the first time to actually try it out on the men.

Let's see how it goes, but please accept my apologies in advance for the dodgy photos. I'm using the iPad and haven't really worked out how to take decent shots with it yet.

1) I've gone for a desert yellow for these chaps and their mounts. I think a nice mixture of wash shades over these will put the C in camel.


2) Brown for these thorakitai which I am going to paint up in Roman colours so I can use them as eastern recruits for my Roman Civil War project (yes, you've guessed it - I'm about 30 figures short, and I don't really want to put the project off yet again while I wait for more figures to arrive!).


3) Basing up the camels immediately. This has already shaved two steps off my normal method.


It will probably be a few days before I come back to these as I'm doing a big push on the Romans you can see in the background, but I think we've made a reasonable start - three steps in already for the camels, and two for the thorakitai!


Friday, April 3, 2015

Romans and Gauls

Following on from our first game of To the Strongest on April 1st, we made an early start next morning so that we could get another battle done before Luke was due back in Osaka (Luke's report can be found here).

Simon Miller has said that Romans vs Gauls was a good match up under the rules, so that's what we decided to play. This time Luke took the Romans, generously allowing me the chance to squeeze into some tight trousers and don a checked cloak.


Luke won the initiative and pushed forward on all fronts. He had gone for a mixture of medium-sized legionary units supported by veteran small units. I enrolled eight bands of warriors and went for cavalry, hoping again to gain ascendancy on one flank and use my deep units to burst through where I could. I enlisted six heroes to lend weight to my attacks; Luke grabbed four.


My cavalry command was a bit slow to get moving, but elsewhere we were able to present a satisfyingly solid front to the dastardly Romans and their tricky commander.


The lines soon came into contact and battle was joined. Annoyingly for both of us, we kept forgetting to use our heroes to re-roll early missed attacks. I need to get some figures to use for the wee champions - little coloured blocks are clearly not obvious enough for our aging eyes!

The initial stages of the fight in the centre were characterised by much effort but little headway.
On the right we had some marvellous success: our cavalry stole a march on their Roman opposites, attacking from both the flank and the front.

Our cavalry can just be seen outflanking the Roman left
Unfortunately for us, the cavalry missed their next five attacks (and yes, I forgot to use my hero for two of them!), Luke got some veteran legionaries over as cover (a la Caesar at Pharsalus) and we began to take casualties.

In the infantry clash the legionaries began to wear us down with their combination of standard and small sized units. Under Luke's sure hand they were able to rally hits on the larger units and exchange lines to protect weaker/damaged units and or deliver a second attack (I thought line exchange worked really well here).

For us, we were unable to rally any hits successfully, and things were beginning to look a little shaky.

Gallic casualties mount as the flexible legionaries mount powerful attacks..

Luke effected a first breakthrough on the left of the Gallic line, but we were able to immediately plug the gap by bringing forward our reserve.

Reserves, eh?  
With the Roman cavalry threatening to outflank us via the stream, the cavalry on our left fired off a few desperate javelin volleys. Incredibly, both hit, and the turncoats (Aedui, no doubt...) broke! Thus inspired, the infantry redoubled their efforts (ie, we gave up trying to rally hits and just went all out on the attack), and the Roman line - thinner in the centre than at its ends - began, for the first time, to show signs of weakness.

Javelins over the stream...
But the situation on our right was now desperate as the legionaries stormed through there as well. With no reserve left, it was up to the warriors of our main line to make up for it, and they did, bursting through the Roman centre themselves.

The Roman line thins...

Our right is about to collapse.


And then we are through in the centre.

Could this be a glorious day?
With the battle entirely in the balance, both sides needed three victory medals to win. In practice, the Romans had to destroy one unit of warband or the cavalry and leader (in photo below) still trying to finish off the cavalry on the Roman left.

For the Gauls, victory would require the destruction of two standard units (cavalry or legion) or a standard unit and a small unit (veteran legion).

You have done well, but a little bit more help from you is required, mes ami!!
We held a slight advantage in that it was our turn, and we could choose where to strike, but we also knew that it had to be won right now: we could not survive the next Roman attack.

Accordingly, we decided to attack first on our left, needing one hit to defeat the legion there, and then to try our luck on the right again, hoping our cavalry could finally score the hit they needed to break their enemy.

Would it be victory or death?


The attack was launched on our left, but we could not land the hit.

Then the Romans battle back and break us!

A triumph, Gaius!

And so ended a tense and thrilling game.

Thoughts

Everything in the rules worked very well here. There were ups and downs for both sides, and while the Romans held the edge, the Gauls came back strongly and almost snatched a victory against the odds.

Luke played a very strong game, I thought. He used the army well mixing standard and small units in double line, and some quick thinking (and steady nerves) saved the breakthrough on his left from becoming a rout. To be honest, we were lucky to come back into the reckoning; but you have to take your luck when you can get it in this game.

Once again we came away thinking that Simon Miller has really got something good going with To the Strongest! It will be interesting to see where he takes things from here.

Thanks for reading, and hope you enjoyed the reports.


Thursday, April 2, 2015

Romans and Macedonians

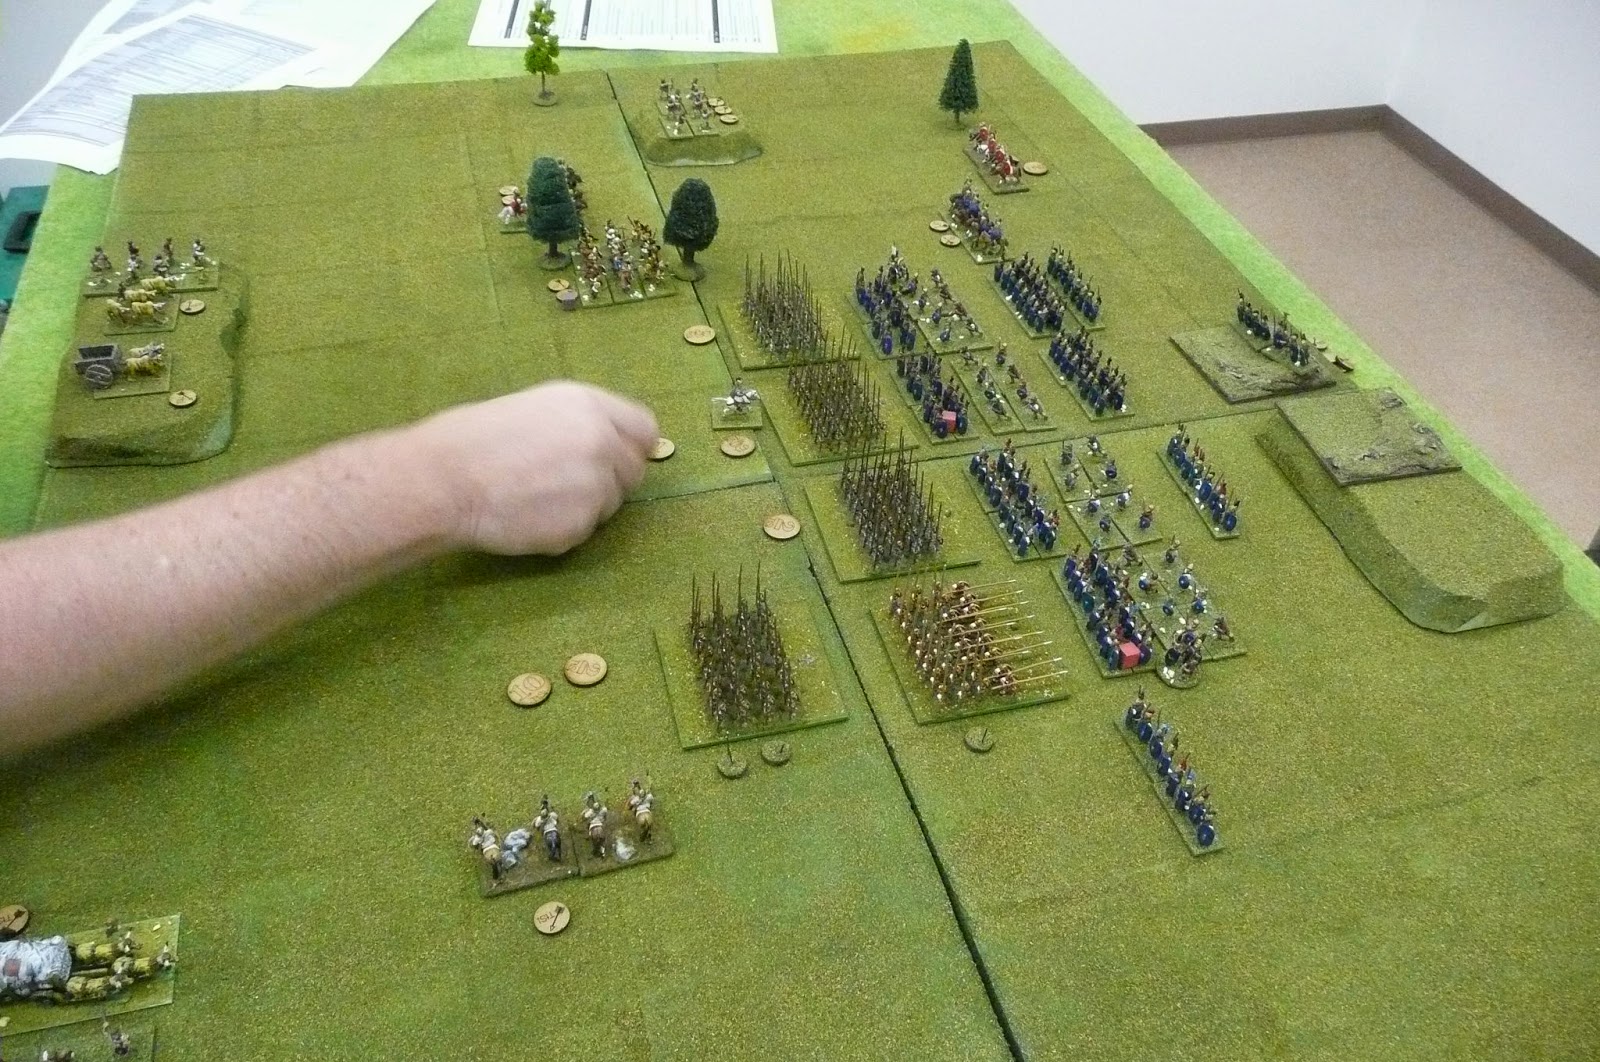
And so to the battle.  Luke took the Macedonians and I the Romans, who won the scouting contest and gained the initiative. The commands were divided up as shown in the photo below. I needed to claim 13 victory medals for the win while Luke needed 12 (for Luke's take on the battle, see this post on his blog named - coincidentally? - hoti to kratistos!).


My overall plan was to try to use my cavalry advantage on the left (command 1) to win through there and either get into the baggage or hit the rear of the phalangite line.

The knottiest problem I faced was how to deal with Luke's deep pike units - each of which could take three hits - with my legionaries, who could only take one hit each. Would I try to defeat him with depth, or aim to get around his flanks and win that way?

All this and more was going around in my little head...

As usual for me, things started badly. Pulling four ones in a row for activation meant I only got to move a single unit in the whole of turn 1!

April fool!  The velites are sheepish after the rest of the army played a wee trick on them...
I must confess now that we made a bit of a rules blunder. While deployment in To the Strongest! is by command, and taken turn about, activation is by army, and within that command by command. That this change occurs had completely slipped my mind, and having got into the deployment rhythm we continued that on in the game proper, activating commands turn about instead of army by army. It probably didn't make too much difference to the result, but did lead to an extra layer of decision making as we wrestled with which command to activate at any particular time.

With that confession out of the way, we return to a battle in which, over time, our main lines came into contact in the centre of the field. Luke's lighter troops had secured the wood on his left, forcing my right wing into a defensive posture, but on the other flank my cavalry command had made better progress, taking the hill and endeavouring to drive off the enemy horse.


Unfortunately, in a most dreadful few turns, the javelins of the velites and the pila of the legionaries proved completely ineffective. The phalangites hit us at full strength, destroying both the hastati units of our centre command almost immediately.

Ouch! Hastati gone, and veteran pike leading the advance.
We tried to recover the situation by pulling back and hitting the lead phalangites from three directions at once. These efforts, however, were in vain: a mixture of failed activations and poor attacks over the course of several turns saw the phalanx stand firm against all dangers.

A grim struggle in the centre.
Our left was doing better: having driven off the enemy heavy cavalry and general, we sent the allied light cavalry in behind the phalanx. Their javelins struck home...


 and then they charged in...


...scoring two melee hits!  At this there was much rejoicing amongst the Romans, not least because these very Tarantines were a gift from the author of TtS! himself!

Luke sportingly agreed that their success was very appropriate!

Sadly for us, the success didn't last - the phalangites coolly saved one of the two hits and the line steadied.

This was the high point of the battle for the Romans, and from here our fortunes rapidly declined, as the remainder of this report will illustrate:

Nail-in-coffin 1: The phalangites advanced.


Nail-in-coffin 2: They shrugged off hits with timely rallies.


Nail-in-coffin 3: Every time they scored a hit of their own, one of my units was destroyed.

Nail-in-coffin 4: We lost the cavalry battle on the right flank (this as the result of a rash advance which I gave myself a good kicking over!), our cavalry on the left were tied up and picked off by some great shooting by the camp guard and the Tarantines were unable to follow up their success against the rear of the infantry line.

Ouch! Down to the triarii.....

And our right flank guard is now gone, too.
The Cretans - and grinning death - put paid to the other Tarantines!
Under pressure!


Seeing that the poor old Romans were being well beaten - and it was 3:30 in the morning - we called it a Macedonian victory, took a few photos, and prepared for a new game on the morrow.

Thoughts 

We both really enjoyed the rules. There were cries of elation and frustration during the gameplay but no sighs of boredom, so Simon is onto something good.

We did feel that there may be a few oddities. It seemed for example that light cavalry could evade off board and then reappear on table a little too easily (and could reappear in some rather awkward places). I was biased though; this minigame of evade-off-table-and-reappear-on-a-unit's-exposed-flank effectively prevented my victorious left from being able to capitalize on their initial success.

The other thing (and again I am biased!) was that the Macedonian phalangites were able to sustain hits and then rally them, but being small units, the Romans once hit were removed from the table. There is not the ability to rally and reform a Roman line in the way that Scipio did at Zama, for example.

But - as Simon warned me in advance - the game has its nuances, and it's quite likely that, first battle in and gaming with a tricky opposed pair, I have simply failed to see subtleties and employ optimum tactics.

Anyway, minor quibbles aside, it was a thoroughly enjoyable game, and the more we played the more we came to admire what Simon has done with these rules. In my opinion, they are well worth checking out.

I'll stop here, but there is another battle report to come at some stage.

Related Posts Plugin for WordPress, Blogger...