Prufrock's Wargaming Blog

Prufrock's Wargaming Blog
Showing posts with label hexmats. Show all posts

Friday, June 6, 2025

How to make a Commands and Colors hex mat (New Zealand version)


Many moons ago I posted a piece here on how to make a hex mat

Unfortunately, I was not able to bring that mat with me to New Zealand, and for six years I have been without a suitable sward on which to play the glorious game Commands & Colors: Ancients. Attempts to obtain a mat here have produced mixed results. I ordered a commercial version which never arrived; I tried making a dodgy off-set squares mat of my own. 

It seemed fate had dealt me a lousy hand. Would I ever play Commands & Colors: Ancients in the proper way again?

Well, last weekend I got notification through my phone of a sale at a store called Spotlight. It's where New Zealanders go when they want to get a relatively affordable set of curtains, a duvet cover, bits and pieces for sewing. Who could resist a 60% off sale on such potentially useful household items? So in I wandered to have a look at their tasteful net curtains and fabrics. Lo and behold: they had some lovely off-green felt, 90cm deep. 

There was a stirring in my soul. 

I asked for a piece 160cm long, and another 10cm long. This would allow hexes c.10cm from flat to flat 13 wide and 9 deep, as in the classic Commands and Colors configuration, as well as a scrap piece for experimentation.

Tools:

Cutting board, leather hole punch (or similar), straight-edge rulers, tape measure, marking dots, marker pen. 


Method:

Print off a template on A4 paper using a hex map generator. With this particular one the 'hexagon size' is the length of each hexside. 6cm gave me two hexes on a sheet of A4 with 10.4cm flat-to-flat, 12cm point-to-point. 

Mine printed too small initially - I had to increase the PDF size to 110% to be able to print the correct dimensions on paper. 

Use the leather punch to make a guide hole at each point of the two hexes.


With this initial template, mark out a larger template on cardboard, punch out the points, and on two of the hexes punch out the centre point as well. I used an opened out artist's wallet as I could get 4.5/5 x 5 hexes on it with the cardboard being easy to punch out but still being sturdy enough to do the job.  


Lay out the felt. 


Using tape measure and rulers, find the centre point of the fabric. Mark it with a dot sticker. Line up this sticker with the centre dot from your hex template and align the template with the fabric edge. 


Before you commence marking the dots on the fabric with your permanent marker, use a scrap piece of the fabric to test for sharpness, smudges, optimal pen size, etc. Better to do this now than risk it on the actual sheet. 


I tried a couple of colours, pen thicknesses and hex designs until I found the ones I liked best.

Returning to the mat, start marking the dots, being careful to make sure everything aligns as well as possible. 

I found out that perfection here is the enemy of the good. The fabric I had was 88cm deep in the centre and 90cm deep at one end. It looks terrible to our wargamerly OCD eyes at this stage when we are dot marking, but if you have fabric bunch or stretch it is better to have the hexes consistent with one another and excess fabric at the edges than to try to keep all the edges consistent and end up with misshapen hexes.

If the hexes are neat and even it will look good, even if the alignment with the edges turns out to have a bit of a slope to it. 

Once you have marked out the hex points, get your straight rule and start drawing the lines, being careful not to smudge them or lose concentration and draw a dud line. This is where you need to be accurate, but be accurate to your marked hex points, not to overall alignments. You will have some distortion and the lines will not be perfect. Accept that: just make sure that you are connecting your points as perfectly as you can and the effect will be good.

If, like me, you often enjoy a tipple while pursuing wargamerly ends, this is not the time to be working your way through half a bottle of vodka. You do not want to be having accidents with your permanent marker!


Stage one hex sides drawn. The lines are horribly out of alignment with one another, but you only notice this as you are marking it, not when you step back and look at the whole effect. Trust the process!

Continue marking the hex sides. Again, be accurate at the hex points so that the connections are clean. This is more important than getting geometric proportions exact. 


Stage two underway.

Once you get to the third stage, you will get a surge of joy.


Now it all comes together!

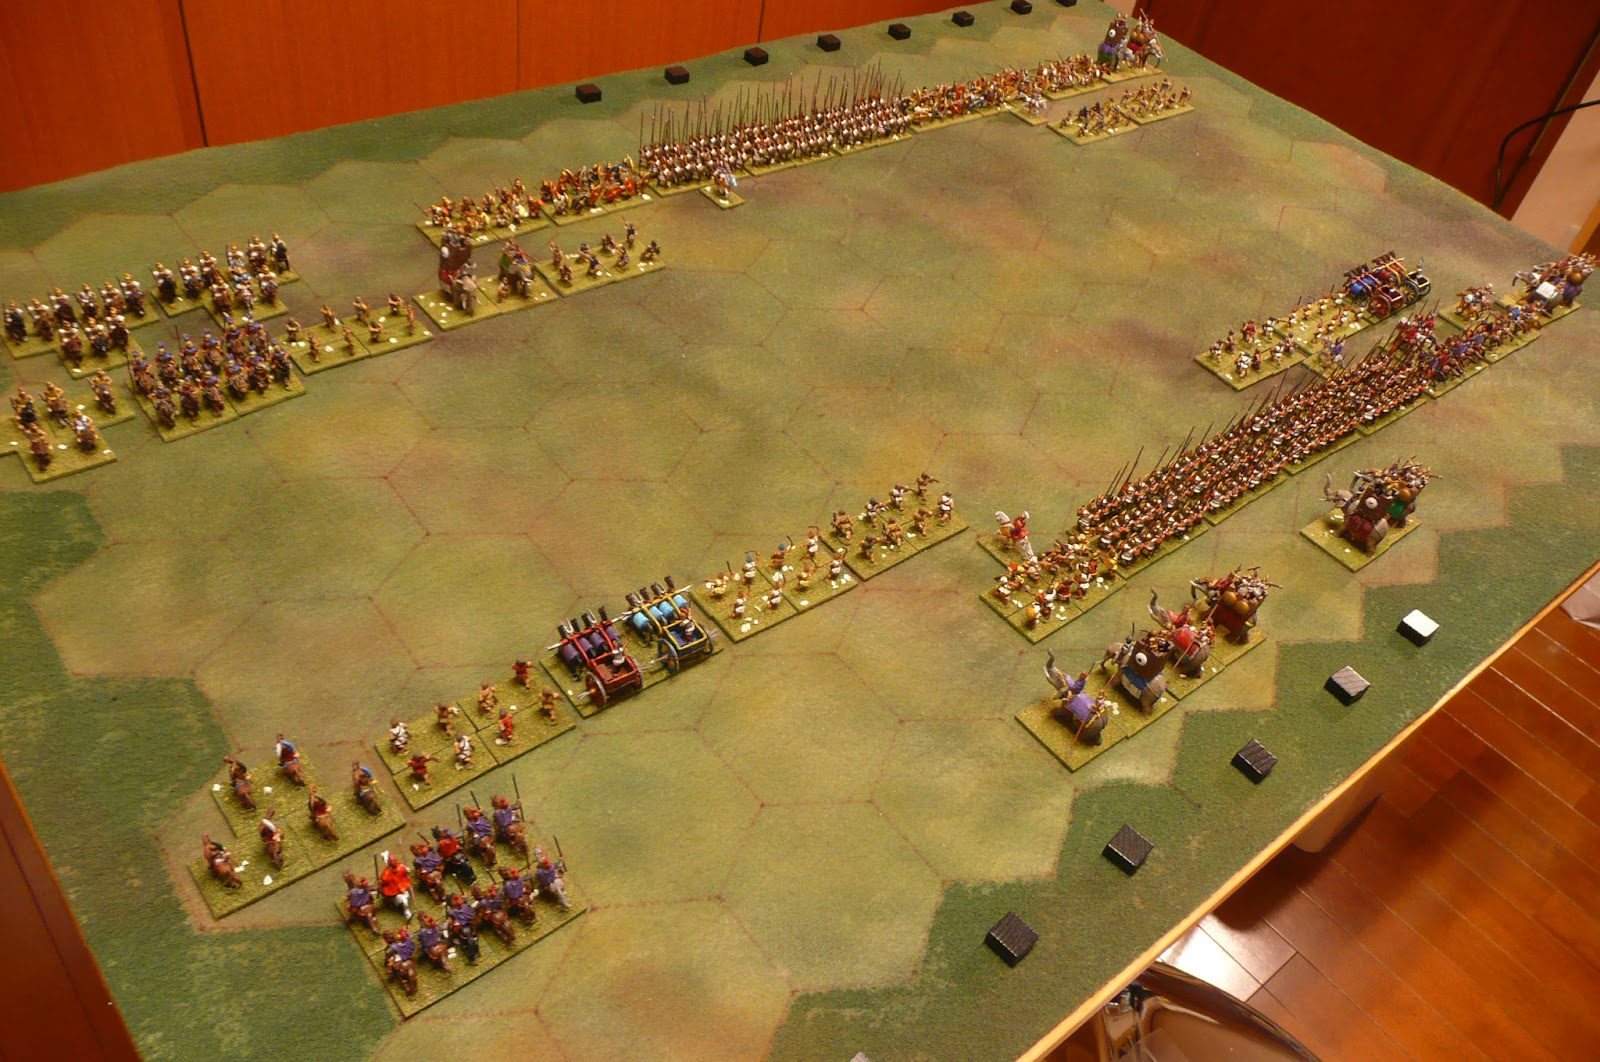
Keep going and you end up with something like this:


And then you can start playing! 

Including markers, this cost the princely sum of $15.00.


Monday, November 4, 2024

Commands and Colors: Ancients mat. The jury is out

After the disaster that attended my attempts to get the Commands & Colors game mat I ordered from Tiny Wargames delivered, I gave up and decided to make one myself, using a ground-coloured curtain I'd brought back from Japan. 

I decided to go with offset squares rather than hexes so that I could use cork coasters for hills without needing to do any cutting. Fine in theory, but I did not properly consider the way that hexes use space more efficiently, and that the height-to-width ratio of hexes vs offset squares therefore makes the battlefield look more populated. 

What I have now is this (Ilipa scenario): 


As opposed to what I'd made before in Japan (Ipsus scenario): 


And what didn't arrive from Tiny Wargames:


I am not finding my new version very appealing in its current state.  The question is what to do. My choices are to beautify the mat with some spray paint and bulk up the number of figures used in each unit to give a heftier appearance, or to scrap it and either make or buy a new hex mat. 

It does look a little better when you get in a bit closer (and with better light!), as below:


And it will certainly be handier for representing terrain, which is a problem I never properly overcame with the hex mat I made in Japan.

Terrain concepts - cork hills (to be flocked), woods, streams (to be cut from desktop mats).

The other thing to think about is that I used hexes 88mm across in Japan; here I am using squares 100mm across, so even on a proper hex mat that extra width would affect the look of the battlelines.

Decisions, decisions!


Monday, July 9, 2012

How to make a quick and nasty hex mat for miniatures

A visitor to the blog, Sean, recently asked how I'd made my hex mat for the Commands and Colors:Ancients games I occasionally play, so I promised to put up a few pictures.

First, the materials.  I got the largest cork bulletin board you could find at the hardware store.  This one is 1200 x 800mm.  If you have a table of the correct size you can just use that instead.


Get some cheap, thin, non-patterned carpet.  Make sure it has a matted rather than ridged texture.  You can use any beige, green or brown colour that takes your fancy, but as you're going to spray paint it the closer it is to the colour you want the more economical it will be.  You can get loads of this type of carpet in Japan.


Cut it to the size of your bulletin board (or tabletop).

Pick up some spray paint in suitable colours to create a patchy effect.  I used about seven different sprays on a very light coloured carpet.

Note: these are not the exact colours I used.  There were about two more shades of brown...


Finally, get a dark green stain (I used wood stain) to use for the border.  This step is optional.


Next, the process.

1) Make up a hex template.  I did this by printing out hexes to the specifications I wanted (87mm from flat to flat) on paper, taping these to a piece of scrap plywood, and then drilling out the hex intersections to create the template.


2) Use a brown marker to dot the hex corners on the carpet itself and use a straight rule to mark in the hex sides.

3) Spraypaint the carpet to create whichever mottled colour effect pleases you.  I quite like the 'start out light and build up to dark' method but it uses a lot of paint - so much in fact that it would probably have been just as economical to buy a mat from Hotz.  If I were doing it again I'd use a light green base carpet and just add browns, yellows, and darker green.  It's possibly cheaper in paint to start out darker and lighten it with yellows and lighter greens.  However you do it, once you are happy with the look, you may have to redraw some hexsides that got lost under the paint.

4) [Optional] Paint in the border areas using stain.  This takes a few coats as the carpet doesn't like taking the stain very much and - depending on how picky you are - you may find yourself wanting to touch it up again after a few plays as well.


For storage, clip it to your bulletin board to prevent creases forming and simply stand it up against a wall somewhere.  If you use your bulletin board during play like I do, be aware that the frame will not support the cork very well under the weight of the lead so put some magazines between the cork and the table top during play to ward off disaster.  Slingshot journals are perfect...


So there it is.  It's not the cheapest way to do it, but I found it to be enjoyable to make, and I'm reasonably satisfied with the results.  It makes for a tough, hard-wearing surface that looks OK and unlike more sophisticatedly modelled boards which use sand, small stones, flock and so on it won't scratch the backs of your C&C:A cards (which is a very important consideration for C&C players!).


All told, I'd say it took about five or six hours to make and - give or take a spray can or two - about $100 US at the current exchange rate.  As I said earlier, if you compare that to the price of a Hotz mat you might find them to be a better option.  That said, you won't get your hotz mat next day, and spray paint may be cheaper where you are than it is in Japanese hobby shops. 
   

Related Posts Plugin for WordPress, Blogger...