Prufrock's Wargaming Blog

Prufrock's Wargaming Blog

Wednesday, January 26, 2011

First painted figures of the year

After ten days fairly intensive painting I can happily report that there is a new force to be reckoned with on the Prufrockian battlefield: sixty-four Roman heavy infantrymen, thirty-two allied Italian infantrymen, sixteen velites, six command figures and eight supporting slingers for a total of one hundred and twenty six figures for the month (and the year) so far.  For me, that is pretty good going!

The bulk of these figures were part of a prize I won in a Commands & Colors: Ancients tournament.  I painted up the first sixteen hastati not long after I got them, but the rest have been sitting in a box for a very long time indeed.  It is rewarding to have finished them.

So, without further ado, here they are!

Principes and triarii, all Strategia e Tattica figures with the exemption of the eagle-bearer, which is a Chariot figure:


The entire lot, with all of the heavy infantry and half of the velites being Strategia e Tattica figures:


The Strategia e Tattica velites, with a Chariot one next to them in the wolfskin:


The army from the rear.  The command figures are also from the Chariot range:


Old Glory slingers:


The whole job lot in their box, waiting for the glue to dry:


These fellows will supplement my Chariot Romans, and I'm so pleased with them I'm going to put in another order with Roberto and Paolo at Strategia e Tattica to bring the allied legions up to strength. 

They turned out very well (bar a few grumbles with my own performance) and I will even go so far as to put up a review and comparison of the figures in a later post.

Stay tuned!

Tuesday, January 18, 2011

The paints are back out

I'm pleased to be able to report a bit of progress on the painting front this week.  My Anglo-Danish DBA army has stalled somewhat, but the Asculum game I played last week reminded me that I had half a consular army of Strategia e Tattica figures primed, brown-washed and ready for a few licks of paint.  So the other night I cleaned off my three year old's colouring-in table and sat down in the living room with the figures and a single pot of  paint. 

It went surprisingly well, and three nights later the things are nearly finished, which is pretty speedy going by my standards.  After spending a bit of time with them I've also decided that I quite like the figures and will put in an order for a few more packs so that I can do up some allied legions too.

Once they're all finished that should give me 4 legions plus allies at 75 men per figure, which is probably just about right for most occasions, though probably not quite enough to make me stop looking for more...

Sunday, January 16, 2011

Humming and harring over base cloths.

Like all wargamers, I'm always looking for ways to improve the appearance of the old table.  One of the easiest ways to make sure a game looks good is to have a nice base cloth, but getting the right shade and the right texture is a bit tricky.  As I'm sure we all do, wherever I go I'm always keeping an eye out for cloths or carpets or other terrain pieces that might fit the bill. 

Anyway, the other day I found yet another carpet and picked it up, thinking it could be all right.  To cut a long story short, I thought it might be interesting to ask for opinions on which cloth goes best with the basing style I use for my figures. 

Please comment and let me which one you like best.  Feel free to go into as much detail as you like, and any peripheral advice or sage words of base-cloth wisdom would be greatly appreciated.

So, here are the options, in alphabetical order:


A) This is the first base mat I used.  It's made up of carpet tiles spraypainted various greens and browns.  It served its purpose but I don't really use it much these days.  It does fit my big table, however.


B) This is what I use for the big table these days.  It's a curtain, again with spraypaint added.


C) This is a different carpet (originally a kind of off white), with a fine grain.  I put hexes on it for use with Commands & Colors.  Again, it has been painted.


D) This is my current home table mat.  Green carpet this time with a bit of yellow and brown added to it.  It's the one I use for my Lost Battles games.


E) This is the new one I picked up the other day.  It's again carpet, and this is its store-bought colour. 


So, there are five of my base materials.  I have other bits and pieces I've fiddled around with too, but these are by far the easiest to pull out and set up, so these are the ones that get most use.

Which one would you prefer to see being trampled under hordes of leaden feet? 

Friday, January 14, 2011

Asculum, oh Asculum.

The hobby room has had a reshuffle of late with my wife's sewing stuff having been moved in there, which means that it had been a while since I'd had a proper miniatures battle at home.  Last night had seemed like an appropriate time to get back on that particular horse, and - as if on cue - around lunchtime the breeze (or perhaps it was the aircon) began whispering 'Asculum; Asculum.'

And lo!  There Asculum was...

Under 
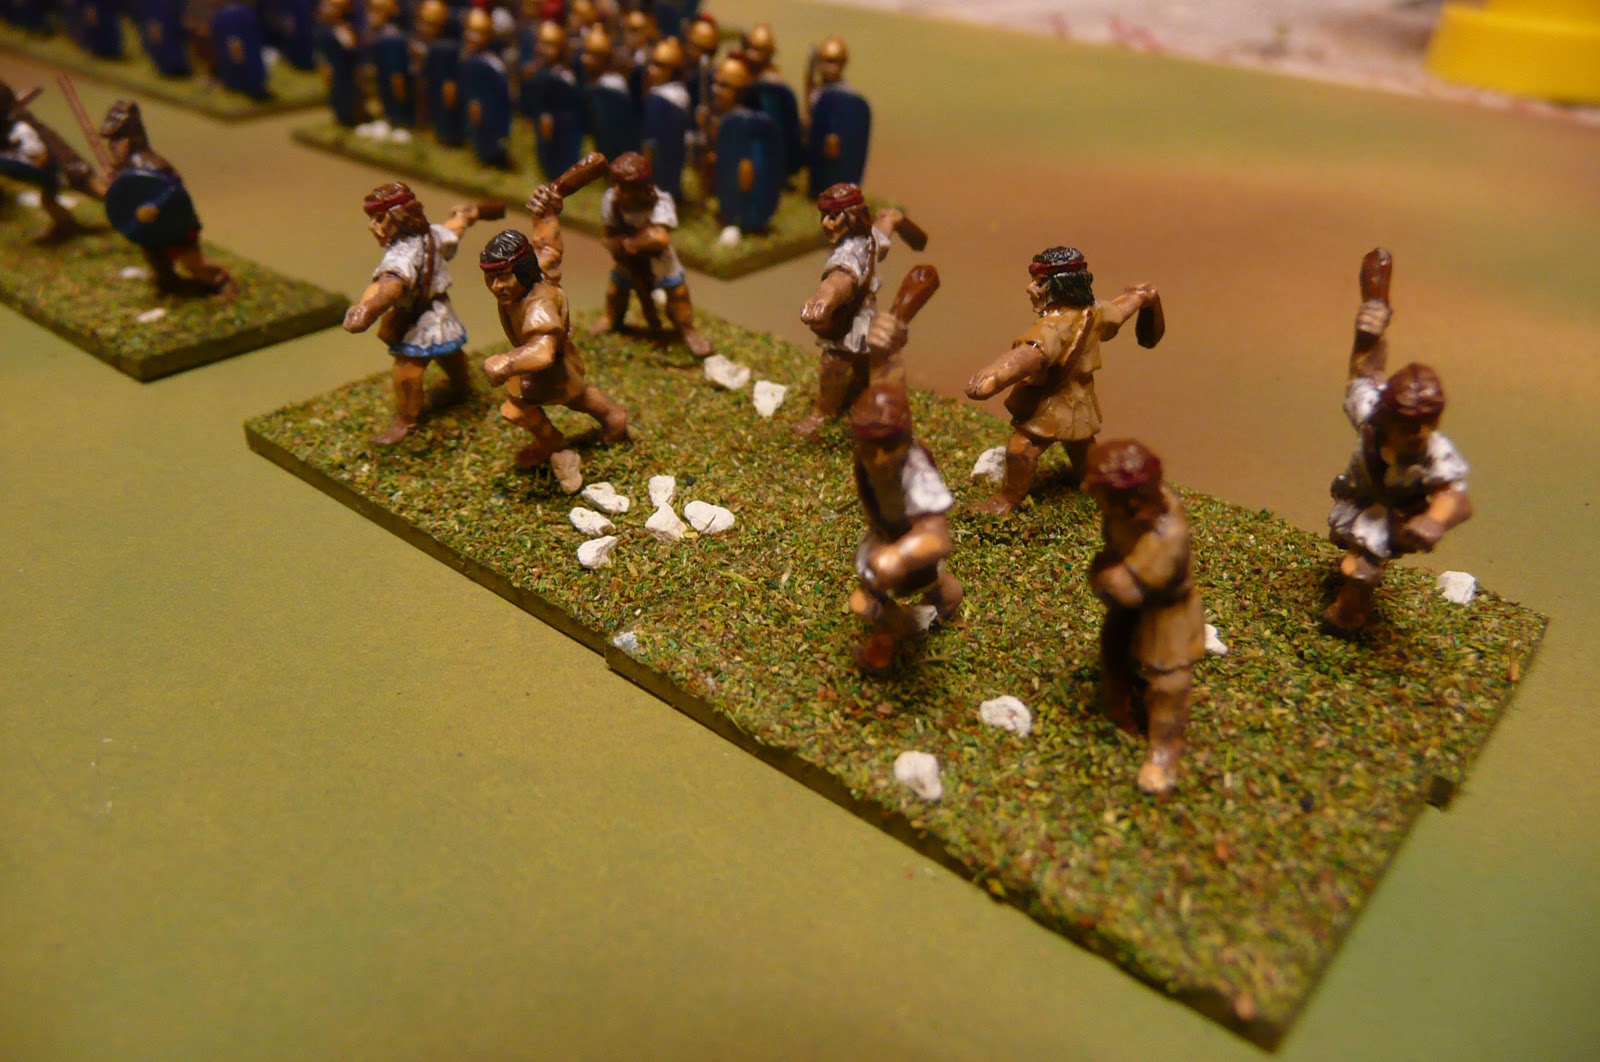
Lost Battles Pyrrhus has a fighting value of 85 versus the 77 of Decius and Sulpicius, equating to a 24 point handicap.  This means in practice that Pyrrhus needs to shatter four legionary units to be on equal terms.  This is by no means an insurmountable task, but the Greek will need to proceed with caution and look to minimise the risk to his own forces.  When fresh his phalangites are strong against the legions, for they can attack in pairs to get a combat bonus (and fresh lead phalangites get a bonus against legions as well).  Less happily, the left flank of the infantry line is made up of a hodge-podge of generic heavy infantry types, so they will find it harder going against the Roman troops and could be a potential weak link. 

A weak link? 

Pyrrhus needs to work with flexibility: he will look to try his luck with the infantry and hold back a little on the flanks to see where the main attacks will come.  Once the Romans make their move he can direct his mounted reserves to shore up vulnerable areas and may choose where to concentrate his own assaults.

On the Roman side, Decius and Sulpicius will try to extend their handicap advantage by scoring hits and preserving the freshness of their own forces as long as possible.  If they can win on one flank they will have a good show off pulling of a points victory; if they can win on both they will have a good show of winning the field.

Decius waves to the crowd.

The first turn begins with Pyrrhus (known as 'The One' on account of his frequent production of that number in command rolls) ordering a general advance in a centre.  He has lived up to his epithet, and does not have the commands to do anything fancy with his cavalry.  They simply dress ranks, move forward to face the enemy and await proceedings. 

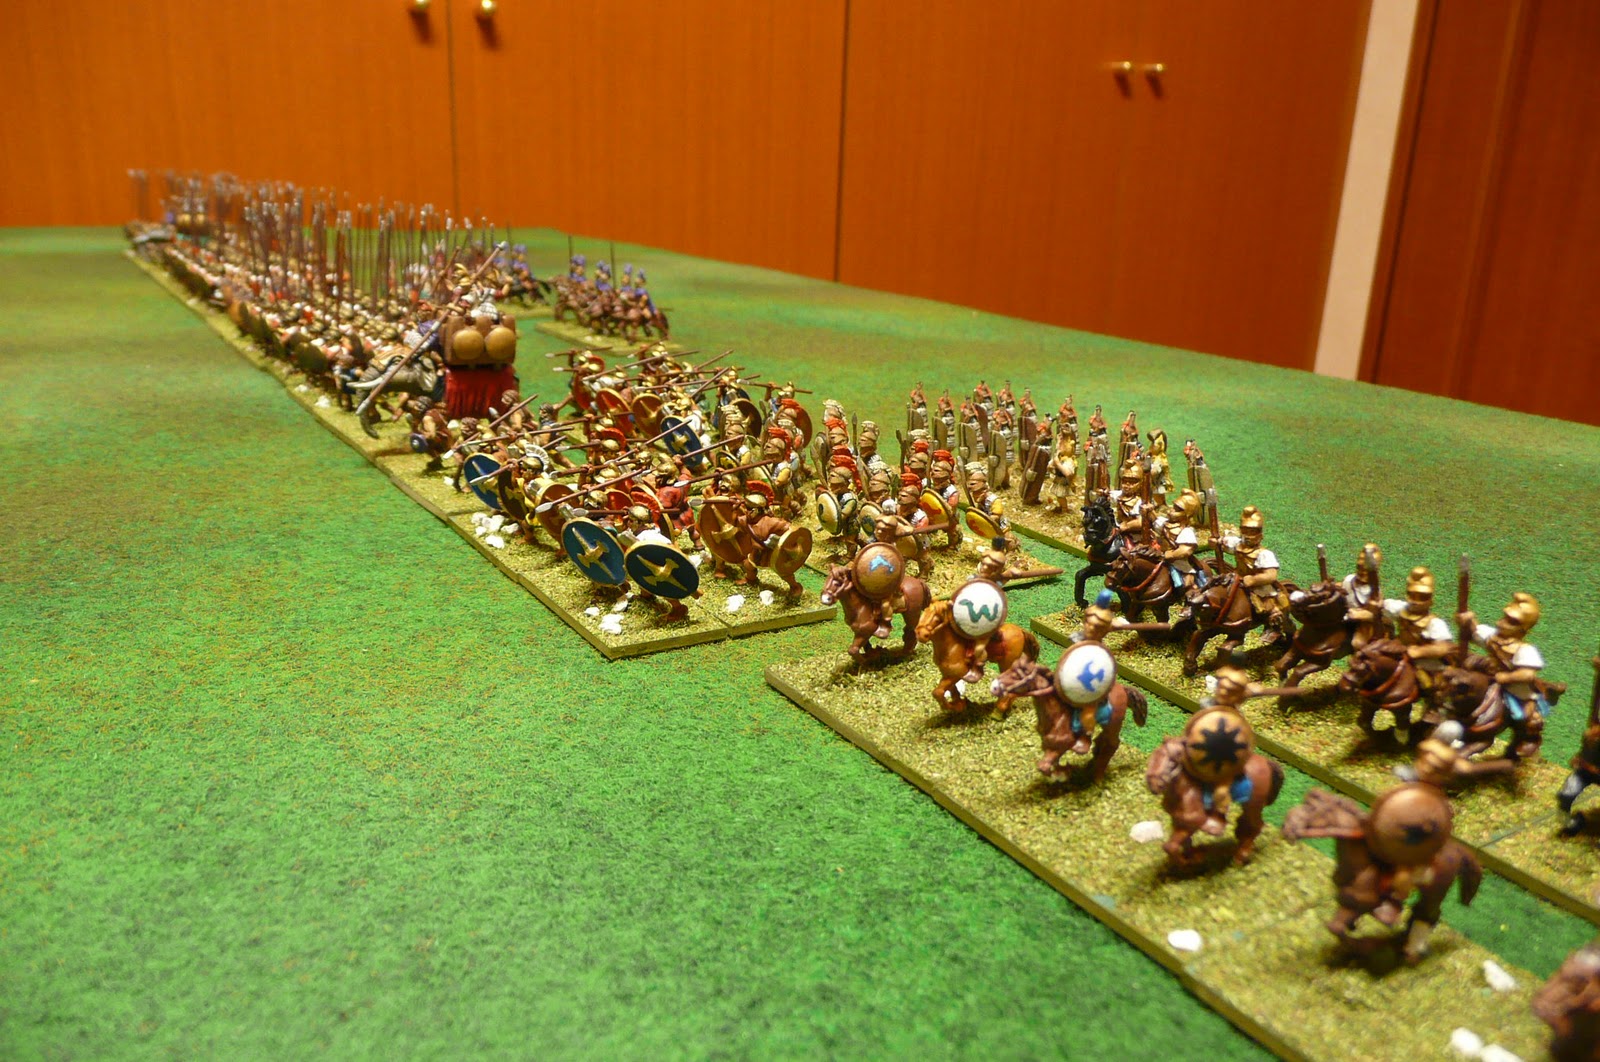
The cavalry and infantry align.

In the centre an eager unit of Italian allies scores a hit on the Roman skirmish line, drawing first blood.

The phalanx and the shaky levy lights.

The Roman machine now sets itself in motion: Decius advances his right centre and the centre itself moves up to relieve the skirmish line before it can get into any further trouble.  Sulpicius holds the left centre back, unwilling to face the cream of the phalanx without having given his men some sort of advantage.  On both flanks the Roman cavalry about-faces, but, daring the Greeks to charge in from a distance, elects to advance no further. 

Decius proves he can advance and wave at the same time even though he's only rated as an 'uninspired commander'.

With two thirds of the Roman infantry line in striking range, Pyrrhus makes the most of rolling a four for command and gives combat bonuses to his left centre and central phalanx.  He does not advance the cavalry on his wings, nor the infantry on his right.  Everything is thrown into delivering a weighty opening blow. 

This proves to be the right decision: he observes his 'weak link' left score three hits at a cost of one to itself and the centre chime in with another.

As if things were not going badly enough, the Romans now roll a one of their own.  Although there are only 8 command points to play with, it's now or never - the cavalry must attack.  Accordingly, the left flank advances, absorbing the negative modifier for moving before an attack, and scores a welcome and morale-boosting hit.


Who's the weak link now, eh?

Pyrrhus the One (once again) is now faced with a dilemma: which flank should he reinforce?  After some consideration, he decides that losing on the right would be most destructive, as it would see his valuable infantry line there outflanked.  In conjunction with an advance from Sulpicius, this could be enough to win the battle for the Romans.  Therefore, he reinforces the right with a unit of veteran cavalry, but not before the original denizens of that flank have scored a hit there and the left has also charged home to add two of its own.

Reinforcements arrive on the Greek right. 

Despite a quiet turn in the centre the 'weak link' does yet more damage to Decius' zone.  The centre right still holds its place in the line awaiting the outcome of the events on its flank.


The Romans appear to be inviting the Greeks to advance into the pocket. 
 
The infantry battle continues, with the Romans managing to make some gains in the centre.  Events there take a dramatic turn as Pyrrhus is forced to start attempting rallies so that he may retain a unit of fresh infantry in the lead position and a fresh pair of phalangites for the attack.  Decius is also beginning to make inroads, with all but two of the units opposing him now spent. 
 
Much depends on the cavalry.  If it could just win a flank... 
 
But the rolls come in, and it is clear that neither flank will be won quite yet.
 
An overview of the field as the moment of decision nears.
 
With the issue in the balance, Pyrrhus rolls a two.  He give a bonus to the cavalry on the right, but all three attacks miss.  The cavalry on the left is not given an attack bonus, and these two units also miss.  With nerves frayed, he orders an assault in the left centre.  The tension is eased somewhat as a hit is scored, Decius fails in his rally attempt, and the first unit is shattered.  The levy light infantry run off from the shock, leaving three units in the zone.  Finally, although the results in the centre are again inconclusive, it is evident that the Romans are being worn down.
 
There's our opening, gentlemen and elephants!
 
With the onus back on the Romans, it's time to break a wing.  The assaults are valiant, but with only eight commands to play with there are not enough combat bonuses to go around.  The lack of command points is particularly telling on the right, where both attacks would have succeeded if bonuses had been available.
 
What we wouldn't give for a combat bonus right about now...
 
On the left, one attack is successful, but the second cannot score the hit that would have caused a shatter.  Things are better in the centre though as the infantry come roaring back into the fight, shattering a unit of Samnites on the Greek left and leaving all but one of the infantry in the central zone spent.  
 
With Pyrrhus now in the ascendant, he obliges by rolling a three for command and commences with the 'weak link' zone.  Leading off with the elephant unit they score a double hit.  Decius rallies one, but is killed by the other, and the collapse begins. 
 
Decius has joined his forefathers, waving even in death.
 
This time the cavalry charge home on both flanks with no hesitation.  All four of the Roman cavalry units are shattered, and the flanks are laid bare; miraculously, the legions do not run. To add to the misery, units are also shattered in the centre. 
 
The Roman line holds out for another turn, but cannot claw anything back and is swept away in Pyrrhus' next attack.
 
With the forward line gone, Sulpicius' men are quickly surrounded and while they score three desperate hits of their own, it is Pyrrhus himself who administers the coup de grace with a devastating flank attack.
 
"Join the army they said. See the world, they said..."
 
As the final analysis is made it becomes apparent just how hard-fought this victory has been.  With one Greek unit shattered and seventeen units spent, the Romans have gathered 83 victory points.   But with nine Roman units shattered, a general killed and the remaining units routed, Pyrrhus has scored 105 points, which is enough to record a narrow victory.
 
All hail the victor, and it must be time for the Romans to raise another army...

Thursday, January 13, 2011

Kudos to Brookhurst Hobbies

Well, yet another example of great service from Brookhurst Hobbies.  Talked to them last Wednesday, figures arrive here in Japan just a week later.  I now have all the extras I needed for my Late Achaemenid army.  When they will get painted is, naturally, another story...

In the meantime, here's a picture of that box-just-arrived-and-ripped-open moment.  It's a lovely feeling :)

A statement of intent

Friday, January 7, 2011

End of year gaming (part 2), in which Prufrock ventures into the lion's den.

After visiting Pat (as related in this post), it was time to leave picturesque Kobe and head into Osaka to meet up with Luke for some miniatures gaming.  I'd brought my sleeping bag and a change of clothes so there was no space for my own figures.  Fortunately, Luke has an ample collection!

First up was a game of big battle DBA, wherein I took Communal against his Papal Italians.  There was a road through the centre of the battlefield stretching from my side of the field to his, with a hill on one flank and a patch of forest on the other.  The Papal fellows had an advantage in knights, but I had three war wagons which I planned to use to anchor my centre and right.  My strike force was on the left, made up of most of my knights (4 elements, I think), a unit of light horse, some psiloi and 6 elements of horde. 

Matched against them was a small right command made up of knights and psiloi.

My centre was spear and bow with a knight general, anchored by two war wagons on the left and my right command on the other flank.  This command was comprised of auxilia, psiloi, the remaining light horse, a knight general and the third war wagon.  I did not expect to do much in the way of moving with this command.  It's main job was to prevent any enemy attempt to infiltrate the forest, but it would depend on how he deployed. 

From left to right, my commands were made up of 13, 13 and 10 elements respectively.  I allocated the high pip dice to the left and the low to the centre, as I wanted to keep some flexibility on my right.

Luke's set up was quite different.  His flank commands were made up of 7 elements, with the centre a hefty 22.

The battle began with the Papal chaps advancing on the right and in the centre while I shuffled my knights across to meet the flank attack.  I broke his right command quickly and spent a few turns mopping it up.  Unfortunately his centre command overlapped mine, and this exposed my horde - which were part of my left command, if you remember - to the tender attentions of his bowmen.  I had foolishly not realised that bows quick-kill horde, and in no time at all he had shot up 4 elements of them and broken my left command to return the favour. 

My plan to fall upon his centre from the left had gone the way of all flesh; nonetheless, not all was lost.  My centre command still had some good match ups and the war wagons on my left were a reasonably secure buttress against the bow (though we did have a scare at one stage!).  I now came to rue having made the centre my pip sink, as they rolled rather a lot of 1s, which hampered my efforts to advance the line.  Eventually I moved forward leaving the war wagons behind (they took 2 pips to move as part of a group) but by this time Luke had cleverly manoeuvred his forces in the centre into a much better position.  When we closed, it soon became one-sided; I tried to get my right into the action to put pressure on his internal flank but I'd left it too late at that stage.

By the time my knight general (and commander-in-chief) was cut down in the centre, I'd been given a lesson in maximising match ups and was left feeling a little red-faced at having wasted such a strong position.  It was a very good game, and Luke earned his win with some excellent play.

Next up was another game of DBA, this time using Luke's Macedonians on their 80x80mm bases.  It started out well enough but things turned to custard as the irregular depth of the bases meant that we were going on guesswork with recoils and so forth.  As the game wore in I got into one of those situations from which I could not contact an enemy element due to geometrical considerations, and it got frustrating having exactitude in this one aspect of the rules when we were having to play a bit fast and loose in other areas.  It just goes to show that it really does pay to have your rules tight before beginning a game!  Still, it was a good experiment, and gave me renewed respect for DBA as written.

We finished off for the night with a game of Phil Sabin's Empire, his fast-play take on the period 350-150 BC.  I lost this game too, as my Rome and Persian/Parthian empires failed to compete with Luke's Macedonians and Carthaginians.  So I headed off to bed having enjoyed the games (bar the geometrical issues in the second DBA outing) but down 3 zip and needing to redeem myself somewhat on the following day!   

And more on that anon...

Wednesday, January 5, 2011

Lost Battles board game developments

Further progress has been made on the Lost Battles board game with the strategic map and a play-through posted on the Fifth Column games site here.   The map really is a work of art, and Phil has kindly allowed me to post a screenshot of the map on the blog, for the edification of any readers out there...  As usual, click on the image for a larger shot.


With four different campaign scenarios playable on it (and home-grown scenarios as well, most likely) it should provide a nice little bit of strategic background for wargames campaigns.  I'm looking forward to this even more now!

Tuesday, January 4, 2011

End of year gaming (part 1), in which Prufrock encounters a Manoeuvre.

Just prior to the end of the year I managed to get some time off to head up to Kobe and Osaka to get together with a couple of wargaming buddies for some face-to-face games.

The first day was spent at Pat's place, where we got through two games of GMT's Manoeuvre  and a few more of GMT's Battle Line.  I quite enjoyed Manoeuvre even though it's more of a strategy game than a 'battle' game, and I was struck by its similarities to DBA.  As in DBA, armies are made up of a set mix of national army lists and battlefields are generated for each game played, these being made up of four 4x4 square sections drawn randomly.  Gameplay however is rather different.  In Manoeuvre there are four parts to the turn: card draw, movement, battle and rally.  Your turn starts by drawing cards to your hand limit of five, with discards allowed.  You must then move one unit per turn (whether you want to or not) and a second unit may also be moved on the play of a special card.  The combat phase then follows, and this is where things get interesting.  You may only attack once per turn and only if you have a card to activate the unit you wish to attack with.  If you decide to launch an attack, the process is simple but engaging: play the unit card to initiate the assault and wait to see your opponent's response.  He may withdraw if permitted or play a card to augment his own chances in the battle.  Supporting units can then be drawn into the combat by the attacker through the play of a leader card and once all cards relating to this combat have been tabled the combat is resolved.  This is done by totalling up the combat factors of the units involved, plumping in modifiers for terrain and adding the scores from any extra dice rolls that the cards played may give the participants.  The attacker's score is then compared to the defender's and, depending on the ratio between them, a result is found.  For example, a four to one sees the defender eliminated; a two to one result sees the defender losing a step or retreating, at the attacker's choice; a result above one to one but less than two to one is a step loss or a retreat at the defender's choice.  If the defender wins the combat the attacker simply takes a step loss. 

This is a rough outline of the process for assault combat, but there is also volley and bombard combat which can take place at longer ranges and does no injury to the attacker if the attack fails.

After combat is finished the active player may choose to use a card and rally one of his spent units.  If the rally is successful then the unit returns to full strength.

These turns proceed until five enemy units are eliminated or both players run through their card decks, at which point the winner is decided by who controls more of the battlefield at day's close.

There are eight armies in the game, each with a slightly different mix of units and cards to activate them (each power uses a national deck of 60 cards) so it has great replayability.  It's also pretty simple to pick up but will repay thoughtful play, so it's a winner as far as I'm concerned.  One thing about it that I particularly liked is the follow up rule which has a victorious unit following up into a space cleared by a successful attack. This allows for some clever play with traps, gambits and bluffs, allowing a battle of wits to develop over time.  If I could convince my wife to play I'd probably pick it up, but I somehow doubt that this will be possible at the moment!

So after a lovely day's play at Pat's it was time to jump on the train to Luke's place for some heavier-duty ancients gaming, but that is a story for another post...
Related Posts Plugin for WordPress, Blogger...