Prufrock's Wargaming Blog

Prufrock's Wargaming Blog
Showing posts with label modern spearhead. Show all posts

Wednesday, January 8, 2014

Modern Spearhead: Clash at Oberickelsheim

In December 1979 the 1st Brigade of the US 3rd Infantry Division was tasked with hitting the flank of the advancing Czech 15th Motor Rifle Division and stalling its approach to the Main River.

Stolen from Luke's blog 'hoti to kratistos'

Accordingly, the commander laid plans to do just that.

The forward deployed 3/7 ACAV troop, on the scene at daybreak, was ordered to advance to the Main and follow it north until it encountered the enemy.


But in a shock to the ACAV's recon elements, it happened that the Czechs were closer then anyone had thought...


As the lead recon units began to trade fire, other Czech units were making their way to the combat zone. Thankfully for the Americans, heavy rain turned the fields into boggy hindrances to the Czech advance.


1/30th Battalion arrived in time to provide the firepower needed to halt the initial Czech attacks.


But with the AVAC elements tied up in a firefight there was nothing to stop the Czech advance to the river further north.  The bridging equipment in evidence gave notice of their intentions...


As tensions rose, the 2/64th American armored battalion arrived, and with this the Czech opportunity to take 1/30 in the southern flank vanished, to the great relief of the American commander.


The day now settled into a series of patterns: Czech advances in the centre were stopped by the massed firepower of the M60A1s and the heavy artillery; Czech reinforcements struggled to get through the mud to aid their compatriots and, in the north, the Czechs continued their steady approach to the Main.


The Czech centre paid a heavy price for its attacks, but the river was bridged, and with air strikes impossible in the wet weather the advance units began crossing.


With time running out for the players, the action was called at 11:00 game time with the Czechs across the river but the Americans having routed the Czech centre and things very much in the balance.


It was a fantastic day and a real treat to see so much happening on such a beautiful table.  Many thanks to my noble opponent Pat and to Luke (whose more in-depth reports can be found here and who put the game on and hosted us) for a great wargaming experience.

Tuesday, November 5, 2013

The Cold War goes hot in 6mm

As mentioned in my last blogpost, Luke and I recently got a game of Modern Spearhead in using Keith McNelly's excellent scenario generation system.

Set in 1979, the situation saw a Soviet Motor Rifle regiment advancing into West Germany and encountering elements of the US 3rd Infantry Division.

We made it a 600 points game, so I took two BTR-60PB battalions, both with a company of T-62Ms attached, one with an anti-tank company for support and the other the regiment's recon battalion.  My third unit was an independent tank battalion beefed up with a recon company.  I only took one battalion of artillery - Akatsiyas - because I was wary of Luke's counter-battery fire, and also to have more troops on table to soak up the casualties I would inevitably suffer.

The table, with objectives marked, looked like this:


I was to be attacking from the top of the picture as we are looking at it, and having only three manoeuvre units, how best to deploy them proved a puzzle.

Objectives, in Keith's scenario generation system, give two points to the holder and breaking an enemy formation will provide an additional two.  I only had a vague notion of this at game start (I was too busy pre-game getting my army list sorted to worry about peripheral matters such as how to win the battle!) but the general plan was to secure three objectives and try to bash the enemy as much as possible.

Knowing Luke, I reckoned he would want three manoeuvre units of his own, so I was banking on there being two units coming up table and a third marching in on a flank somewhere.

After a bit of thinking I decided to hit objectives C and D and look to drive on E if luck was with me. With my BTRs being wheeled, there was no point having them slog through the muddy fields in the centre, so this made my decision easier.  The 1st battalion with the recon would go straight up the road and take the town on Luke's side of the board; 2nd battalion with the attached anti-tank assets would flank march and head for objective E; the independent tank battalion would be deployed on table in reserve, allowing me to order the armour through the centre or to my right later on, once I had a better idea of whether there was likely to be a flank march coming in against objective B.

This is what my order sheet looked like (seen from my side of the table):


Things began reasonably predictably: Luke also appeared to be heading for the town on his right using an ACAV unit comprised of a couple of M60A1s, some M113s, some nasty M150s, and a bit of recon.  His main force, a composite battalion of mechanised infantry and trusty M60A1s, was heading for objective E.  It was quite big; probably 2 companies of infantry, a company of tanks and support in the form of tank-killing M150s and mortars.

Hmm, not sure if I want to tangle with these guys!

Luke took the town on, I think, the first turn, and as he came into view 1st MR Battalion began deploying off the road, trying to use speed and cover to close with him as quickly as possible.  

Luke's ACAV have taken the town and are heading for the objective on the high ground.
Over the next two turns 1st MR began taking casualties from the M60A1s, ATGWs, and incoming artillery. But our Shilka calmly switched from AA duties to hitting the enemy ground troops while we winkled our BTRs closer.

The advance continues in the face of enemy fire.
My T-62s await their orders...
Meantime Luke's main force showed its hand. I had expected the composite battalion to halt on the hill and assume a defensive position, but it didn't.

He came down off the hill, rushing recon and combat teams in M113s towards the wood on the ACAV unit's left flank.  I waited one more turn before committing the tanks - just to make sure - and gave them timed orders to advance through the centre to objective E, and then - perhaps a trifle ambitiously! - to turn towards objective B from turn nine onwards.


As turn four rolled around the god of flank marches proffered me a 5, which allowed my 2nd battalion to come on table in a position that was particularly sweet. Since Luke has done this to me in just about every game of Spearhead or Modern Spearhead we've ever played, it was nice to return the favour!

2nd MR battalion arrives, behind the American ACAV.

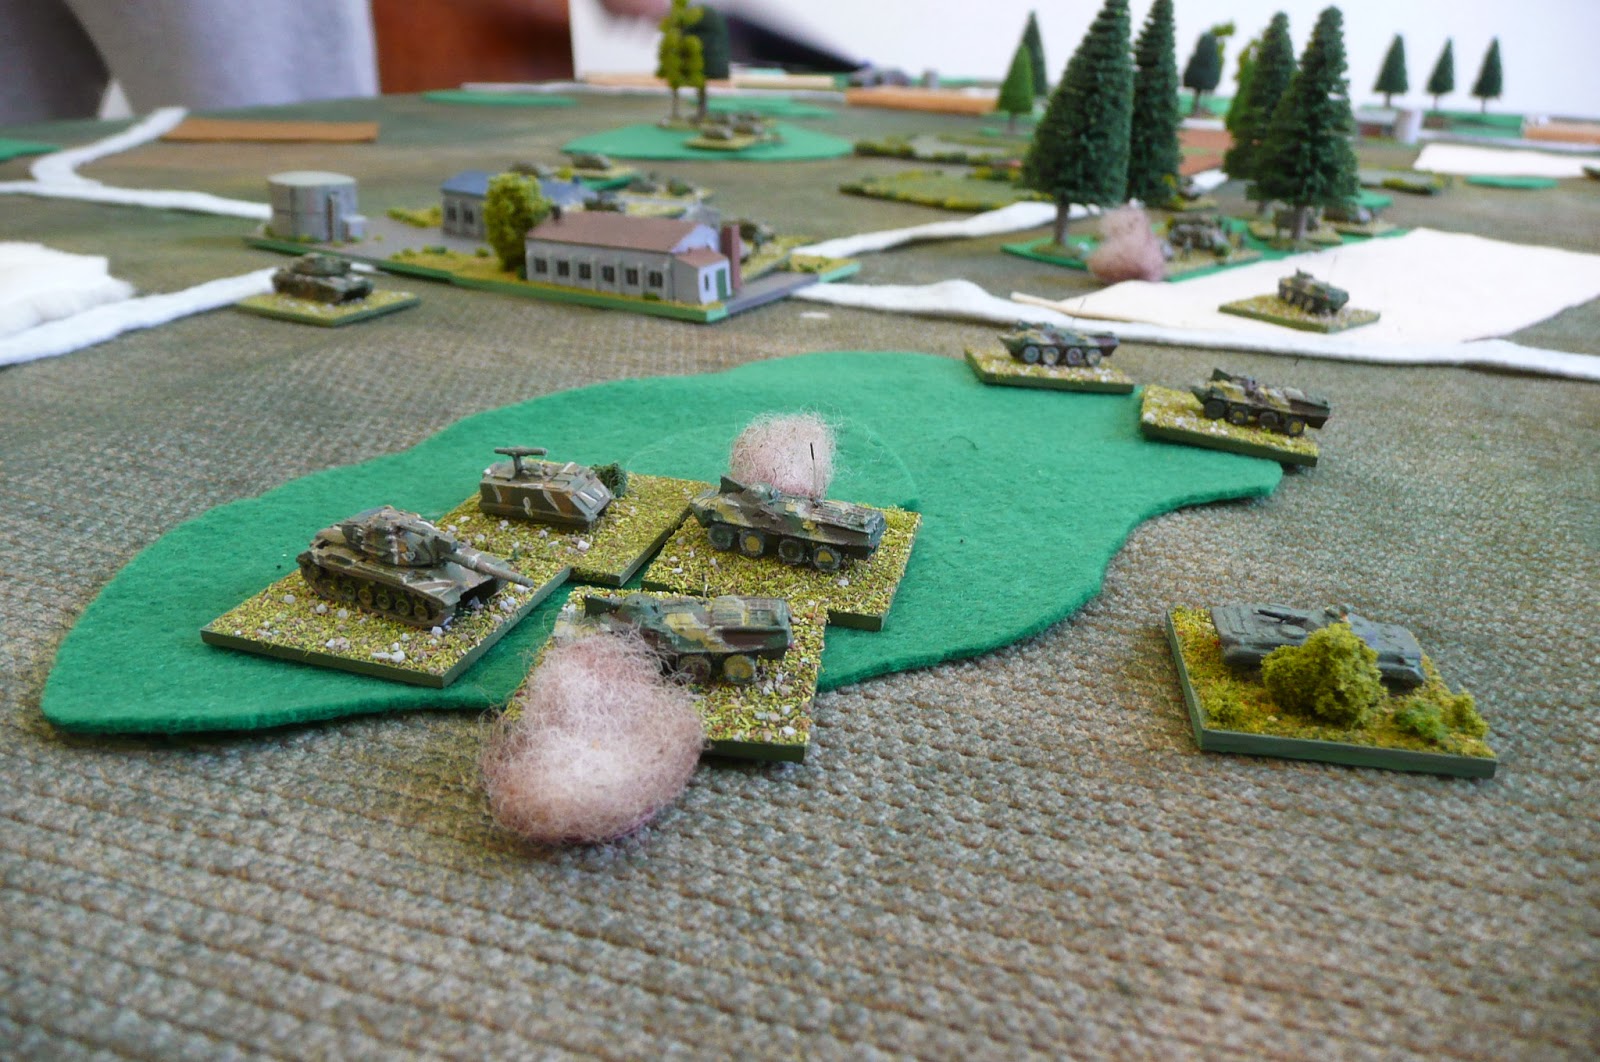
With tanks behind Luke's flank and able to hit the weak side armour of the M60 Pattons, I decided now was the time to push the BTRs of the 1st battalion into close combat to clear the hill and hopefully break the ACAV unit completely.

Turn 4 after movement, but prior to the artillery phase.

The tank battalion commences its advance.

But Luke had some tricks up his sleeve.  First up, he called down smoke to prevent the advantageously positioned tanks from 2nd Battalion utilising their flank shots.


Luke's skill: exhibit A

Second, he called down artillery onto the advancing elements of 1st Battalion, hitting them so severely that the battalion was suddenly only two kills away from its break point; exactly the number of elements that (if you'll recall) I had ordered into close combat on the hill, against an M150 and an M60!

To make matters worse, Luke's forces now suppressed both of those close-combat elements with gunfire prior to the fight, putting the odds heavily in his favour.

Clearly, those two kills were not now a million miles from possibility, and if I lost those combats it would in fact be my battalion that broke first.


Luke's skill: Exhibit B - suppressing the advancing BTR teams prior to close combat.
So, with everything (for the moment, at least) riding upon the results of these close encounters, we took our dice, nodded coolly at each other, and flung.  The first result saw the M150 kill off my initial attack, so now both his ACAV and my 1st Battalion were just one kill away from breaking. 

For the second attack - with me at -2 - we rolled again; and this time I had all the luck in the world.  My 4 played his 1 and we had broken the ACAV after all!


The crucial combats end one apiece.  Great tabletop theatre!  I think I like this game...
Whew!

Next turn Luke committed the third battalion which he'd been keeping in reserve. This was not large, but packed some punch: a company of M60 Pattons, a company of M113s, M150s, and the obligatory mortars.

Fortunately for us, as they came on table we got off a lucky shot, destroying the lead tank.

Things look pretty good right now!

Less fortunately, the good news was not entirely universal. 1st Battalion now took the hit which put it over the break point. This was inevitable, but it's still a blow to see your little lead men beaten up and forced to flee...

It was now two formations on two, but I had the advantage of terrain and numbers. It was going to take some careful manoeuvring to make sure I got the best out of the tank battalion, but I was so confident that I even joked to Luke that it'd take some work to explain if I managed to lose from there.

I really should have learnt to keep my mouth shut by now!

The next few turns saw us jockeying for position in the centre and a mini-battle on my left as the tanks accompanying 2nd Battalion tried to get shots on Luke's M60s while the ATGWs and a T-12 anti-tank gun moved into position to give us local superiority.

2nd Battalion getting into position to take out the M60 Pattons.

In the centre our recon managed to call down some ICM rounds onto the M150s in the composite battalion, which tilted things significantly in our favour.  Luke now had, in effect, only three guns against a potential nine in that sector.

The situation in the centre just prior to us sorting out the M150s with artillery.
But it was at this point, when things were looking at their grimmest for him, that Luke started to get into his work. You will probably already have an idea about what form that work took, but as I can summarise it very briefly, I will.

He did two things:

1) Call down smoke to limit the number of tank guns the Soviets could bring to bear.
2) Have confidence in the superiority of his tank crews.

And it worked.

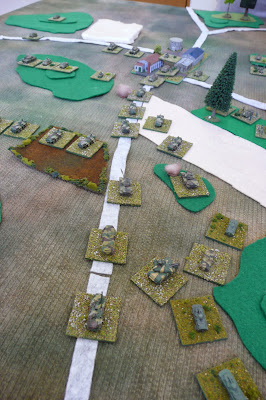
Turn after turn we would fail to score the killer blow, and his M60s would knock out another one or two T-62s from those approaching, as you can see illustrated below:


By the end of it not only had it taken three turns to kill his three tanks, but he'd gutted my tank battalion and prevented the breakthrough to the hill that the advantages I possessed should really have made a mere formality.

It was a superb example of a player keeping his nerve, using every inch of ground, every round of smoke to limit the firepower that could be brought to bear, and carefully making sure of his own shots.

It was a hard lesson for me and one that I found a little difficult to take.  After the third turn of not making any but the barest progress I was getting pretty grumpy!

My mood was not helped by the fact that it was a similar story on the left, as again I failed to make the most of my chances. There we faced smoke, shrewd gambles on our shots missing, and deadly shooting in return.

I also made a couple of silly errors here by fluffing around going into the town, but the less said about such rookie mistakes the better!


So by the time we finally destroyed the last M60 in the centre the situation on the left had reached an empasse: I was holed up in the town and pinned there by American combat teams on the outskirts, with neither side wanting to risk closing for close combat. I had more combat teams on the hill, but all of my tanks and the AT-gun had been destroyed.

At current ranges I had nothing left to hit his tanks with, and he couldn't see my infantry in cover. If he closed it would get bloody but neither of us was particularly keen on that!

So after turn nine, with family duties calling, we finished up.

As it turned out, I had won a nominal victory - 5-2 - but it really felt like a defeat. I had not made the most of my considerable mid-game advantage and it was clear that I still have a lot to learn about how best to employ combined arms tactics, particularly mortars and artillery.

I was reasonably happy with how I used the tanks in the centre, but Luke's counter-tactics there were too good. At this juncture I'd just like to say that throughout the game Luke gave me a lot of sound advice, some of which was quite detrimental to his cause. It's a great pleasure to have an opponent who genuinely wants you to get better, and not just to beat the pants off you because he knows the rules or period better, so hats off to Luke again on this score.

To conclude, it was a great game, and showed once more that Modern Spearhead is an excellent set of rules. There's still a lot I need to get better at, but hopefully that will come with time, and more speedily when there are players as sharp as Luke to learn from.

For anyone interested in reading things from the American perspective, Luke has a report up on his website as well, here.

Luke also has a blog now too, so do head on over and have a look when you get a moment.

Until next time!

Tuesday, September 24, 2013

Modern battle tactics

As I gear up to play some Modern Spearhead using the models I recently acquired, I realised that it's probably a good idea to brush up on / get some kind of grounding (whichever the case may be!) in real world tactics.

To this end I've been looking through the US army's field manuals, some of which can be found here.

Of particular interest for the scenario I'm working on now has been Field Manual 71-1, "Tank and Mechanized Infantry Combat Team".  It is a very useful resource and includes many handy diagrams, such as this one from the chapter on defensive positions.


For a US interpretation of Soviet tactics we also have the FM 100-2 series, which is again gold for a novice like me, even if, as some have said, not everything is 100% correct.

But illustrations like this example from FM 100-2-1 really help set the tone for the kind of fictional Cold War encounters I aim to play out.


As the small table will be in use for these games, most battles will see only one to three battalions per side, and the kind of information these field manuals provide is just what I need.


Saturday, August 25, 2012

Czechs and Americans, 1980. Part III - the Czech perspective.

Luke has sent me his comments on the game, so here they are.

Luke says:


I knew Aaron wouldn't be able to bring a 4th battalion to the table unless he took a B option, with its attendant victory point penalties, I expected him not to take that gamble, and thus be left with 3 battalions. As it turned out he took a B option, but one that didn't involve a 4th battalion, so that part of my pre-battle prognostications was sort of right; what I really didn't expect was that he would start with only 2 of them on the board, and flank march one - it was a good move IMO.

My plans were as follows:


Experience has taught me that trying to advance on all 5 objectives is a wasteful dilution of forces. Since my right contained a higher proportion of objectives, that is where I would concentrate my forces. My OT battalions were rated cheap in terms of points, and rated Green to boot, so they would take on their task in a circumspect manner: one approaching through the woods to the right of the farthest town, and the other two flank marching towards it (I figured one of them ought to show up in reasonable time). A BMP battalion would approach frontally to engage the enemy's attention.

A BMP battalion would try and hold my left, and the other BMP battalion plus the consolidated tank battalion would be held in reserve. The weakness of this plan was the only NATO1 opponents I had played before were way back at the NZ NatCon in Easter 2008, and I'd forgotten how hard it was to make any order changes in the face of their radio jamming. Hence I really needed to have put in timed orders to continue the advance on my right to go right into the actual objective (and beyond)from about turn 6; as it was, I was stalled badly on my right due to lack of effective orders once the flank marching unit arrived (the other one never got the 6 it required to arrive).

The strength of the deployment was that the reserves were of an appropriate strength - not too strong to drain my attack of assets too badly, while being strong enough to make a decent influence when committed. In hindsight, I'd have been better off keeping one (or both) of the OT flank marching units on-table and marching it right along the flank, since if you measure out the distance to their point of arrival, it would take less time to get their on-table than their expected 6 or so turns to randomly arrive. That's what you get for plaing cheap-arsed WarPac2 forces!

I had 9 actual battalions in the game; two were parcelled out to other battalions to make 7 in-game battalions (the ones parcelled out were the divisional recon battalion and the 5th Regiment's tank battalion). Each regiment had a battalion of towed 122s in support, plus a battery of MRLs. 3 of these 4 were completely taken out my Aaron's M107s: 1 shot per target. I also had a battalion of M46s for counterbattery work, but these were also taken out in one shot by the M107s. The divisional AA Regiment (all towed at this date, 1980) provided more elements. It's a lot of gear, but the quality is poor.

Aaron's flank march really surprised me. He also didn't do much in the way of cross-attaching, so his armoured thrust didn't leave much in the way of vulnerable targets for my regimental artillery to hit. As a consequence my MRLs on this half of their able did what they've never done before, and fired smoke for their single volley before being wiped out by Aaron's divisional-level M107s. It bought me a turn of extra delay before collapsing on my left, it was worth it.

At the and of the game I was technically one point ahead. But the morale victory goes to Aaron. I was contesting one of his objectives with a battalion that was going to be eliminated over the next few bounds if we had played on until exhaustion, which would have bagged him 3 more victory points. He would then have been left with two slightly damaged armour battalions, and me with 3 mostly undamaged but green infantry battalions lacking anti-tank weapons save their RPGs. So he wouldn't have been able to shift me from my objectives, and I couldn't have left them to contest his, leaving him 2 points up.

It was good fun - but we must learn how to process the turns more quickly. Most people seem to get at least a couple of turns in per hour, while we averaged over an hour and a half per turn :-(

Czechs and Americans, 1980. Part II - the battle.

Previous post on plans can be found here.

Turn 1

The Czechs deployed five battalions on table, with the central ones in reserve.  They were a formidable looking lot.  Although there was only one tank battalion, the mechanized infantry battalions - in BVP-1s - of 5th Motor Rifle Regiment each had a company of T-55s attached.  4th Motor Rifle Regiment had four battalions present, three of motorized infantry in OT-64s, and one of T-55s.

As expected, Luke had ordered a flank march.  What I had not expected was that it would be scheduled to arrive on turn 1.  No matter, I thought; he had to roll a 6 for it to arrive.  Fat chance!

One roll of 6 later, I began to think wistfully of my original plan...


The mechanized infantry of 1/30 speeds towards its objective...


The M60A1s of 2/64 advance.


The Czech left heads for the hamlet.

The map below shows the table at the completion of the first turn.  My mechanized infantry battalion is making for the two-sector town in the centre, while 2/64 armoured battalion is advancing on my right.  Luke's flank march can be seen on the top right of the picture.  The rest of his forces can be seen in the lower quarter of the map...


Turn 2

The advance continued, with my infantry speeding to occupy the town before being taken in the flank by 2nd Battalion, Fourth Motor Rifle Regiment.


Something wicked this way comes.  OT-64s crest the brow of the hill on my left.

The map below shows the situation at the end of turn 2.  The Czechs have occupied three of the five objectives already, but recon elements of my mechanized infantry battalion have taken one of their own.


Turn 3

My mechanized infantry are now dangerously exposed on their left.  Their anti-tank guided weapons systems are out-ranged and out-spotted by the OT-64s opposing them, so it is all they can do is dismount and prepare for a grim fight.  In happier news the recon elements give their opponents a bloody nose.


The M60A1s skirt the rough ground as they make their way forward. 


Oh dear.  Under pressure on two fronts, and it's only turn 3!

The map below shows the table after the third turn.  The Czechs hold three objectives; the Americans two.


Turn 4

The big question this turn is whether we will see our flank march arrive on schedule or not.  It's 50/50...


Will we get to fall upon this flank?

And we will!


The cavalry arrives!  Things are looking up.


The Czech left, blissfully unaware of the menace to its rear.

The map below shows the table at the conclusion of turn 4.  Things have swung the way of the Americans.  The Czech flank march has ground to a halt overlooking my position, unable to advance without a further directive from above.  There is more good news: the Americans are locating the Czech batteries and the M107s have begun knocking them out with deadly counter-battery fire.

Add to this the arrival of 3/64 in the enemy's left rear and the Americans are feeling quietly confident.


Turn 5

Will this be the turn that the Americans win the game?  The Czech right is stopped, while the Americans have the Czech left in a vice.


So near yet so far: the Czechs find it frustratingly difficult to coordinate their assault.  The Americans, meanwhile, keep their heads down and call in the artillery.


The M60A1s of 3/64 about to overrun the Czech rear elements.  2/64 can be seen to the left of the picture as the pincer closes.

But the Czechs have a few tricks up their sleeves.  In desperation they call down rocket fire.  It arrives, and the Americans on the flank are blanketed with smoke, thwarting all attempts to fire.

The map below shows the situation after turn 5.  Well-placed smoke is preventing the Americans from making good the advantage on theirr right, and is buying time for the T-55 battalion to race to the rescue of their beleaguered colleagues.


Turn 6

There is fighting on the Czech left and artillery is called in on the Czech right.  American counter-battery fire continues to be devastatingly efficient.


In this sector smoke is now the Americans' friend...


The flanking troops are unable to bring much of their firepower to bear due to the smoke.

The Americans are able to force a morale test on the leftmost of the Czech battalions, but it still maintains its position.

The Americans have not made as much progress as they would have liked, and the T-55s are making their presence felt on the Czech left.

The map below shows the table after turn 6.  It is in the balance.


Turn 7

The advantage swings back to the Czechs as their high command finally gets orders through to 2nd Battalion on the left.   They are to coordinate with 1st Battalion and commence their assault on the American position in the town.


2nd Battalion gets its order change at last!


The men of 1/30 call down as much artillery fire and smoke as they can.  Somehow they manage to beat off 1st Battalion's assault on the town, but they will not be able to hold much longer.


The M60A1s of 3/64 advance through the smoke, picking off enemy armour as they go.  

The map below shows the situation at the end of turn 8.  2/64 and 3/64 are both now in firefights with the enemy on the American right.  The ATGW capacity of the BVP-1s is beginning to take its toll on the Pattons, and casualties are sustained on both sides.


Turn 8

The American armour continues its assault on the Czech left, causing significant damage, but the American left is under extreme pressure of its own.  Who will break first?


3/64 gets into the enemy rear areas, but BVP-1s take out two M113s with ATGW fire.


OT-64s advance on the American left.  The Americans break the battalion to their front but cannot reposition themselves quickly enough to reinforce the flank.


Heavy fighting on the Czech left as the tank battalions clash.  The T-55s are bringing more guns to bear, but the Americans have their best chance to inflict heavy causalties.   Neither side can land a telling blow.

This is the situation at the end of turn 8.  Two Czech battalions have been broken.  The Americans control three objectives; the Czechs two.


Turn 9

Time is running out, so the Czechs launch an all-out assault on the American left.  They successfully call in rocket fire (at last!), which causes predictable carnage.  The dazed and confused Americans are now dangerously close to breaking: one more casualty will do it.


The OT-64s prepare to assault the American positions.


One American stand and two Czech stands are destroyed in the close assault.  It is enough to force a break test.  The Americans fail!


The armour breaks another Czech formation, and is finally in position to focus on swinging the door shut on the Czech T-55s - but it is too late.  

The map below shows the situation at the end of turn 9.  The Czechs have broken the American left, and the Americans have done the same to that of the Czechs.  The American armour has once again failed to score hits on the T-55s, and this has decided the affair, for their presence means that the objective, despite being in American hands, is classed as contested.

Time has run out, and the forces disengage!


Conclusion

By game end the Czechs control three objectives and have broken one American battalion for 8 VPs.  They lose 1 VP for having taken an 'a' option in their force.

The Americans hold two objectives and have broken three Czech battalions for a total of 10 VPs, but they lose 3 VPs for having taken a 'b' option, and another for one of their objectives having enemy close enough to contest it.

The Czechs therefore win, 8 points to 7!

Thoughts

This was an excellent game.  It was in the balance throughout; one turn going one way and the next the other.        The winning of the game for the Czechs came, I felt, in the middle turns, when Luke's use of smoke bought enough time for reinforcements to arrive and evened up the firefight by preventing the Pattons from being able to bring their fire to bear while allowing T-55s and BVP-1s to get into range and gang up on isolated American vehicles.

I had a good deal of luck in that the Czech left failed to coordinate its attacks until late in the game (jamming came in handy here!), and in that the M107s were magnificent in knocking out four enemy batteries with counter-battery fire.  It was significant that the left fell only once the M107s had run out of ammunition.

Luke was a deserved victor, as his timing and skill was superior to mine.  It also turned out that he had another flank march to come on board but forgot about it, so he was actually fighting at a further disadvantage.

For myself, I underestimated how long it would take to break the Czech left, and paid the price.  It is a delicate balancing act, and I have a lot to learn yet.  So, a most enjoyable game, and many congratulations to Luke for a nicely worked victory.

Luke's thoughts can be found here.


Related Posts Plugin for WordPress, Blogger...