Prufrock's Wargaming Blog

Prufrock's Wargaming Blog

Thursday, September 26, 2024

The Lamps are Going Out - learning game

Earlier this year I was lucky enough to pick up a used copy of the The Lamps are Going Out, produced by Compass Games. I'd been keeping an eye out for it for a while after reading a review that struck a chord.

I set it up on Monday, have slowly worked through the sample game which takes you through the first two turns, and am carrying on from there myself to learn the rules and try to get a sense of how the game flows. It can be played solo, two-handed or four-handed. I think it will be a good one to get down: there is promise of replayability!


The map is pleasing. I like area maps for solo play, and it reminds of the Diplomacy board, which gives me the warm fuzzies. 

The game play is interesting. You have a fresh/spent model - familiar to me from Phil Sabin games - with a production model which allows replenishment of spent units, but production points are at a premium, and must also be used to do other things. 

Attacking units automatically become spent, but if they score equal or higher to the defender (with a few modifiers here and there as you would expect) the defender will also become spent. When all defenders in an area are spent, further successful attacks will either force retreats or cause casualties. 

You can probably imagine how the Western Front might go under such a system!

Alongside this you have event cards drawn each player turn which change the board situation in some way, and technology cards, which may introduce new types of units, or leave you with no advances at all, depending on what card your faction pulls.

There is 'chrome' to keep things interesting (trench rules, air rules, artillery rules, naval rules, U-boat rules, collapse-of-Russia rules, amphibious operation rules, a 'USA entry' track and so on) and allow players to put some Baldrickianly cunning plans into action.

I'm pleased with it so far and enjoying pottering around with it. It is satisfyingly large in scope, but without so many moving parts and so many decision points that you burn out playing it. 

The Schlieffen Plan - Germans in the Somme!

It has started well. Let's hope it continues that way!


Saturday, September 14, 2024

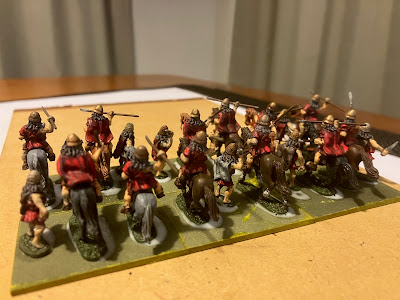
Spartan cavalry done

The latest batch to come off the painting line is now ready for flocking. These are more Xyston cavalry with light infantry mixed in. It took me a while to get through these but last night helped by a little cider and some loudish music we got them finished off.


I used three shades of brown alongside grey and black for the horses. 

Tunics and cloaks were crimson with washes and highlights used selectively.


The light infantry I used crimson for either tunic or cloak and then other colours to add some variation.
  

I finished them off with my magic wash and a dousing in matt varnish.


Xyston are just lovely to paint. They have a lot of character and you never feel ashamed to plonk them on the table. Just as well - I have plenty more of them to do yet!

In other news, I'm off to Auckland tomorrow to meet up with my brother, who's coming from Adelaide, to go and see Iron Maiden. The old metalhead in me is getting quite excited. If you're wondering what the loudish music that attended last night's painting session was, you can now probably guess! 

I'm also really looking forward to catching up with my brother. We've not seen each other (apart from video calls, of course!) since 2019, so it will be a mighty reunion. We might even have a beer or two. 

Monday, September 9, 2024

Tunis again with SP - a mighty clash

SP popped over today Sunday to play Tunis in our Washbourn Trophy series. An earlier post gives some information about the initial set up. 

SP took the Syracusans under Agathocles, an inspired leader. I took the Carthaginians under Bomilcar (on the left) and Hanno (on the right). We decided to play without the Favour of the Gods rule. The Carthaginians (to the right in our pictures) have first move each turn.

A high command roll gives Carthage options: they attacked on each wing but not in the centre in order to keep the levy heavy cavalry there out of the clutches of the enemy. One attack was successful, but it was rallied by Agathocles himself. 

SP then rolled a 1 for command, meaning he either could attack or reinforce, but not both everywhere. He attacked in all zones and then reinforced the centre and the right, trusting Agathocles to hold firm without further support. The attacks inflicted three hits, but two of them were all-out attacks by his hoplites (who must all-out attack given the opportunity).


After turn two. Syracuse on the left; Carthage on the right

In turn three feeble attacks from Carthage - despite another high command roll - are met with grumblings of discontent by senior leadership. They manage just one hit from thirteen attempts. 

The Syracusans roll another 1 for command. They reinforce Agathocles' wing and attack in the centre and the right. They are very successful on the right: the Carthaginian units are all left spent, but at the cost of another hoplite unit spent from an all-out attack.

At this point SP is reasonably content with his start, but is heard indicating some concerns about the centre. On my side of the table there are mutterings about being pounded.


After turn three, with the Washbourn Trophy shining at the far end of the table in all its gilded glory. In the foreground the shaky Carthaginian left is visable.

Carthage rolls high for command again. I decide to pull my left back onto the hill. With spare commands, I double-move the chariots onto the hill to their left, creating a pocket. Elsewhere we manage a solitary hit.

SP is a little non-plussed by the withdrawal of the Carthaginian left. Should he advance into the pocket? To do so will put him at a morale disadvantage and the hoplites, with enemy on their flanks, will not be as effective in attack. 

Another low command roll sees him leave things on the right as they are for the moment and press on in the other zones. In a turn up for the books all of the Syracusan attacks are unsuccessful. 

It seems that when the Washbourn Trophy is on the line even the dice start to feel the pressure... 

After turn four. The Carthaginian left retreats.

Carthage attacks. Great dice see three hits scored in the centre, leaving just one fresh unit there. On the right, another flurry of hits leaves Agathocles as the only fresh unit in his zone. Those mandatory hoplite all-out attacks have weakened the Syracusans more than expected.

Syracuse decides to advance into the pocket on the right. SP needs to shatter some units. After all the movement and fighting is done, Syracuse has five fresh units across three zones; Carthage has four. 


After turn five. Carnage in the battle line.

Turn six is more grim attrition. A unit is shattered in Agathocles' zone, but the rest hold firm. Both centres still have one unit fresh each, and the Syracusan right still has two units fresh, but the rest of the units on the field are spent.

Agathocles is faced with a choice: retreat from his zone to prolong the battle and give time for his right to clean up the levies on the hill, or stand. SP chooses to stand. He will not give up his key zone.


After turn six. Still the Carthagian levies survive!

Carthage has a royal opportunity to put Agathocles, now in the lead unit position, to the sword. Heroically, he stands firm! Did we only imagine an owl or two in the air? On the right the Syracusan hoplites shatter an average heavy infantry unit. Bomilcar attempts to rally the hit, and dies. Disaster! Two morale checks needed on d3s. Fortuitously for Carthage, the scores are 3 and 3, and even the levy light infantry refuse to rout. Disaster averted.

Agathocles strikes from the lead position: two units shattered, two units routed. Only the veteran heavy infantry remain in place to hold the zone for Hanno. But the morale check results are high enough to prevent the rest of the army from routing. 

And what is the health of the battle lines at this point? Agathocles has three units against Hanno's two. All spent. The Syracusan centre has five units all spent, against Carthage's four spent heavy infantry and one levy heavy cavalry kept - wisely as it has turned out - out of the lead position, still fresh. Syracuse has one fresh and four spent units on the right facing four spent infantry units and the Chariots mucking about on the hill.


After turn seven. Both armies out on their feet.

Hanno attacks, and scores two double hits from his zone. Agathocles rallies one, but suffers a close shave with the next, is laid low, and can do nothing to stop the second double hit. They are all shattered. Hanno advances to take the key zone and Syracusan morale will now suffer accordingly.

A succession of failed attacks by Carthage in the centre is redeemed by a final attack which does enough to shatter a unit. With morale now at a -3 (general killed, four-plus units shattered, key zone lost), the army flees.


Turn eight, the moment before the Syracusans are swept away.

Well, after a great start from Agathocles things went a bit pear-shaped for the Syracusans. The longer the game went on the more the Carthaginian position improved. SP was hampered by poor command dice. 1, 1, 2, 3, 2, 4, if my memory is correct. This meant he was unable to get his army into position as quickly as he would have liked, and nor did he have commands to spare for combat bonus purposes.

For me, the command dice were extraordinary. 5, 5, 6, 4, 5, 4, 5 or similar. This allowed me the luxury to pull back on my left, and gave the ability to load up my attackers with combat bonuses. 

In the end, I think this (and my high morale rolls at crucial times) were probably the difference.

As usual, it was a gripping game. We both felt from turn four onwards that "THIS turn will decide it!" but that feeling went on for five turns. 

We will look forward to contesting the Washbourn Trophy again soon. I will have to have a think about what battle to do - it was refreshing to have hoplites and chariots on the table. Funnily enough, the battle was quite similar to the account in Diodorus, except that it was Bomilar who died, not Hanno, and the Carthaginians managed to resist the urge to rout at that point.

Final scores were Carthage's 97 to Syracuse's 60, for Carthage to register a clear victory. On the day I had 85 to 60, but forgot to include the withdrawn Agathocles in the count. 

Sunday, September 1, 2024

Tunis 310 BC, the battle.

Before we get to the action, there are two points to note. One is that for this game I am playing Lost Battles pure; that is, without the Favour of the Gods rule that allows players, when conditions are right, to demand the re-roll of an attack result. Suggested by Charles Vasey, this rule variation was adopted by Phil Sabin for the deluxe board game edition of Lost Battles. Since I am playing solo and feel there is a chance I will use the Favour rule more in aid of one side than the other I have decided this time to play pure, to reduce the chance of - shall we say - authorial intrusion.


Lines meet in a grassy area of North Africa....

The second point is that I will be mentioning lead units. Lead units are a Lost Battles game mechanism requiring one unit to be nominated to take the point position for each zone in the battle line and remain there until either the unit suffers a hit or is replaced by a different lead unit on a subsequent turn. 

This mechanism allows advantageous match-ups in attack, but as the lead unit will be the focus of enemy attacks on the other side's turn it is key in defence as well. While in attack, for example, it may seem like a reasonable idea to have a levy heavy cavalry unit in the lead position, it can seem quite unreasonable when it comes time to defend! Decisions around which class of unit to put into the lead position when are part of what makes Lost Battles such an engaging game. 

Anyway, enough of that. To the action! We have already seen in a previous post the initial deployment positions (turn 1), so let us move on from there.

Turn 2 - Carthage. 10 commands plus those of the two generals. 

In the right centre the chariots take the lead and attack the opposed Syracusan unit of veteran hoplites. Usually requiring a 9 on two dice to hit heavy infantry, the lead unit bonus and a combat bonus purchased from army commands reduces this to 7. A roll of exactly 7 sees the chariotry decide to prosecute an all-out attack (a hit to both the attacking and defending units) to hurt the precious veteran hoplites. Agathocles must attempt a rally. The rally fails, and his own veteran guard, being the only other unit currently in the zone, now takes the lead position. A Carthaginian light infantry attack follows in support of the chariots, but is unsuccessful. 


View from the Syracusan side.In the picture above a spent marker is visible next to the veteran hoplites. The Carthaginian chariots, also spent, have retired from the lead position they held at the start of the attack and are now at the rear of their zone. Since the attack the reinforcing infantry have moved up.

In the left centre no attacks succeed. The levy heavy cavalry in the central zone demonstrates only in order to allow the more defensively capable infantry to come up and move into the lead position. This was a tricky decision: if Carthage had used the cavalry to attack, they could have scored a hit on a 9, or all-out attack on an 8, but would then themselves be hittable on the Syracusan turn on a 7 (or 6 for an all-out attack) and an increased chance of a double hit (a score 4 above what is needed for a single hit). In this instance caution prevailed.

After the attacks are complete the infantry is brought up into the line in all three central zones.


View from the Carthaginian left after their turn. Each carpet tile is a separate zone.


Turn 2 - Syracuse. 12 commands plus those of Agathocles.  

The Syracusans are slow to action. Attacks by the forward units in the centre and centre right fail. On the centre left, Agathocles declines to attack so as to preserve himself fresh for later in the battle. If he had attacked, he would have been in the lead position in the next Carthaginian turn and with a corresponding increased risk of being hit or even killed. 

The rest of the infantry comes up into line. 


View from behind the Syracusan left center as the lines close. Agathocles can be seen on the left, having left the lead unit duties to some less valuable troops.


Turn 3 - Carthage. 8 commands plus those of the two generals. 

An attack in the centre yields a successful hit. The next attack roll is 12 - 3 above the required 9 - and it is converted into a double hit by an all-out attack. From five fresh units Syracuse is down to two - both hoplites - and Carthage has four of five units fresh. The Syracusans are somewhat rocked by the onslaught.

The attack from the left centre hits the Syracusan veteran light infantry. The roll is actually a double hit, but as the defending lead unit is light infantry supported by wholly fresh heavy infantry, only the first hit counts. No other attacks from this zone are successful. The veteran lights have done their job.

On the right another hit is scored against Agathocles' zone. If he had been in the lead position he would have taken the hit and been forced to attempt a rally. 

Five hits to one over the turn. Carthage is inflicting damage.


Spent markers litter the field after the ferocious Carthaginian attack.

Turn 3 - Syracuse. 9 commands plus those of Agathocles. 

Agathocles' left centre attacks, scoring a double hit on the vulnerable levy light infantry in the lead. Being levy, and with a spent unit in the zone already (meaning they are unable to ignore the second hit like the Syracusan light infantry could the turn before), they are automatically shattered rather than being able to pass the second hit to another unit in the zone. The morale roll is a 2 - safe so far.

The right centre and its formidible hoplites score three hits. The centre scores another. Six hits to none over the turn. 

The Syracusans are settling into their work, but there is more to do. Carthage still has three fresh units in its centre left and centre, and four fresh units on the right centre, where Hanno leads the veteran Sacred Band. Syracuse has four, two, and three respectively in the zones opposite.


Spent units now on both sides.


Turn 4 - Carthage. 10 commands plus those of the two generals. 

The Carthaginian left centre attacks. The average grade units are all spent, so a unit of levy grade infantry is put into the lead role. The attacks score two hits, leaving only two fresh units for the Syracusans in that zone, but the levy will be vulnerable when attacked themselves. 

In the centre another two hits see the whole of the Syracusan central zone now spent. All five units spent in just two rounds of attacks. Future hits there will cause units to shatter. Is it time for the Syracusan centre to pull back to buy some time? This will be a question for next turn.

The Carthaginian right then attacks. Tension is high, but the attack fails to score any hits. Carthage has managed four hits to none this turn. Agathocles' army is running out of fresh units, but his own zone is still relatively intact. 

Hanno and Bomilcar are in a strong position.


Turn 4 - Syracuse. 11 commands plus those of Agathocles. 

Agathocles loads up on attack bonuses where he can. His right centre attacks the lead levy heavy infantry and scores a double hit, shattering the unit outright. The morale test this causes sees the spent light infantry in the same zone rout. Elsewhere, morale holds. No more attacks on this zone succeed.


View of the Syracusan right centre on the attack.

In the left centre, Agathocles decides that it is now time for his guard to take the lead position. With his centre in danger he decides to force the issue. His guard unit is assigned a double attack bonus. He is hitting on a 6 (9 for a double hit) or 5 for an all-out attack. He rolls a 10 and a double hit is scored. The next attack also succeeds by converting it to an all-out-attack. The remaining attacks are unsuccessful, but even so there is now only one fresh unit - Hanno with the Sacred Band - left in the zone. It will be a fight between the two leaders' guard units next turn.

In the centre, the Syracusans ponder whether to stay in place or pull back. If they were only facing infantry, pulling back would be a good option. They would about-face and retreat one zone. The enemy following up next turn could move into the vacant space but would not be able to attack; in effect, this would buy a turn's grace for the left and right to try to win the battle. But in this case Carthage has fresh cavalry, and cavalry can move and attack in the same turn. Cavalry attacking spent heavy infantry from the rear would not be a happy proposition. Moreover, to about-turn and move the hoplites out of the zone would require four commands (they don't like to turn around in Lost Battles), so they decide to stay and fight it out.

Their opponents in the lead role are levy heavy infantry. Once more they are vulnerable: another double hit is scored on the lead unit, which shatters the levies outright. A poor morale test then sees the other levy units in the zone flee the field. A subsequent attack also scores a hit, shattering one of the remaining average quality units. 

The Carthaginian centre is now reduced to a single spent unit. The decision to stay in place has been vindicated!

Turn 5 - Carthage. 4 commands plus those of the two generals. 

With the centre melting away, the chance to defeat the Syracusan there is gone. For Carthage to win now, the formula is simple: Hanno must kill Agathocles. A roll of 1 for commands does not, however, give too many options for attack bonuses.

The left centre attacks first. Two hits are scored, leaving the Syracusan right completely spent. A third hit, which would have caused a unit to shatter, proves elusive.

It is now Hanno's turn. He is in the lead position and needs a 7 to hit Agathocles' guard. He rolls an 11, a double hit! Agathocles is forced to make a rally roll. A high score will cancel the hit; a low roll will kill him. The roll is high and the hit is cancelled. He makes a rally roll for the second hit. The dice are shaken in the hand... again he rolls high. Again the hit is cancelled. Fortune has a favourite! The remainder of the attacks from this zone fail.

There is just the centre to activate. The lone unit there makes its attack. Success! At last a Syracusan unit is shattered. 

Carthage is left to rue what might have been.


The field after Carthage's attacks.


Turn 5 - Syracuse. 11 commands plus those of Agathocles. 

Leading off the with right centre, Syracuse mounts its attack. A double hit is scored on the levy unit in the lead. The unit shatters. As there are four or more Carthaginian units shattered now, the morale test is taken at a -1. A 1 is rolled; there is is a catastrophic morale failure, and the entire army streams from the field.


A double six does the trick!

Results:

Carthage scores 6 points from units shattered, 38 from units spent, 18 from the handicap.

Syracuse scores 22 points from units shattered, 42 from units routed, 12 from units and leaders withdrawn.

62 vs 74 - it is a narrow victory to Syracuse. 

Thoughts:

Initially the battle seemed to be favouring Carthage, but once Syracuse had punched through the better infantry, the poor quality of Carthage's levy second-line troops told. A succession of double hits allowed Syracuse to quickly reduce Carthage's fighting fitness. The brutal dismantling of the Carthaginian centre in turn 4 turned the battle, but another key moment was Agathocles managing to rally both hits scored against him on turn 5. 

It was interesting to see how many double hits were scored across the game. When playing with Favour of the Gods, many double hits are cancelled and re-rolled. Here, playing 'pure', the double hits had a noticeable effect and the battle finished more quickly than I have been used to.

It was enjoyable to play a lesser-known battle in a lesser-known war, and to have such an interesting mix of troops on the table. Fresh hoplites are deadly against heavy infantry!

I might leave the table set up and see if SP and I can find time for a game this coming weekend. 


** with thanks to Duncan Head, the original account of the battle can be found in Diodorus, here.

Sunday, August 25, 2024

Buyer beware - Tinywargames UK.

I don't like to grumble about wargames companies. Wargaming is a small world, we are all dependent on each other, and much of what we do requires goodwill to run. That is not something you want to disrupt lightly.  

However, I do feel a responsibility in this case, because in an earlier post I had mentioned I was buying a hex mat. Given the experience I have had with the company I would not like people to see that post as a recommendation.

Back in mid May I ordered a Commands & Colors hex mat from Tinywargames UK. They replied on the same day to my query and I paid for the order, with '7 days international delivery' promised for the shipping. A couple of weeks later, at the end of May, I got sent a tracking number with an estimated delivery date of June 18th. June 18th came and went. There was no update on the tracking website. It still said what it had said originally: 'sent to hub, in transit'. 

Early July I emailed the supplier. There was a process to follow if you wanted to find more information on an order but the inquiry had to come from the email address of the supplier. I asked them if they could follow up. 

The email bounced. 

I tried again, and the email again bounced. I checked their website: they now had a new email address with gmail as the provider rather than their original handle. 

I emailed this address, and got a reply. "We'll check".

I then got a notice from the shipping company straight away, June 6th, saying that the item had been returned to sender as it had failed a customs check. There was a photo of the item safely returned to the original address as proof.

Several days later, July 9th, I got an email from the company asking me to check that my address was correct. I thought this was odd. I've never had an issue getting stuff delivered from overseas before, but I confirmed with the Post Office here in NZ, replied with the best address to use, and asked them to let me know if they needed me to pay again for shipping.

I have not heard from them since. 

I have emailed three more times, each time with no response. 

I have not had any tracking notification sent to me.

A few weeks ago I asked if anyone on the Society of Ancients forum knew the owners and could ask what was happening. No one did. 

I then left a post on their facebook page asking if they could email me. They replied to my post with the original tracking number (the one that had been returned to sender weeks before) but did not email me and have been silent ever since.

As it is now more than three months since I placed the order, I feel it is fair to post here to say that I would be very careful if you are dealing with this company, especially if you are ordering from outside of the UK. 

An internet search seems to show that I am not the only one who has had problems with them. 

It's a real shame as they seem to offer an excellent product, but it is only excellent if it gets to you! 

Saturday, August 24, 2024

Tunis, 310 BC, dispositions.

Over the past few evenings I've had that restless 'I want to play something but don't quite know what' feeling. First night I ordered a second copy of Memoir '44 so that I can stage larger scenarios; second night I did some painting; third and fourth nights I watched re-runs of The Sopranos. 

Tonight I decided to set something up.

I pulled out the Lost Battles scenario book and Tunis jumped out at me as a battle I'd not done for a long time. 

Agathocles of Syracuse. What an interesting character. I don't think I would like to have had much to do with him on a personal level, but you have to take your hat off to a fellow who would stage an invasion of Africa from Syracuse, while Syracuse was besieged!


This Lost Battles scenario gives Agathocles the advantage in army quality, 60 to 51. He has a mix of hoplites and generic heavy infantry elevated by his own inspired leadership. He has no cavalry at all, and just one unit of light infantry, but that is elite. 

Agathocles himself leads the left of his line with two units of veteran hoplites. The light infantry is on his right, in advance of the bulk of the hoplites. The centre and centre left is mainly heavy infantry. 

All of his troops are either veteran or average in quality.


The hastily-assembled Carthaginians under leaders Bomilcar and Hanno combine a dangerous mounted arm with mixed-grade infantry. The terrain does not allow the chariotry and cavalry the space to best use the advantages they offer. The light infantry is poor, and while the tip of the heavy infantry spear is strong, the iron behind is suspect.


Carthage has leaders on both ends of the line, but the leaders are of uninspired quality. It will be a hard fight for the Africans. 


Points to note: 
  • hoplites have special characteristics in Lost Battles. They hit hard, and must all-out attack if the opportunity arises. Their morale is more fragile than standard heavy infantry. 
  • the terrain is against the Carthaginian mounted. They could attempt to manoeuvre onto the flanks, but the command cost to do so is high. 
  • Agathocles seems to have the advantage in troop quality and terrain, but nothing is assured.  

Sunday, August 18, 2024

Monday, August 12, 2024

On rules lawyership, and matters pertaining thereto


Jon Freitag recently did one of his famous data dives and looked into people's least favourite things about wargaming.

Rules lawyers were top of the list. That's right, not expensive, errata-riddled rulebooks; not cheats; not figures that break at the ankles; not stubborn mould lines; not kickstarter addictions; it is rules lawyers that get under our wargaming skin. 

I have a bit of difficulty around this. Not because I have been traumatised by any lawyers, but because I have a sneaking suspicion I might be one. 

I am going, therefore, to do the most rules-lawyerish thing possible, and mount an inquiry.

1) What is a rules lawyer? 

What do people mean when they use the term rules lawyer? Wikipedia has one answer:

rules lawyer is a participant in a rules-based environment who attempts to use the letter of the law without reference to the spirit, usually in order to gain an advantage within that environment.[1] The term is commonly used in wargaming and tabletop role-playing game communities,[2] often pejoratively, as the "rules lawyer" is seen as an impediment to moving the game forward.[3]

Carlos Caro on Quora has another:

A rules lawyer is a person who insists on rules in an RPG, wargame, or other sport/game being followed to the letter. This applies to games besides Dungeons and Dragons. A rules lawyer is a person who insists on Rules As Written (RAW) and scorns Rules As Intended (RAI)

A Steven Dashiell starts short and sweet before elaborating exhaustively in an article through Analog Game Studies:

A rules lawyer is a player who argues and interprets the rules of the game during play

A thread on the Boardgamegeek site solicits plenty of responses on rules-lawyering, but one by a Dave Weiss is pithy:

It's the manipulation of the rules to favor the lawyer

Going by these definitions rules lawyers seem to share three main characteristics. The first is rules pedantry, the second is arguing over rules, and the third is the tendency to make this all work in the rules-lawyer's favour.

So we have pickiness in applying the rules, but with a tendancy for this pickiness to be somewhat selective, with the sense that there is strict application of the rules when it suits. We have a willingness to argue over the interpretation of rules, with these interpretations again tending to advantage oneself over others. Finally, we have one's table-side manner used in a kind of metagame to bring advantage. 

2) How is a rules lawyer different from an ordinary player?

Knowing the rules and applying them in the pursuit of tabletop victory is not a bad thing. In fact, it is the essence of wargaming. The rules that define the arena we operate in regulate play and allow us to formulate plans, make decisions, and take action towards specific goals. Rules are necessary, and knowing the rules is essential for the game to work.

It is also not a sin to want to win. Some people are happy win lose or draw. Others, for their own reasons, want to get a W. 

The things that make a rules lawyer's behaviour different from that of an ordinary player are, I would suggest, a) motivation and b) degree. Ordinary players can question rules interpretations, point out rules forgotten or misapplied, consult rules books and argue points. When it becomes rules-lawyerish is when the motivation is to gain an undue competitive advantage for oneself (interpretations become selective, or rules are applied less scrupulously if to apply them would benefit an opponent) or to throw someone off their game.

The other point of difference is degree. The rules lawyer will do these things as a matter of course. An ordinary player might become picky and/or argumentative about the rules in a tense situation when there is something riding on the result, if they are playing someone they have taken a dislike to, or if they feel they are being taken advantage of. The rules lawyer will exhibit these traits regularly: he is serially picky, argumentative and self-interested.

3) Am I a rules lawyer?

Now we come to the heart of the matter. 

The answer for me is, I think, both yes and no. I could come across as a rules lawyer in some situations. I like to get rules correct, and if there are times that rules may need some discussion, or a point argued, I will usually have the discussion or argue the point. But I also like to be fair, and I like to be consistent, so I would hope that it would not seem as if my motivation for being careful / picky / pedantic was to gain an unfair advantage. That said, in the heat of the action, my idea of fair and my opponent's may not quite line up, so I can imagine a person could question whether the motives behind my penchant for pedantry were always pure. 

I grew up in a large family with competitive instincts. In our house you never got to take a move back in chess. You touched a piece, you moved it. There were no 'gifted victories' to ease you in. I still carry some of that mentality with me and I have to fight against it a little.

So yes, I do tick the 'matter of degree' box as well, unfortunately.

As with all things, I try to pick my audience. I love a hard battle against an opponent similarly experienced and with something on the line, but do try to temper my approach to the environment. Still, there are one or two times I have been a little ashamed of my rules-pedantry. One occasion was at the end of a game of Machiavelli, when I pointed out an error in how victory points had been calculated. The recalculation then gave the win to me. The problem was that the initial reading of the score would have given the win to a high school lass in her first game with the group. 

Given my time again I would keep my trap shut. 

4) Is being a rules lawyer such a bad thing?

The results of the survey Jon analyses leaves little doubt - it is a bad thing. The worst thing! It is the thing that drives people away from particular opponents, from gaming groups, from particular games, and even from games at all. 

The best that I can hope for is to be a rules lawyer that is 'lawful neutral' but I suppose I am not the one who gets to judge! 

5) What can I do about being a rules lawyer?

Aside from ringing or emailing every person I've played with to apologise for any negative experiences they may have had, I think the thing to do is to be aware of the tendency and try to catch myself. 

Is it worth telling people before I play that I have a tendency to be a bit picky with rules and if you think I'm being a dick, tell me so? This may smooth things with an ordinary player, but if you are up against a fellow rules lawyer - especially one who is lawful evil - they will school you like a rookie!

6) What do people think?

Do you have rules lawyer tendencies? If so, when? 

Do you not? Not even a little bit?

Have you had particular experiences either as a rules lawyer or as the victim of one?

How would you suggest a rules lawyer go about making themselves more acceptable as a gaming opponent? 

Finally, a wildcard: why do people exhibit rules-lawyerish behaviour? Is it performative hyper-masculinity? Is it to establish uber-nerd cred? It it to mask deep-seated personal inadequacites? Is it just a bad habit?

I would value your thoughts!

Tuesday, August 6, 2024

Bloodied but unbowed - Undaunted North Africa part 1.

SP was able to come over Sunday to the dungeon to squeeze in a bit of gaming before the working week whacked us over the head again.

What shall we play, I asked. Something I know, was the reply.

After a bit of consideration I settled on Undaunted North Africa. We'd gone through Undaunted Normandy and knew the rules.

As it turns out, there was a bit to get our heads around. The first thing is the change from squads to individual men (it took a moment to sink in that in U:NA the troops cards all had the same name); the second is the introduction of vehicle crews; the third is the different paths to victory.

We decide to play through the scenarios in order as a campaign. SP has taken the Long Range Desert Group. I will be the Italians. 

Game one: Landing Ground 7


First game is a secure vs destroy scenario. I have to control three points of objectives to win; SP has to destroy three points of objectives to win. I can only control with my rifleman; SP can only destroy with his engineer. I advance my rifleman too far. SP hits him hard, and destroys the depot and the aircraft for three points.

Game one to SP! The engineer is the hero. 


Photo above shows casualties sustained. We did this wrong: we only count casualties removed from board, not cards lost. Casualties then are 0-0.

Game two: The Hammer

It is another control / destroy scenario, with the hanger, the aircraft and the supply depot all counting as one point each. SP can only destroy with his engineer; I can only control with the medium tank or the rifleman.


I don't quite understand the vehicle rules correctly but feel I can manage on the fly.


I am wrong. I pin my hopes on the medium tank, get my machine gunner killed, and am too cautious with the rifleman. I am too static and not able to balance fire and movement. SP wins with good play. I am not finding my rhythm, am putting my guys in exposed positions but not seizing opportunities. 

I am also seriously spooked by SP's sniper!


Game two to SP: casualties 0-1. Heroes aplenty for SP: my pick is the sniper; his is probably the engineer.

Game three: And the Anvil

This is a different game entirely. SP has to control objectives; I have to prevent him. He can only control objectives with a Staff Sergeant or Sergeant. All I have to do is hold in place and shoot up those two chaps. 


This strategy I can manage! SP caught out by first-time vehicle rules and is not quite sure how to proceed. I have no such issues. Eventually I get the dice to do as I ask them.

Game three to me: casualties 2-0.

Cards lost for the LRDG.

I am not quite sure what to make of Undaunted North Africa. The rules are simple enough, but how they work in play is trickier than it first appears, and we were consequently unsure of our strategies.

SP adapted more quickly and more surely than I did, and showed boldness at the right times. Luckily for me, scenario three is a bit of a puzzle for the LRDG player otherwise I think I would be three games down. 

As it is, we will regroup and go again another time.

It was an excellent way to spend a Sunday afternoon, and sure beats painting the fence!

Monday, July 29, 2024

An audible feast

There was a poll recently on the Society of Ancients forum about whether members listen to wargaming podcasts while they are painting. Curiously enough - and perhaps proving once and for all that we are indeed crusty, cantakerous old coots - most of us said no, or not much.

I suspect that if the question had been more general - do you listen to podcasts of one type or another while painting, say - the answers might have been different. 

For myself, I don't listen to wargaming podcasts at all. When it comes to wargaming, I prefer the written word. I also enjoy the occasional accompanying map, illustrative graphic, apposite picture, or short, sharp, how-to youtube video, but for me reading works best: it allows me to control at what pace and level I engage with the content. 

Listening to wargaming chat (unless one is taking part in it) strikes me as a bit boring and a bit distracting. I don't think I could listen to it properly while painting, nor paint properly while listening. 

I've tried history podcasts, and had the same issue. Either the inner critic engages or else I switch off and then come to finding I can't remember what they've been talking about.

What has worked for me in the past is lectures. I had a great series on noteable Greeks and Romans that I would listen to on repeat while painting. Sadly, the format I had them in is no longer current (and besides, it was in another country). 

But what does work for me at the moment is the marvellous Mary Beard. I signed up to Audible a few months ago, found it to be not really my medium, and exited. But I had a few credits to use before I left, so on a whim I grabbed a couple of Mary Beard audible books. 

I have of course seen some of her documentaries and read SPQR, but I hadn't thought about her being a good accompaniment to painting Greek light horse.

Well, I started listening to the audiobook version of her Emperor of Rome the other night while doing the dishes. You have to love Mary - she reads the book herself. It turns out I could listen to her all day, part of the evening, and even when I paint.


If you don't know her, I would recommend checking her out. She is an absolute treasure. Quirky but carefully considered narrative structures capture your interest, and she presents familiar material in new ways, finding parallels you hadn't thought of, or approaching things from angles which surprise. You shouldn't expect military focus, but you will get great, thoughtful storytelling. 

Anyway, consider her Prufrock-endorsed!
  

Sunday, July 21, 2024

Clusium 225 BC with Commands and Colors: Ancients.

I've had a hankering to play some C&C: Ancients recently. I went for a Gallic scenario, Clusium (or Faesulae as it's also known) 225 BC, pitting Gauls against Romans in the decade before the 2nd Punic War commenced.

While describing ongoing Roman / Gallic struggles for power in Italy, Polybius tells us that in the year 232, during the consulship of Marcus Aemilius Lepidus, the Romans divided Picenum, previously a territory controlled by the Senones, amongst its own citizens.

Gaius Flaminius was the originator of this popular policy, which we must pronounce to have been, one may say, the first step in the demoralization of the populace, as well as the cause of the war with the Gauls which followed. 9 For what prompted many of the Gauls and especially the Boii, whose territory bordered on that of Rome, to take action was the conviction that now the Romans no longer made war on them for the sake of supremacy and sovereignty, but with a view to their total expulsion and extermination. (Polybius's Histories, 2.21)

Against this backdrop of Roman expansionism the Boii and Insubres made common cause with 'Gaesatae' tribes dwelling in the Alps and near the Rhone to make war on the Romans. Not needing too much convincing, this coalition gathered a combined force of 50,000 foot and 20,000 cavalry and chariots under the command of the kings Concolitanus and Aneroëstus and prepared to descend on Etruria. Fearing the consequences of such an incursion, Rome sent a Consul to Ariminium, a Praetor to Etruria, and levied troops both citizen and allied. 

On every side there was a ready disposition to help in every possible way; 12 for the inhabitants of Italy, terror-struck by the invasion of the Gauls, no longer thought of themselves as the allies of Rome or regarded this war as undertaken to establish Roman supremacy, but every man considered that the peril was descending on himself and his own city and country. (Polybius's Histories, 2.23)

The Praetor in Etruria appears to have been commanding allies from the Sabines and Etruscans, presumably in addition to whatever citizen force he led. This force amounted to 4000 cavalry and above 50,000 foot, says Polybius. The rest of the Roman troops were with the Consuls Lucius Amelius in Ariminium and Gaius Atilius in Sardinia. In reserve was a force stationed in Rome itself.

The Gallic army made its way through Etruria, laying waste the countryside and gathering spoils. Three days march from Rome, at the town of Clusium, the unnamed Praetor caught up with them. The Gauls left cavalry in a forward position and retreated north overnight towards the town of Faesulae, seemingly hoping to draw the Roman force into a rash assault.  

According to Polybius the Romans moved on the cavalry at daybreak, at which point the rest of the Gallic force 'left their position' and attacked. The Romans had the worst of it, losing some 6000 men in casualties, and the rest fled to a nearby hill, where they made a stand and drove off the pursuing Gauls. It had been a long day: too fatigued to continue the attack, the Gauls settled in for the night and waited for what the next day would bring.

As it turned out, the next day brought the arrival of Lucius Amelius and his consular army. He had force-marched from Ariminium to bring assistance to his countrymen. Seeing the campfires of the newcomers, the Gauls held a council of war and decided to move north, taking their booty with them. 

Rome had been given a bloody nose, but Lucius Amelius's timely arrival had warded off further immediate danger.

So where was Clusium? If you look at the map below, draw an imaginary line between Volsinii and Arretium, then find Perusia and draw another imaginary line due west. Where those two lines intersect is about the site of the town. 


Link to map.

The Commands and Colors scenario presents us with the first day's battle. With not a lot to go on in the ancient sources, the scenario is necessarily just an impression of events. The map below shows the terrain and dispositions.

Map taken from the commandsandcolors.net site.

The Gauls have a numerical advantage but they are positionally compromised: there is a camp forward of their main line, garrisoned by cavalry only, and their forces are scattered. The Romans are formed in a solid line with a formidable centre of medium infantry and leaders supported by a heavy infantry reserve. If the Romans can take the camp hexes it will yield a victory banner, and their proximity to the central ridge also gives them first opportunity to take the high ground should they want it.

Both sides have five cards in their hands, and the game is played to six banners. At first glance it appears to be quite a balanced scenario, with the central tension being whether the Gauls can coordinate their forces well enough to challenge a Roman advance through the centre.

The Gauls move first. 

The battlefield at game start, viewed from the Roman side.

The Gauls begin by pulling back one of the exposed cavalry units to the right centre, moving a leader to join them, and advancing a unit of auxiliaries towards the closest camp hex. The plan is to have leaders positioned to make use of the initial card hand and to provide options for attack on both ends of the Gallic line.

The Romans use a Move-Fire-Move card to drive off another unit of cavalry from the camp, occupy a camp hex, and take the hill on their right centre.

The Gauls use an Order Two Units Centre card to get their auxiliaries into a camp hex and the last of the vulnerable cavalry out of the way.

The Romans use a Coordinated Attack card to bring the Heavy infantry into contact with the main line and reinforce both flanks. 

So far there are no losses on either side.


The situation after two card plays each.

The Gauls pull out a big play - an Inspired Right Leadership card, which they use to attack the auxiliaries and light infantry of the Roman left. A combination of missile and melee attacks damage two units and force the left to retreat. 

The Romans respond with a Double Time card. They bring forward their centre, occupy another camp hex, and attack the lead units. There are casualties on both sides, but no banners are taken as yet. The auxiliaries in the last camp hex under Gallic control fight hard and hold on despite taking heavy losses.


The situation after the Roman Double Time play.

An Order Medium Troops played by the Gauls brings warriors and cavalry into action. Attacks on the Roman position on the hill are futile, resulting in more damage to the attackers than the defenders, but on the other flank the Gauls destroy a unit of medium infantry and an auxiliary unit to take two banners, damage but can't finish off another medium infantry unit, and drive the light infantry back to the Roman baseline.


The unnamed Praetor and his assistants survey the damage.

The Praetor does not need to survey too long: a Clash of Shields card is produced, allowing all Roman units adjacent to Gallic units to melee with plus 2 dice! The Gallic groan is audible. Two units are destroyed, and three others take damage, but it could have been worse. Banners are even at two each, but the Romans have now occupied the last camp hex, so will gain an extra banner next turn unless dislodged.


After the Clash of Shields. How you like that, as Blackpink might say.

Gallic plans have gone awry. With few good options, a Double Time is used to activate the weakened warriors on the Gallic right to drive forward against the light infantry on the Roman baseline. It is a 'pick off the vulnerable' and 'distract the enemy' move, but it gets the warriors out of immediate danger, evens up the score to 3-3, and gives the Romans something to think about. 

The unnamed Praetor uses a Line Command to keep the pressure on in the centre where the Gallic cavalry has nowhere to retreat to, but is not able to add any further banners to the tally. 


The Romans press forward against the vulnerable Gallic centre. Note the warriors in the foreground who have pushed through to the Roman baseline.

The Gauls have some good cards, but given that they need to destroy three units in the next turn or two, they go for immediate effect - an Order Four Units Left which they use to attack the Romans on the hill. They kill off the auxiliary infantry, and drive off the cavalry, but can only take one block off the light infantry. 4-3 to the Gauls.


The Gauls are on the hill and the Romans are disordered, but the Gallic centre is pushed back right to the baseline and has no room to retreat.

The question now for the Romans is what cards they have in their hand. With vulnerable units across the board, there is a sense of urgency. They play an Order Medium Troops: it gives options to get the three banners needed for victory. 

Cavalry is moved into position to attack the warrior unit in the Roman rear; the centre moves forward to threaten the weakened unit in the woods and the cavalry on the Gallic baseline. Lastly, the medium infantry is activated on the hill. 

The first attack is against the warrior infantry. Two hits are needed, or else a hit and a retreat, which can then be followed up with another attack. Disastrously, only one hit is scored, and no retreat is rolled. The warriors battle back, forcing the cavalry off the map. 5-3 to the Gauls!

The next option is the centre. The unit of weakened medium infantry attacks the auxiliary unit in the woods. One hit needed; two dice. Success! 5-4 to the Gauls. The Roman medium infantry with leader attack a unit of medium cavalry on the baseline. If they succeed, they can use their leader to advance into the emptied hex and attack again. The result? Two retreats. The cavalry are forced off the board. 5-5. The leader and unit advance into the gap, and attack the chariots to their left. 


Attack to come - how will it go?


A roll of two light (green) hits is good enough! 6-5 to Rome. 


A good final roll!

And in a reversal of the historical result it is a victory for the unnamed Praetor.


Board at game end.

The win was a good example of the Commands and Colors: Ancients principle of playing what is in front of you. A conservative play by the Romans on the final turn may well have cost them the battle; but you never quite know. In this case they took the risk and it paid off. 

The cards played each turn, in order, Gauls to the left.

It was a most enjoyable game. I had hoped by this time to be able to play with figures on the 4 inch mat I ordered some time ago, but as it has not yet arrived, I decided to just go ahead and play with the board game version. 

To close, I must salute, once more, the great Richard Borg, designer of not only this superb game, but a superb family of the things. He is a legend of the hobby! 

Related Posts Plugin for WordPress, Blogger...