Prufrock's Wargaming Blog

Prufrock's Wargaming Blog
Showing posts with label variants. Show all posts

Saturday, September 1, 2012

More Lost Battles testing...

I played through a game of Carrhae solo last night to get a better idea of the impact that using a proposed alternate movement turn sequence would have on Lost Battles.  The Carrhae scenario was probably not the best choice actually - I don't know it that well and it's not as linear as the other scenarios in the game - but I gave it a crack, anyway.

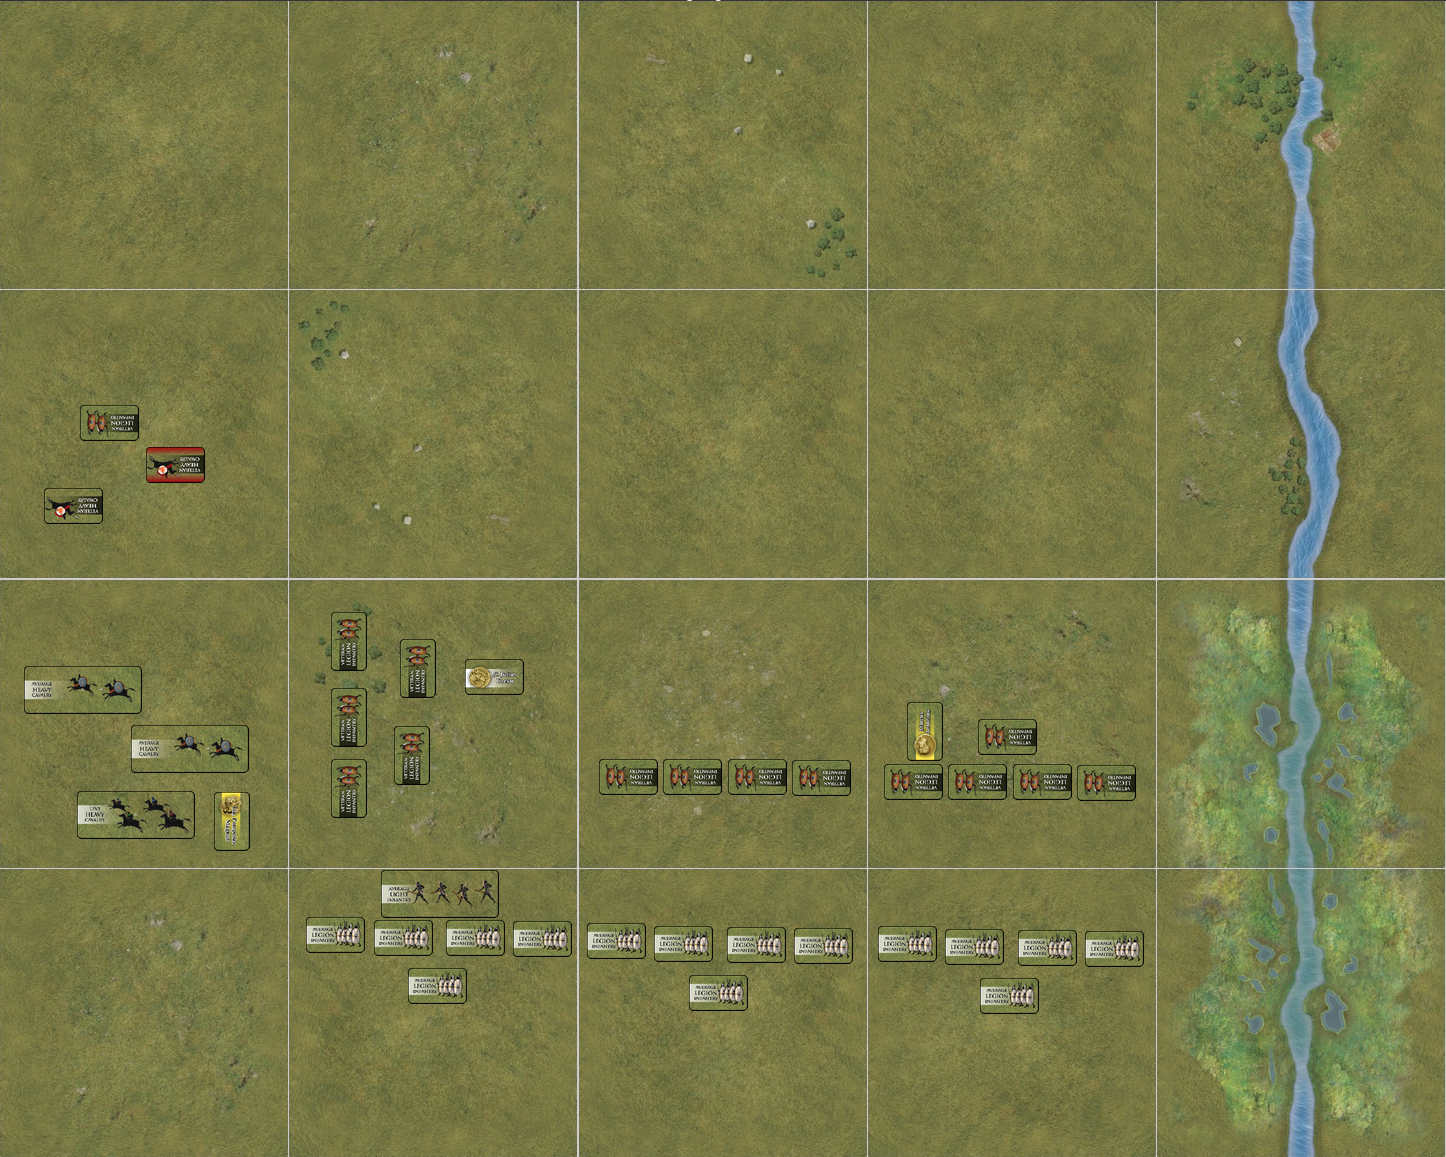
This is the board at start of turn two, with Crassus in the foreground, Romans the white-on-black counters.


Right away it became clear that each move would be important in such a chaotic situation, and that the order of events would greatly impact on the plans of each commander.  Crassus began by using cavalry and light infantry to drive a wedge between the Parthian centre and its right wing.  The light cavalry all-out-attacked from distance to score 2 hits on the Parthian centre but did not survive the counterattack.

On the Roman right both sides tried to force the other to advance first, but in the end it was Surena who charged into contact.  Unfortunately, I made a rules error here; I momentarily forgot that cataphracts cannot move and attack in the same turn, so this was an illegal move.

On the Parthian right the light cavalry disperses to make it more difficult for the Roman centre and centre left to advance into contact with the mostly spent centre.

Observations: when commands are relatively plentiful, as they are in this scenario, there is incentive for players to do a higher proportion of single-unit moves than we might normally see.  That said, there is a lot of space on the board in this scenario and there would not be the same opportunities for this in battles where the board is more densely populated.

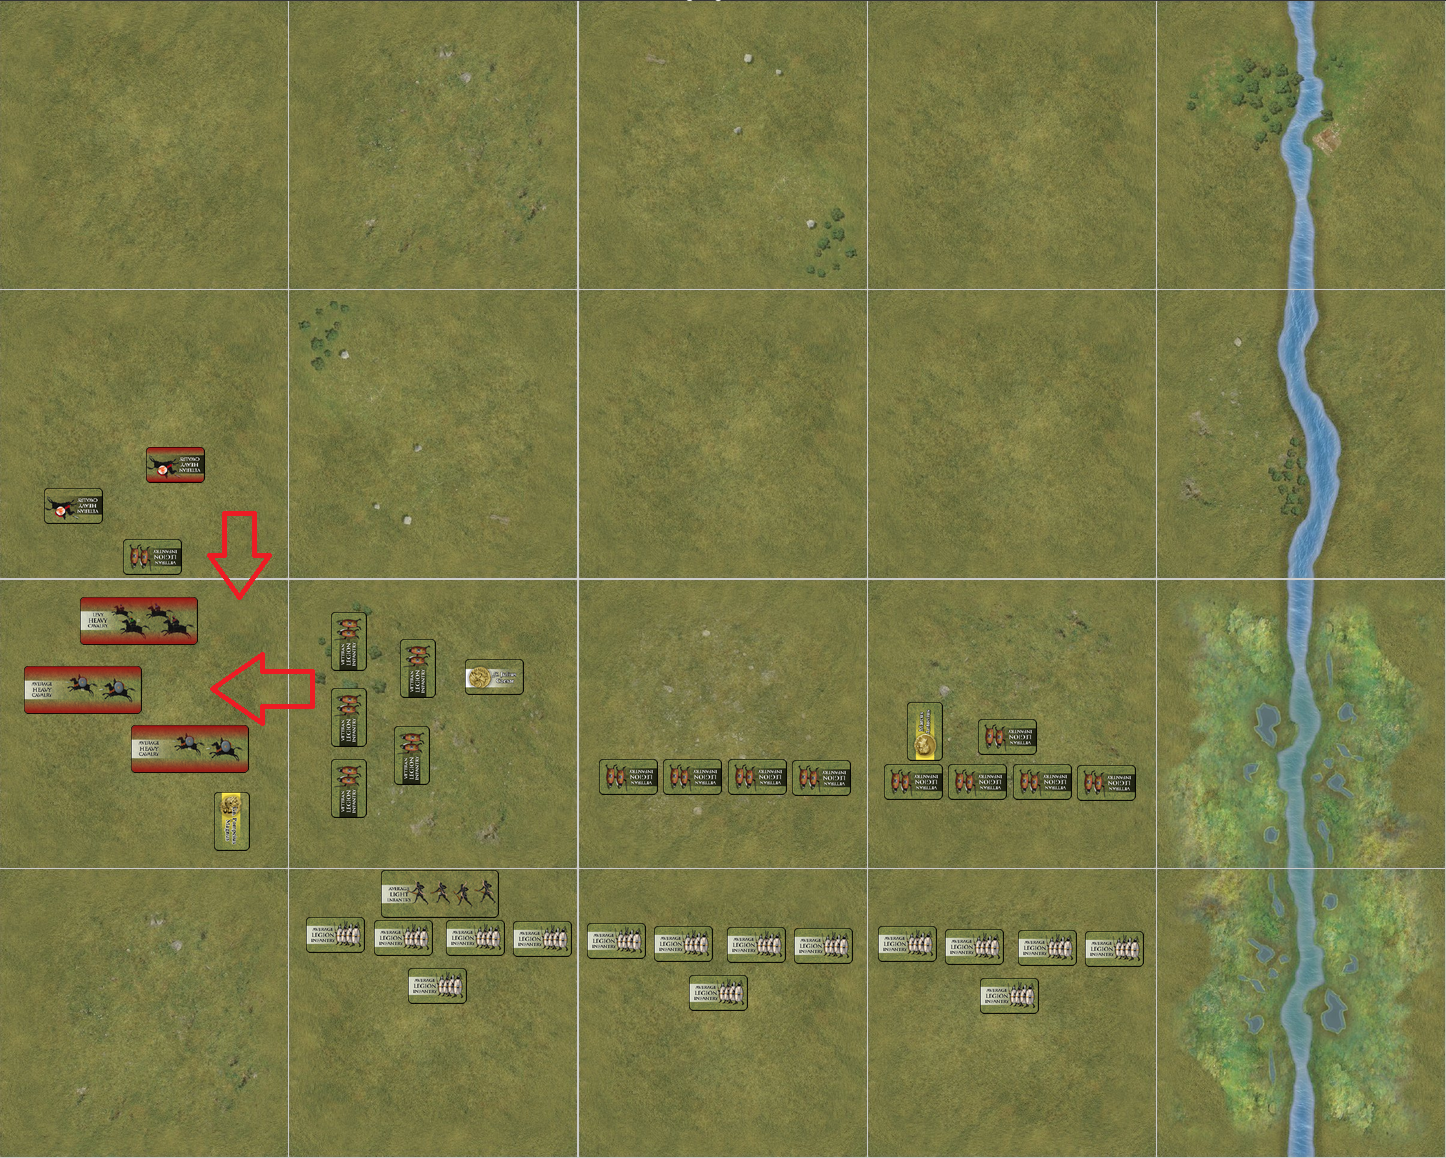
(Board after turn 2)


The third turn saw the Romans get in the first move, which they used to attack with the heavy cavalry on the left.  The turn proceeded with tit-for-tat attacks, culminating in Crassus Jr. rolling snake eyes while attempting a rally.

The Romans now had the semblance of a line but the right was entirely spent.

Observations: there perhaps needs to be provision for troops who wish to vacate a zone entirely to be able to move out all of their units in one go, even if it requires more than one phase to do so.   Deciding whether to prioritize attacks over movement, and if so where, adds another interesting layer of decision making to the game.

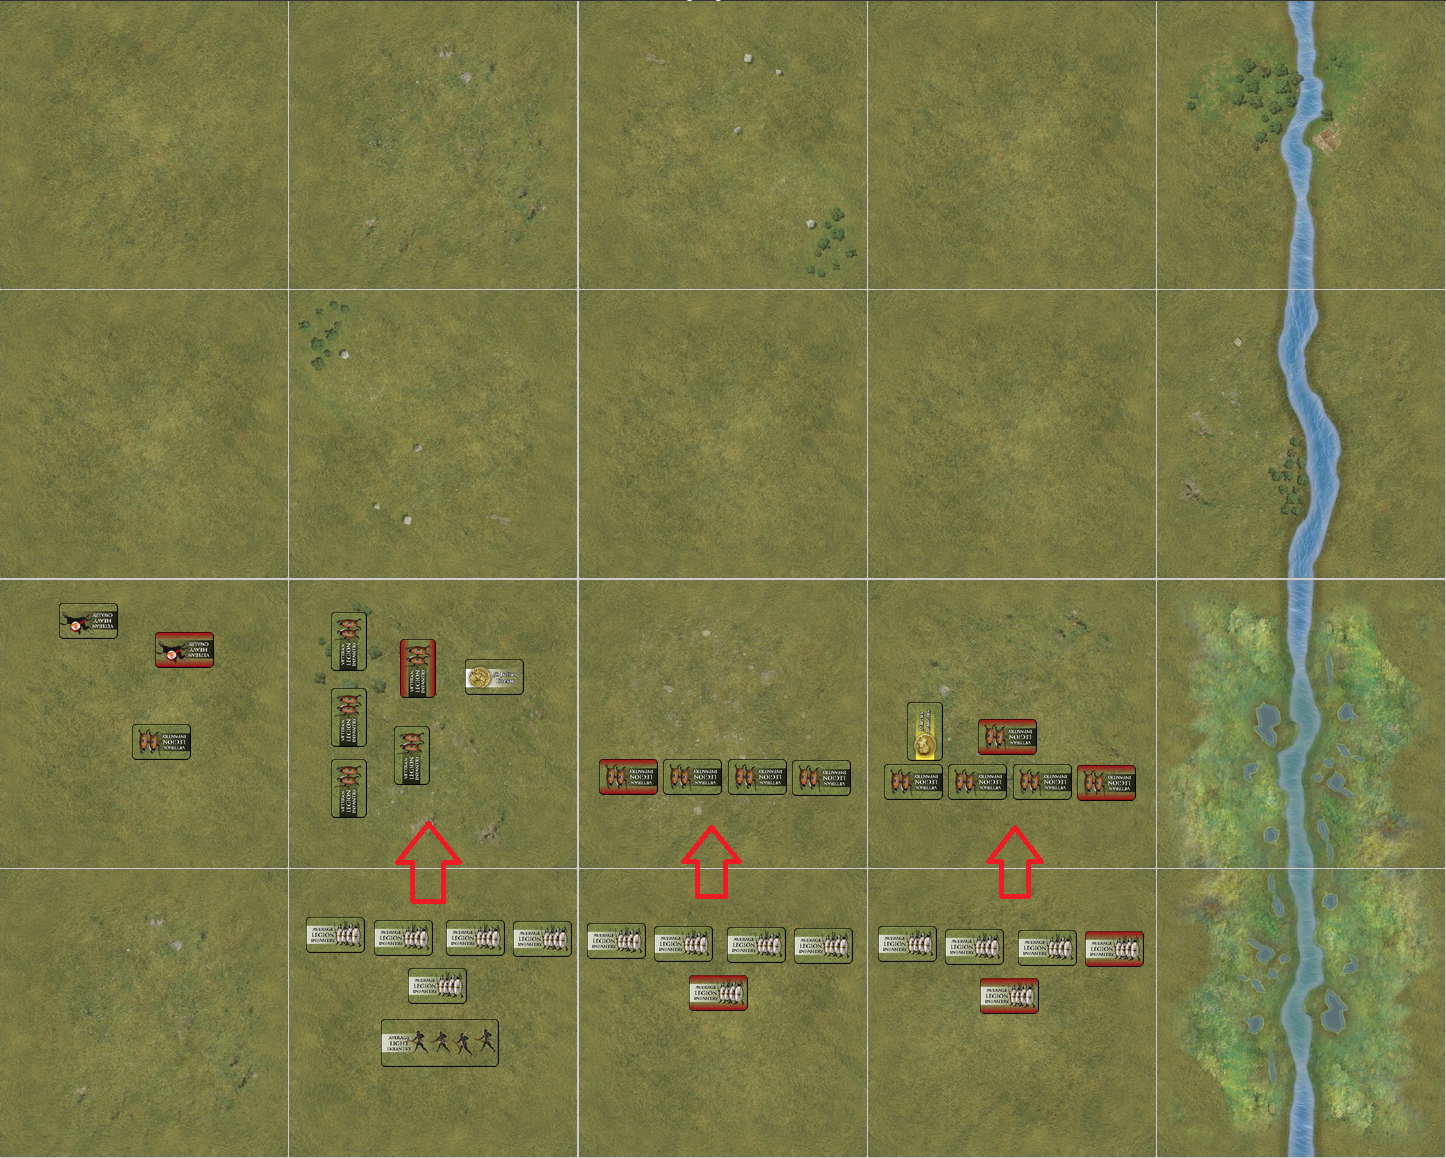
(Board at end of turn 3)


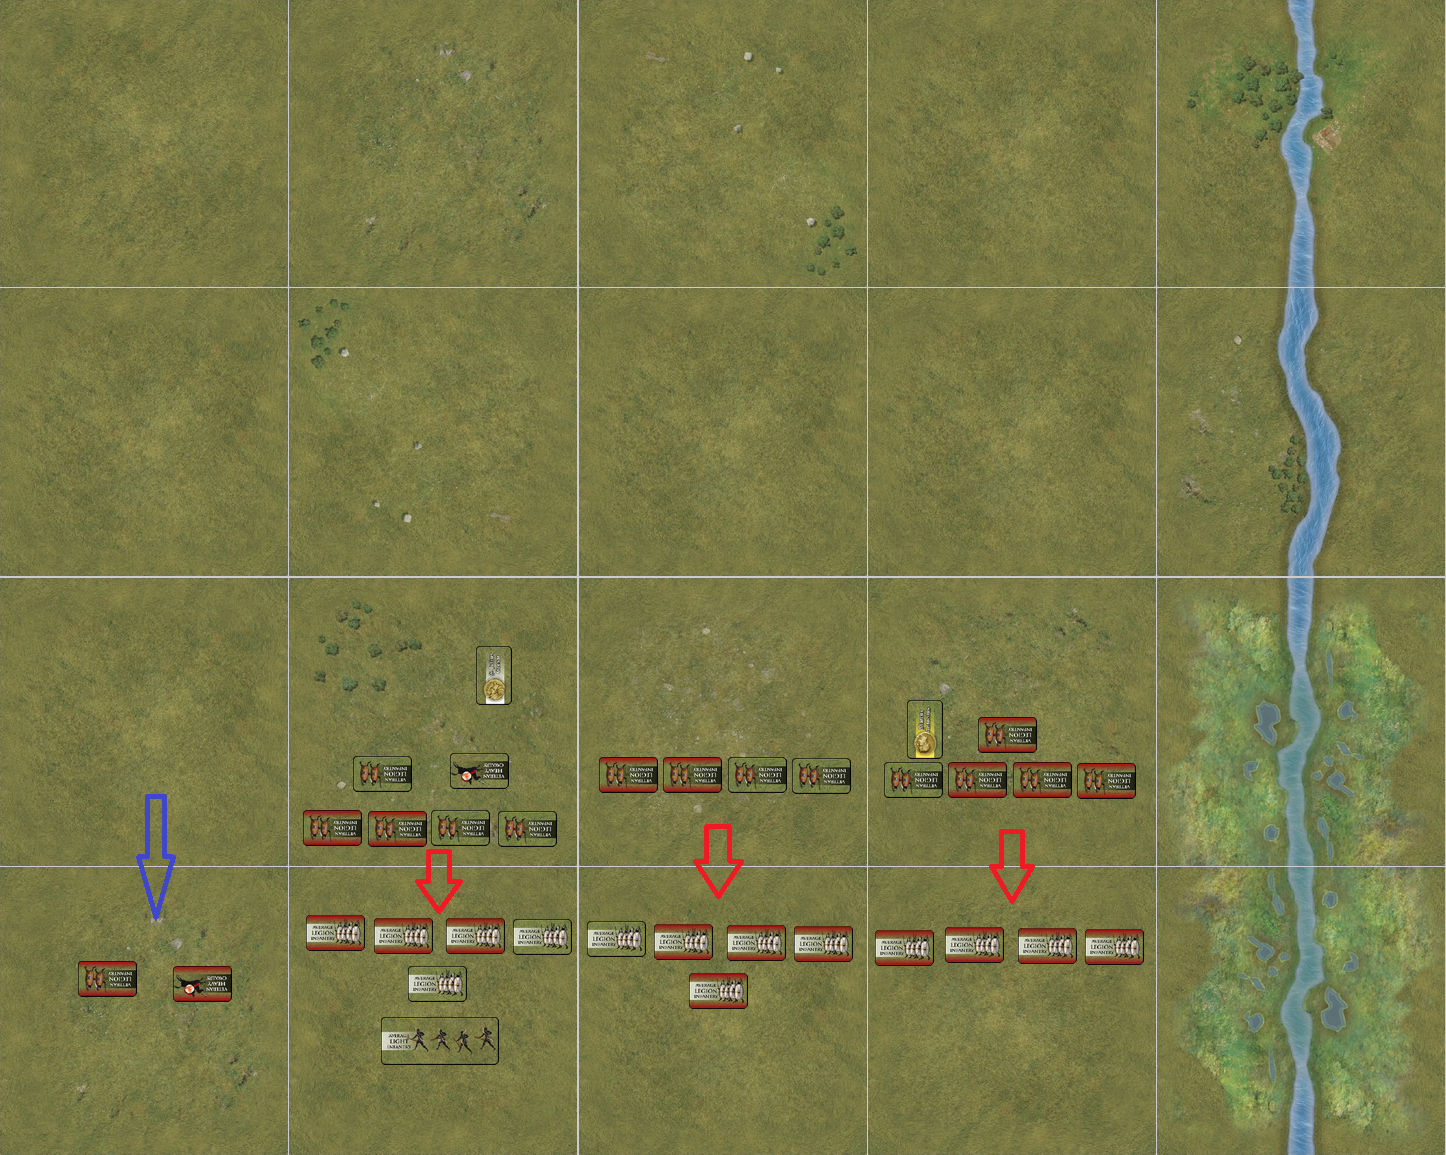
The Romans had first move again this turn, which they used to get in another attack from the unfortunate Crassus Junior's zone.  They scored another hit there before their right was eliminated.  The Romans turned their centre to meet the threat from their collapsed right, while advancing on the centre left to try and get closer to the juicy targets in the Parthian centre.

The Romans now had only three zones with troops in them, so the Parthians could easily keep out of reach of the legions if they so wished, and could move individual units around to maximise morale attack advantages.

Observations: while you would think that having first move would confer a significant advantage, as the game wears on, the extra reaction ability that moving last brings - especially when there are several unanswered moves - seems to be very effective in its own right.

(Board at the end of turn 4)


It was at this point that I realised I'd made the error I mentioned earlier with the Parthian cataphracts, so I decided that there was no need to continue as the result would be devalued and that the things I'd wanted to test had been done so satisfactorily.  It was also getting rather late by this point, so that was a factor too!

All in all, I thought alternate movement worked quite well.  Playing against a live opponent there would be room for clever play and the chance to exert a bit of psychological pressure here and there with adroit manoeuvre.  The problem of course is whether such clever play detracts from the simulation value.

As a final point, the board did not get cluttered; I used the provided 'attack made' markers to show which zones had already attacked, and when adjacent zones had both attacked I conserved said markers by placing a single marker across the borders of the two (or more) zones. 


Thursday, August 30, 2012

Tweaking the Lost Battles turn sequence. Any thoughts?

Phil Sabin's Lost Battles uses a standard universal IGO-UGO turn sequence, with the potential for turn reversal if a particularly brilliant general is present or there are dodgy weather conditions.  Unusually, combat in Phil's rules is not simultaneous, and an army can only score hits on the enemy in its own turn.

There is thus considerable advantage in getting in the first attack, especially in the cavalry fights, for these tend to be bloodier and resolve more abruptly than the clash of infantry.

Balancing this first attack advantage, the player moving second will get to see what the first player does and can then react accordingly; perhaps establishing superiority in one sector of the board, refusing a flank, or setting up a defensive trap.

This works well, and makes for a grand game, but I have often thought that it would be a relatively simple matter to introduce more fluidity into the course of events by dispensing with universal IGO-UGO and using, instead, alternate movement phases.  Lost Battles employs a derivative of the pip method to control movement and combat, so the idea is that instead of Player 1 performing all of his movement and combat and then Player 2 doing the same, Player 1 could perform one movement or combat action - expending command points as usual - and then the active role could pass to Player 2, who would in turn perform a movement or combat action and then return the active role to Player 1.  This alternative move sequence would continue until both players had used up all of their command points or had both forfeited their remaining command points by passing up the chance to act.

So, how would this change the game?

1) More interaction between players and less downtime while waiting for an opponent to finish a turn.

2) The advantages of moving first or second will change over the course of the game, and players will be able to control this to some extent.

3) There will be advantage in conserving command points so that a player can get a series of moves in last.  This could lead to the use of 'filler' moves so that players can jockey to get the last phase.  In order to make this less attractive, the player who moves last in any turn should move second in the turn following.  This may not, however, be enough; some additional rules may need to be introduced to prevent filler moves.

4) The turn-reversal ability that brilliant generals have would no longer be as effective.  There may need to be some (possibly fiddly) rules concocted to bring that advantage back.

5) Tactics will change.  The current attack - reinforce sequence can be interrupted by the enemy and turned into an attack - counterattack - reinforce sequence.  There may be more incentive for players to advance en masse, or to defend in depth. 

6) The dynamics may change.  It may encourage inertia on the part of the player whose army is on the defensive.

7) It would require 'moved' markers to be used, cluttering up the board and rendering it less attractive.

8) There may be some concerns that come up about when players can declare a new lead unit.


It's one thing to do this in the abstract, and another entirely to see it in action, so I will play out a sample turn of Sentinum to illustrate how it might work.

Here is a screenshot of the historical deployment for Sentinum, with the Romans top of the screen and the Gallic/Samnite host at the bottom.  The action starts in turn 2.


As the Samnites/Gauls have 6 command points + d6 and 1 command exemption from their leader, in standard Lost Battles they would typically first move up the infantry, using 5 commands, at which point they would roll their d6.  They would use the remaining command points that die roll generated to attack from and reinforce their right, and, if there were points left over, to combine or - if they were really lucky - perhaps even advance the cavalry on the left.

In response the Romans with their 6 commands + d6 and 3 command exemptions would attack with the levy light infantry in the centre, the cavalry on their left, and advance the heavy infantry and cavalry of the left if possible.

Given average command rolls, the turn would probably end with the board looking something like this:


By way of contrast, this is what might happen with an alternate move turn.

Phase 1: Samnites use 1 command to attack with the cavalry on their right.  They roll an 8 for 1 hit on the opposing cavalry.

Phase 2: The Roman cavalry expends 1 command and Decius' exemption to counterattack.  If they can score 2 hits they will shatter the enemy horse.  They hit once.

Phase 3: The Samnites advance the heavy infantry of their right rear into the right centre, using 2 commands.

Phase 4: The Romans mirror their move, advancing into the space in front of the Samnites, also using 2 commands.

Phase 5:  Gallius Egnatius activates the heavy infantry of his zone at a cost of 1 command and his exemption to advance the infantry into the left centre space.  4 commands used.

Phase 6: The Romans mirror this move also, using the exemptions of Fabius to do so.  3 commands used.

Phase 7: The Samnites expend 1 command to advance the cavalry of their left.  With only 1 command remaining they are now allowed to roll the command die.  The result is a 5.  They have 6 commands remaining.

Phase 8: The Romans spend 2 commands to advance the average heavy cavalry against the Samnite left.  They now have 1 command left and may roll the command die.  The result is a 3.  They have 4 commands to use.


Phase 9: With a 2 command advantage, the Samnites try to prevent the Romans from getting an attack in with the levy light infantry in their central zone.  They spent 2 commands to express move the cavalry of the left rear to join their fellows in the left flank zone.  4 commands remain.

Phase 10: The Romans do their best to generate an attack for the light infantry and advance the veteran heavy cavalry on the right at a cost of 1 command.  They have 3 left.

Phase 11: The Samnites advance the cavalry of the right to join the spent cavalry in the right flank zone.  They have 2 commands remaining.

Phase 12: The Romans admit that they cannot attack with the light infantry and elect to move their heavy infantry into the central zone.  Since they have joined the light infantry, the light infantry can no longer make an attack.

Phase 13: With no attack possible from the Roman light infantry, the Samnites advance their centre, using the last of their commands to do so.

Phase 14: As they cannot attack and have moved everything they can, the Romans pass and forfeit their last command.

The turn is over, and the map looks like this:


The Romans will get first phase in turn 3 because the Samnites were last to move in turn 2.  It dawns on the Samnite player that perhaps it would have been better to have suffered an attack from the Roman light infantry if it would have given him the first attack in turn 3... 

****

We can see from the screenshots that there is little difference in the on-board situation between standard LB and the alternate move sequence; but I think it's fair to say that there has been more player interaction with the alternative move turn, and therefore more of a battle of wits.

So, is it worth pursuing?  What do you think?

Thursday, June 28, 2012

Commands and Colors: Ancients Solitaire variant.

Reading Bob Cordery of (amongst other things) Wargaming Miscellany's fame's blog post on playing Memoir '44 solo reminded me of a solitaire variant I used to use to play Commands and Colors: Ancients.

The idea was initially inspired by something another fellow had posted (I think it was this, yet can't remember for sure), but I changed it around quite a lot and gave the non-player side certain advantages in the hope that it would become a more challenging 'me versus AI' type of game.  It is of course perfectly possible to play Commands and Colors games by drawing cards as normal and simply playing both sides, but as I do that with Lost Battles I found that I wanted something a little different.

The point of difference in these rules was that the 'AI' did not use the same card deck as me - it used a 'virtual deck', which divided the cards into seven types: left, right, centre, flank, leadership, special and troop.

The 'Virtual Deck'

The non-player turn consisted of me choosing the best three to five cards still in the virtual deck -with certain restrictions in place - and rolling a d10 to see which of the cards would get played.


The number of cards in the select pool depended on morale, which degraded as the non-player army took losses.  The higher the losses the greater the number of cards and the smaller the chance that the AI would get the cards that would be most effective. 


When a card was used it would be crossed off the virtual deck and could not be used again until a 'reshuffle' had occurred, at which point the deck would be reset.  A reshuffle would be caused by the play of 'I am Spartacus' by the player side, or by the virtual player not being able to make a legal card selection.


And that's about it.  I recall that I played about five games of Arausio with it, losing three out of five. In the end I decided it wasn't worth all the extra record keeping, so if I were to revisit it I think I would make or buy a second set of cards to use for the non-player hand to cut out the bookwork.

I would use this second deck to provide the selection pool for the non-player side, using twice as many cards as were officially in the non-player's hand with modifications as seemed sensible.  From that draw 3-5 cards would be selected, and I would most likely relax the restrictions on card types able to be selected.  The card used would be removed from the deck but the others would be put back in and the deck reshuffled.

This would make for less record keeping but at the cost of increasing the amount of shuffling.

So, there we have it.  Any and all comments and questions most welcome!

Tuesday, May 22, 2012

Pharsalus: a Lost Battles variant game

Following on from the recent lively discussions on the yahoo group around the topic of dice in Lost Battles, Patrick W and I decided to use VASSAL to test out his averaging combat variant, which uses a much narrower range of combat outcomes than the standard game.

The variant is simple: instead of attempting to roll the 'to-hit' number on 2d6 for each individual unit attacking in a combat, players consult a table that converts the 'to-hit' numbers of each attacker into fractions of 36.  These fractions are then added together and a hit registered each time a whole number is reached (ie, 36 points).   Left over fractions are then reconverted to a 'to-hit' number, against which 2d6 are rolled to see whether an extra hit is scored.

In practice, what this means is that players can predict the likely course of the action with far more certainty than usual, and in keeping with Patrick's philosophy, the game becomes less dependent on dice and more dependent on player choices.

The battle we chose for our refight was Pharsalus as it is fairly well documented and thus relatively easy to refer back to for testing purposes.  The dice gods gave me command of the forces of the ever magnanimous Gaius Julius Caesar, while Patrick took those of that opportunistic demagogue [lately turned establishment] Gnaeus Pompeius Magnus...

Caesar listening to Cato the Younger.
 (Wikimedia Commons)


Pompeius listening to Cato the Younger.
(Wikimedia Commons)
           

Historical deployment (turn 1).

Pompeius (bottom of screen) begins by advancing the cavalry on the left and deploying his average legionaries in line.  Caesar sends forward his own cavalry and positions his veteran legionaries across the three central zones, though with more weight on his right. Marcus Antonius commands the left wing.


Turn 2 (Pompeius' move).

Pompeius orders the cavalry to attack on his left.  One of Caesar's units is spent; the other is lucky to escape the same fate.  Pompeius himself leads reinforcements to join the cavalry.  The skirmishers reintegrate with the infantry on the left, but the legionaries stay put, reluctant to advance and give Caesar's men the first strike.


Turn 2 (Caesar's move).

Unbeknownst to Pompeius*, Caesar declares a flip-flop, and reverses the turn order.  In preparation for the imminent attack he reinforces his cavalry wing and advances the infantry into contact.  His right concentrates on the cavalry, intending to see off the immediate threat before turning on the infantry.

*As a nice touch, it turned out that Patrick had forgotten Caesar's ability to do this, so he was indeed caught out by this unexpected manoeuvre!


Turn 3 (Caesar's move).

Caesar now uses the flip-flop to attack Pompeius' cavalry.  By leading off with his own zone he is able to inflict three hits, which results in all of the cavalry units being left spent.  Caesar's cavalry wing now piles in and shatters the lead unit, and this carries the rest of the cavalry off the field in flight.  Pompeius himself makes for the safety of the camp, taking him out of the battle.


The legions crash together, with Marcus Antonius' wing launching a determined attack at some cost to the tenth legion.


Turn 3 (Pompeius' move).

Pompeius' infantry resist strongly, putting pressure on along the line.  They are unable to take advantage of Caesar's distraction on the left (the carry-over roll was not successful), but they have numbers on their side and from here on it will be a grinding fight.   


Turn 4 (Caesar's move).

Caesar swings his right about to face the infantry of the Pompeian left, with modest success.  He pulls the cavalry in behind him to provide extra strike power and sends Crastinus' surviving friends to the far right with instructions to await orders for an outflanking move.  

Elsewhere the grind continues, with Marcus Antonius, pressing the attack strongly, in inspirational form on the left.


Turn 4 (Pompeius' move).

Pompeius' men maintain the line doggedly, with their effectiveness giving both Caesar and Marcus Antonius  immediate cause for concern.  If the Optimates can maintain their strength and enthusiasm for the battle they could yet fight Caesar to a standstill.


Turn 5 (Caesar's move).

With the battle at its crisis point, Marcus Antonius rises to the challenge, urging his veterans to remember their courage and drive off the enemy.  They respond by shattering an enemy unit.  Are the Pompeians about to lose heart?

Caesar signals for the right wing to advance and outflank the Pompiean left.  


Turn 5 (Pompeius' move).

The left attacks vigorously (it gets five attacks due to the presence of the outflanking force) but fate does not smile kindly upon the men, and they cannot find a break in the line.


Turn 6 (Caesar's move).

Marcus Antonius' men shatter one unit and need a carry-over roll of 5 to shatter another.  An 8 is scored, so the second unit also shatters, reducing the morale of the entire army down to zero.   The other troops in the zone run, as do the light infantry from the left.     


The centre attacks, needing just one shatter to send their opponents racing for safety.  Thanks to the averaging system the shatter is achieved with no fuss, and Pompeius' central zone also joins the rout.


Finally, the combined attacks on the Pompiean left drive the rest of the army off the field.  The day belongs to Caesar, but it is Marcus Antonius to whom the laurels must go!  


The final points tally sees Pompeius claim a well-deserved handicap victory by 97 points to 91, on the back of his having spent 13 units' worth of Caesar's valuable veterans. 

So how did it go?

The result was quite similar to the historical result.  Pompey stayed on his baseline and did not fight for the centre, which gave Caesar a morale advantage he did in fact claim to have had historically.  This meant that it was easier for Caesar to force the rout of the entire army.  While this was advantagous in VP terms (for Pompey did not lose so many units shattered), if the Pompeians has stayed on field longer they may have been able to score some shatters of their own, thereby increasing the margin of game victory.  

And the averaging system?

This seemed to work pretty well for a first outing, but it is not without its quirks.  Double hits are out of the game, meaning that light infantry has lost some of its character, and the precisely calculable nature of the combat table meant that there was a real hesitancy to undertake certain moves, an example being Caesar's reluctance to make an outflanking move due to the fact that it would give Pompeius' men an extra attack on the left, with the increased likelihood of a carry-over hit being scored having the potential to quickly exhaust Caesar's limited manpower resources.

But we'll need more tests to see what effect on player decisions the increased predictability will have.

We played this game with set command and morale rolls, so adding variation there might be a good way to introduce more uncertainty but without altering the attrition rate significantly.

There are some small changes and at least one more test planned, so we'll see how it goes.  I think Patrick has done a good job, and as far as having the variant do what it is intended to do is concerned, he seems to be on the right track.  


Some years later...
Ant: ...and so that's how I upstaged the old man at Pharsalus.  
Cle: How fascinating, Antonius!  I never tire of that story.  Would you please tell me that bit about the CRT again?


Related Posts Plugin for WordPress, Blogger...