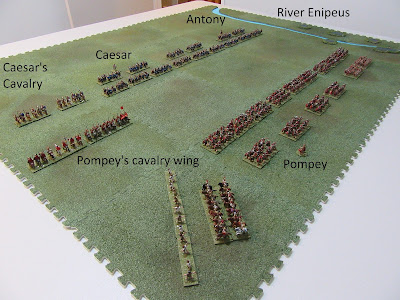
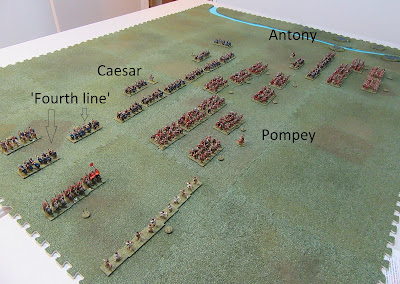
SP popped over today Sunday to play Tunis in our Washbourn Trophy series. An earlier post gives some information about the initial set up.
SP took the Syracusans under Agathocles, an inspired leader. I took the Carthaginians under Bomilcar (on the left) and Hanno (on the right). We decided to play without the Favour of the Gods rule. The Carthaginians (to the right in our pictures) have first move each turn.
A high command roll gives Carthage options: they attacked on each wing but not in the centre in order to keep the levy heavy cavalry there out of the clutches of the enemy. One attack was successful, but it was rallied by Agathocles himself.
SP then rolled a 1 for command, meaning he either could attack or reinforce, but not both everywhere. He attacked in all zones and then reinforced the centre and the right, trusting Agathocles to hold firm without further support. The attacks inflicted three hits, but two of them were all-out attacks by his hoplites (who must all-out attack given the opportunity).
 |
| After turn two. Syracuse on the left; Carthage on the right |
In turn three feeble attacks from Carthage - despite another high command roll - are met with grumblings of discontent by senior leadership. They manage just one hit from thirteen attempts.
The Syracusans roll another 1 for command. They reinforce Agathocles' wing and attack in the centre and the right. They are very successful on the right: the Carthaginian units are all left spent, but at the cost of another hoplite unit spent from an all-out attack.
At this point SP is reasonably content with his start, but is heard indicating some concerns about the centre. On my side of the table there are mutterings about being pounded.
 |
| After turn three, with the Washbourn Trophy shining at the far end of the table in all its gilded glory. In the foreground the shaky Carthaginian left is visable. |
Carthage rolls high for command again. I decide to pull my left back onto the hill. With spare commands, I double-move the chariots onto the hill to their left, creating a pocket. Elsewhere we manage a solitary hit.
SP is a little non-plussed by the withdrawal of the Carthaginian left. Should he advance into the pocket? To do so will put him at a morale disadvantage and the hoplites, with enemy on their flanks, will not be as effective in attack.
Another low command roll sees him leave things on the right as they are for the moment and press on in the other zones. In a turn up for the books all of the Syracusan attacks are unsuccessful.
It seems that when the Washbourn Trophy is on the line even the dice start to feel the pressure...
 |
| After turn four. The Carthaginian left retreats. |
Carthage attacks. Great dice see three hits scored in the centre, leaving just one fresh unit there. On the right, another flurry of hits leaves Agathocles as the only fresh unit in his zone. Those mandatory hoplite all-out attacks have weakened the Syracusans more than expected.
Syracuse decides to advance into the pocket on the right. SP needs to shatter some units. After all the movement and fighting is done, Syracuse has five fresh units across three zones; Carthage has four.
 |
| After turn five. Carnage in the battle line. |
Turn six is more grim attrition. A unit is shattered in Agathocles' zone, but the rest hold firm. Both centres still have one unit fresh each, and the Syracusan right still has two units fresh, but the rest of the units on the field are spent.
Agathocles is faced with a choice: retreat from his zone to prolong the battle and give time for his right to clean up the levies on the hill, or stand. SP chooses to stand. He will not give up his key zone.
 |
| After turn six. Still the Carthagian levies survive! |
Carthage has a royal opportunity to put Agathocles, now in the lead unit position, to the sword. Heroically, he stands firm! Did we only imagine an owl or two in the air? On the right the Syracusan hoplites shatter an average heavy infantry unit. Bomilcar attempts to rally the hit, and dies. Disaster! Two morale checks needed on d3s. Fortuitously for Carthage, the scores are 3 and 3, and even the levy light infantry refuse to rout. Disaster averted.
Agathocles strikes from the lead position: two units shattered, two units routed. Only the veteran heavy infantry remain in place to hold the zone for Hanno. But the morale check results are high enough to prevent the rest of the army from routing.
And what is the health of the battle lines at this point? Agathocles has three units against Hanno's two. All spent. The Syracusan centre has five units all spent, against Carthage's four spent heavy infantry and one levy heavy cavalry kept - wisely as it has turned out - out of the lead position, still fresh. Syracuse has one fresh and four spent units on the right facing four spent infantry units and the Chariots mucking about on the hill.
 |
| After turn seven. Both armies out on their feet. |
Hanno attacks, and scores two double hits from his zone. Agathocles rallies one, but suffers a close shave with the next, is laid low, and can do nothing to stop the second double hit. They are all shattered. Hanno advances to take the key zone and Syracusan morale will now suffer accordingly.
A succession of failed attacks by Carthage in the centre is redeemed by a final attack which does enough to shatter a unit. With morale now at a -3 (general killed, four-plus units shattered, key zone lost), the army flees.
 |
| Turn eight, the moment before the Syracusans are swept away. |
Well, after a great start from Agathocles things went a bit pear-shaped for the Syracusans. The longer the game went on the more the Carthaginian position improved. SP was hampered by poor command dice. 1, 1, 2, 3, 2, 4, if my memory is correct. This meant he was unable to get his army into position as quickly as he would have liked, and nor did he have commands to spare for combat bonus purposes.
For me, the command dice were extraordinary. 5, 5, 6, 4, 5, 4, 5 or similar. This allowed me the luxury to pull back on my left, and gave the ability to load up my attackers with combat bonuses.
In the end, I think this (and my high morale rolls at crucial times) were probably the difference.
As usual, it was a gripping game. We both felt from turn four onwards that "THIS turn will decide it!" but that feeling went on for five turns.
We will look forward to contesting the Washbourn Trophy again soon. I will have to have a think about what battle to do - it was refreshing to have hoplites and chariots on the table. Funnily enough, the battle was quite similar to the account in Diodorus, except that it was Bomilar who died, not Hanno, and the Carthaginians managed to resist the urge to rout at that point.
Final scores were Carthage's 97 to Syracuse's 60, for Carthage to register a clear victory. On the day I had 85 to 60, but forgot to include the withdrawn Agathocles in the count.