Prufrock's Wargaming Blog

Prufrock's Wargaming Blog

Saturday, December 31, 2011

Hannibal: Rome versus Carthage

With my folks having come over for a surprise Christmas visit tradition dictated that the old man and I would get a bit of gaming in.  He had been reading a bit about the Punic Wars and was quite keen to try out Hannibal: Rome vs Carthage once he saw it on the shelf.  I'd picked up a copy of the Valley Games reprint when it came out but had not had a chance to play, so we set it up and went for it.

The first game in I managed to lose from a strong position when Hannibal wan vanquished in battle and had nowhere to retreat to.  I hadn't realised he could have counterattacked to take back the initiative during the battle.  Bad move!

In the second game my Carthaginians absolutely dominated due to Roman uncertainly about how to proceed strategically and were ahead 11 provinces to 7 prior to Scipio Africanus making his appearance.  Showing himself to be worthy of the name, he of the gens Cornelia promptly sailed to Carthage; four card plays later, he had taken it for the victory!  I was a bit brassed off with myself for losing (again) from a strong position, but I suppose I can console myself with the thought that I'm in reasonably good company...  In this case there were only two cards in the deck that could have stopped me relieving the siege of Carthage, and I had a nasty feeling the old man had them both in his hand.  I gambled on him having only one of them and - predictably - paid the price!

Full marks to the old fulla - he once again showed himself to be a canny opponent and a good advertisement for the benefits of a regular diet of chess.   No matter what the game, and no matter how unfamiliar its concepts might be, he is able to quickly assess what needs to be done to win and then goes about doing it.  It has been a great few days and I'm not looking forward to their leaving tomorrow.

As for Hannibal, it is an intriguing game.  It seems to require a curious mix of prudence and daring; no doubt the mark of a good player is knowing when each is called for.  I think it will take me a while to get the balance right because - as the picture below shows - if I can lose from this position it is hard to know how I will ever win!


On that note, cheers, and all the best for 2012!

Sunday, December 25, 2011

Merry Christmas

As we head into the holiday season I'd just like to take the opportunity to wish all readers a safe and merry Christmas!

Best wishes to you all,
Aaron

Thursday, December 22, 2011

Orders in...

Well, after much kuffuffling about I finally decided to order some Gauls.  I have a few about but I really need to get serious.  What hobbiest worth his salt can own Carthaginan and Caesarian armies and not have Gallic cavalry?  It was getting embarrassing.   The upshot is that orders have been placed for Xyston packs from Brookhurst Hobbies and for some Tin Soldier ones (you can see pictures of the latter here) from the UK.

Research suggests these ranges will go well together, and there should be quite a bit of pose variety, which is a good thing with these kinds of armies in my opinion.

Just to round things off I also popped in an order with Quick Reaction Force for some Late Republican Roman command figures.  I've had exceptional service from QRF recently and wanted to pick something up from them as a wee thank you.

All that means I will have large Gallic, Persian, Greek and Successor armies all waiting to be painted.  I guess I'd better hope for a few rainy days!

Tuesday, December 20, 2011

Some Carthaginians finished

The Carthaginian bits and pieces I've been working on are now finished, thankfully.  First up is a unit of Citizen cavalry made up of Corvus Belli figures supplemented by a Chariot standard bearer and Old Glory commander.


Next up we have some reconstituted units.  Here are some Old Glory Spanish cav touched up and rebased to include some newly painted Essex figures.


More reconstituted units - this time older Chariot Citizen spearmen rebased to add in Corvus Belli figures.


  Finally, some Chariot Italians that I got in an ebay deal years ago touched up and rebased for play.


I've been experimenting with basing troops as units, a la Basic Impetus, with infantry elements 80mm wide by 30/40 deep and some 40mm wide to add a bit more flexibility.   This is because I only really use unit-based rules these days, and I do like the look of the bigger elements.

I'm pretty pleased to have these guys out of the way.  Next task to tackle is the odds and ends Spanish - around 150 of them, I regret to say!

To finish, here's the lot of 'em:

Saturday, December 17, 2011

Painting Progress

After quite a hiatus, I've started picking up the paint brushes again at nights.  I have so much stuff sitting in boxes ready to take its place on the table that it seems churlish to deny it the necessary lick of paint.

Just finished are a bunch of 32 Punic Citizen infantry from Corvus Belli, with officers and standard bearers from Chariot (Magister Militum).  These have been done quickly and to match other units, so they are only basic paint jobs and nothing to write home about.  Still, they're probably worth chucking on the blog as I've had so little else to report of late!


These have been given their first coat of Future/Klear, and after one more coat will be mixed in with existing Chariot figures, given a spray of matt varnish, and based.  Should see these on the table fairly soon, all going well...!

Wednesday, December 7, 2011

Battle of Tunis with Piero

Last night fellow Lost Battles enthusiast Piero and I tried out Joel Toppen's beta version of the Lost Battles VASSAL module in a 'live' game online.

Playing Tunis, we saw Carthage (Piero) pitted against the might of Syracuse (yours truly) .  Carthage has a combined-arms force employing heavy and light infantry, cavalry and chariots; the opposed Syracusans have Agathocles and his powerful but limited force of hoplites and heavy infantry.  While Agathocles is classed as an inspired general, Carthage has the mournfully unspectacular Hanno and Bomilcar sharing command duties.  Both armies are stiffened by two units of veterans, but Syracuse holds the edge in fighting values - 60 against 51 - thanks in large part to Carthage's reliance on levy troops.

We used the historical deployment, which looks like this:


You will note that Carthage (the white troops) is not able to make good use of its chariotry and cavalry due to command limitations and the nature of the terrain.


The first few turns were notable for the number of all-out attacks employed - Carthage's by choice; Syracuse's by rule (hoplites must all-out attack if the chance arises) - and some low command rolls.

Taking the action up in the third turn, we see that Agathocles finds himself and his guard hoplites as the lead unit in their zone (this meaning that all enemy attacks will be directed against him this turn) and also spent (ie, his unit will be removed from the game if it takes another hit).  That this is not a good position to be in is something of an understatement!

  
Despite some desperate rally attempts, Agathocles' chaps are shattered and he is forced to flee the table under, it must be said, somewhat ignominious circumstances!  Fortunately, the rest of the army is made of sterner stuff.

Over the next few turns Carthage keeps scoring hits (mostly by all-out attack), which cause the battle lines to quickly weary.  Hanno is killed in a rally attempt, but it is no great loss.  At last Syracuse finds enough command points to bring up some reinforcements in the centre, and things become very tense as both sides near breaking point.

The next screenshot shows the situation just before things start to swing to one side's advantage.  You will see that both of Carthage's wing zones are entirely spent (designated by reddened units) and that Syracuse is in a similar situation.  It is now Carthage's turn, and a strong showing will likely see them strike a decisive blow...

This is the situation:


Leading with the centre, Carthage scores a hit on one infantry unit, but misses with the other three attacks.  On the left, two hits are scored, but at the moment of the second the gods are invoked on Syracuse's behalf, and the re-roll is a miss.  The other attacks also miss, leaving Syracuse with one unit of fresh hoplites to attack with next turn.

The greatest effort is now summoned for the assault on the right, but as determined as the attackers are, the defenders prove to be their equals.  No headway can be made, no hits are scored, and no morale test is required.

This is all the encouragement that the Syracusans need, and on their phase of the fifth turn the one remaining unit of fresh hoplites on the right launches a glorious attack which sees a unit shattered and Bomilcar fall in attempting to rally it.  With both generals now dead, the Carthaginian levies panic and run, leading to a general rout.  Despite the chaos around them, the two veteran units of the right and the unspent heavy infantry of the centre can hold their heads high after retiring from the fray in good order.

So, with the field won for Syracuse (but not without cost), it was time to tally the victory points.  In so doing we discovered that Carthage had scored 82 points to Syracuse's 75, which gave Piero a famous game victory.

It was a tense and exciting game, and considering that it was played live by two people on different sides of the globe connected by a computer program and a pair of headsets, it went pretty smoothly.  It is remarkable what a wonderful tool VASSAL is and how convenient is it to use.

We made a few in-game mistakes while getting used to the medium, the interface and, in my case, hoplites.  While all of the mistakes were minor (and my fault!) the biggest error was forgetting to rotate Agathocles' guard unit out of the lead position after it had been forced to make an all-out attack.  I won't forget again!

For those interested, Piero of Carthage has posted his own thoughts on the game here.  Many thanks to him and also to Joel for his fine work getting the new module ready.  I shall look forward to the next game!

Thursday, November 24, 2011

A short holiday, in which Philippi was sneakily re-fought twice, but without any pictures to show for it.

I've just got back from a two-night getaway with the family.  We headed down south to take the kids to the zoo-cum-theme park there,show them a few dancing dolphins, let them take a few mildly-daunting rides and generally have a good family outing.

Needless to say, dad needed something to do once the kids were in bed, and as the in-laws were staying with us it was thought that the Lost Battles board game might do the trick...

One of the good things about having the board game version is that it allows me to re-fight battles that I don't have figures for (or that I rather sadly do have figures for, but have not yet painted...).  Therefore I decided to give First Philippi a go as I've been reading Appian at nights (my life is a real humdinger at the moment, can't you tell?) .

As Philippi is a relic from the original Strategos rules, the scenario is not included in the Lost Battles set.  It can, however, be found in the files section of the Lost Battles yahoo group.

The Triumvirs, led by Antony, have a fighting value of 82.  They have 15 average legionary units, an average light infantry, an average heavy cavalry, a levy heavy cavalry and a levy light cavalry unit.  Antony is classed as an inspired commander.

The Republicans, with good old Cassius and Brutus leading from the front, have a fighting value of 74.  They have twelve average legionary units, two units of average light infantry, three of levy heavy cavalry and one of levy light cavalry.  Both Brutus and Cassius are rated average.

The terrain favours Antony, for the Republicans have a hill in their right rear zone and a large patch of marshy river in three of the left flank zones.  This makes it tricky for them to make good use of their superiority in cavalry (it's tough to move cavalry in poor terrain).

In the first battle there was a stand-off on Antony's left as neither cavalry force wished to give the other a first-strike advantage.  On the Republican side Cassius directed one unit of heavy cavalry and some light infantry to wade through the marshes on the left and outflank the enemy that way.

The infantry combat was protracted, with both sides having periods of ascendancy.  Antony was the first to shatter a unit, but Brutus replied in kind and, thus encouraged, the cavalry of the right launched into the fray, only to be promptly beaten.  The infantry combat continued on, with the Republicans beginning to get the better of it.  By the end of the seventh turn, all of Antony's legionaries were spent, and his fourth unit was shattered.  The resulting morale penalty (-1 to morale for every four friendly units shattered) caused his cavalry to run, and then it was tit-for-tat.  Fortune played a merry game with both sides (Brutus rallied one unit and then fell by the sword), but eventually the Triumvirs were defeated.

The final tally was 123 to 76 in favour of the Republicans, which was a whopping victory.  Antony lost 10 average legionary units shattered and would have died himself if I had read the correct table following a failed a rally attempt.  As it was he survived by the grace of the gods and escaped the field with his last few loyal legions.

The second game (on the second night, oddly enough!) started out similarly, except that Antony decided to beef up his right to prevent another pesky encircling move.  Brutus closed with his cavalry early, scoring an impressive three hits on the first charge and shattering a levy unit immediately.  Antony had kept three legionary units in reserve this battle though, and he was able to shore up his left in response to this eventuality.  The infantry lines again slugged it out, and although it was close Antony got the better of it this time in two out of the three central zones.

When the shatters started coming Brutus fell (again), and this in conjunction with the -1 for four units shattered meant that the cavalry and light infantry did not hang around for too much longer.  The infantry fight was grim, and both sides struggled for command points, but in the end it was Antony who prevailed, with a tight 103-84 victory.

Philippi is an excellent scenario - both sides have a good chance of winning a battlefield victory and the nature of the terrain means that choosing how to employ the cavalry and light infantry resources is a puzzle within a puzzle.  Although I played it solo there was real drama to it, and carting the box up and down flights of stairs was well worth it in the end.

It was also a fine accompaniment to late night gins-and-tonic (ah, that's the life!).

Finally, I said in the title that there weren't any photos, but I'm afraid that I was not being entirely truthful - there is one of an interested onlooker...


Wednesday, November 16, 2011

Chaeronea, 86BC - the battle.

Preamble

As outlined in my last post, I played through a refight of Chaeronea (86BC) last night.  Here then is the promised report.

**  Unfortunately (and embarrassingly!), I misread the scenario details and had the battlefield reversed.  It was in fact the Pontics who had the river on their side of the table.  This is a result of my own wrongheadedness, and should not be blamed upon the author of the rules! **

Under Lost Battles Archelaus has twenty units of Pontics, made up of a vast quantity of cavalry, phalangites and light infantry.  Against this horde Sulla has sixteen units of Roman veterans and his lieutenant Murena.  With a fighting value of 50, for Archelaus' men to actually win the field would be a difficult task.  Given the disparity in quality, Archelaus' best chance is to try to win a game victory by scoring as many hits as possible on the Romans before his fragile levies flee the field.

Being a positive sort of fellow, Archelaus hatches a plan to refuse his left, hold the Romans with his centre and push the cavalry forward on the right to turn Sulla's left.  This done he will roll up the Roman flank, slaughter the legions and teach Sulla a lesson he will never forget.

Meanwhile, the genius of Lucius Cornelius has informed him that the aim must be to win the battle without suffering major casualties.  He has a fighting value of 77, giving the enemy a very useful victory point handicap of 39 points; his plan therefore is to refuse the left and rely on the river to his rear to help his own left-wing cavalry fend off any attempts at encirclement.  He will use his command and quality superiority to get his veteran legionaries into position quickly, break the enemy phalanx and then return at pace to reinforce the left before Archelaus gets into the baggage.

Such at least were the the pre-battle plans of the two commanders...


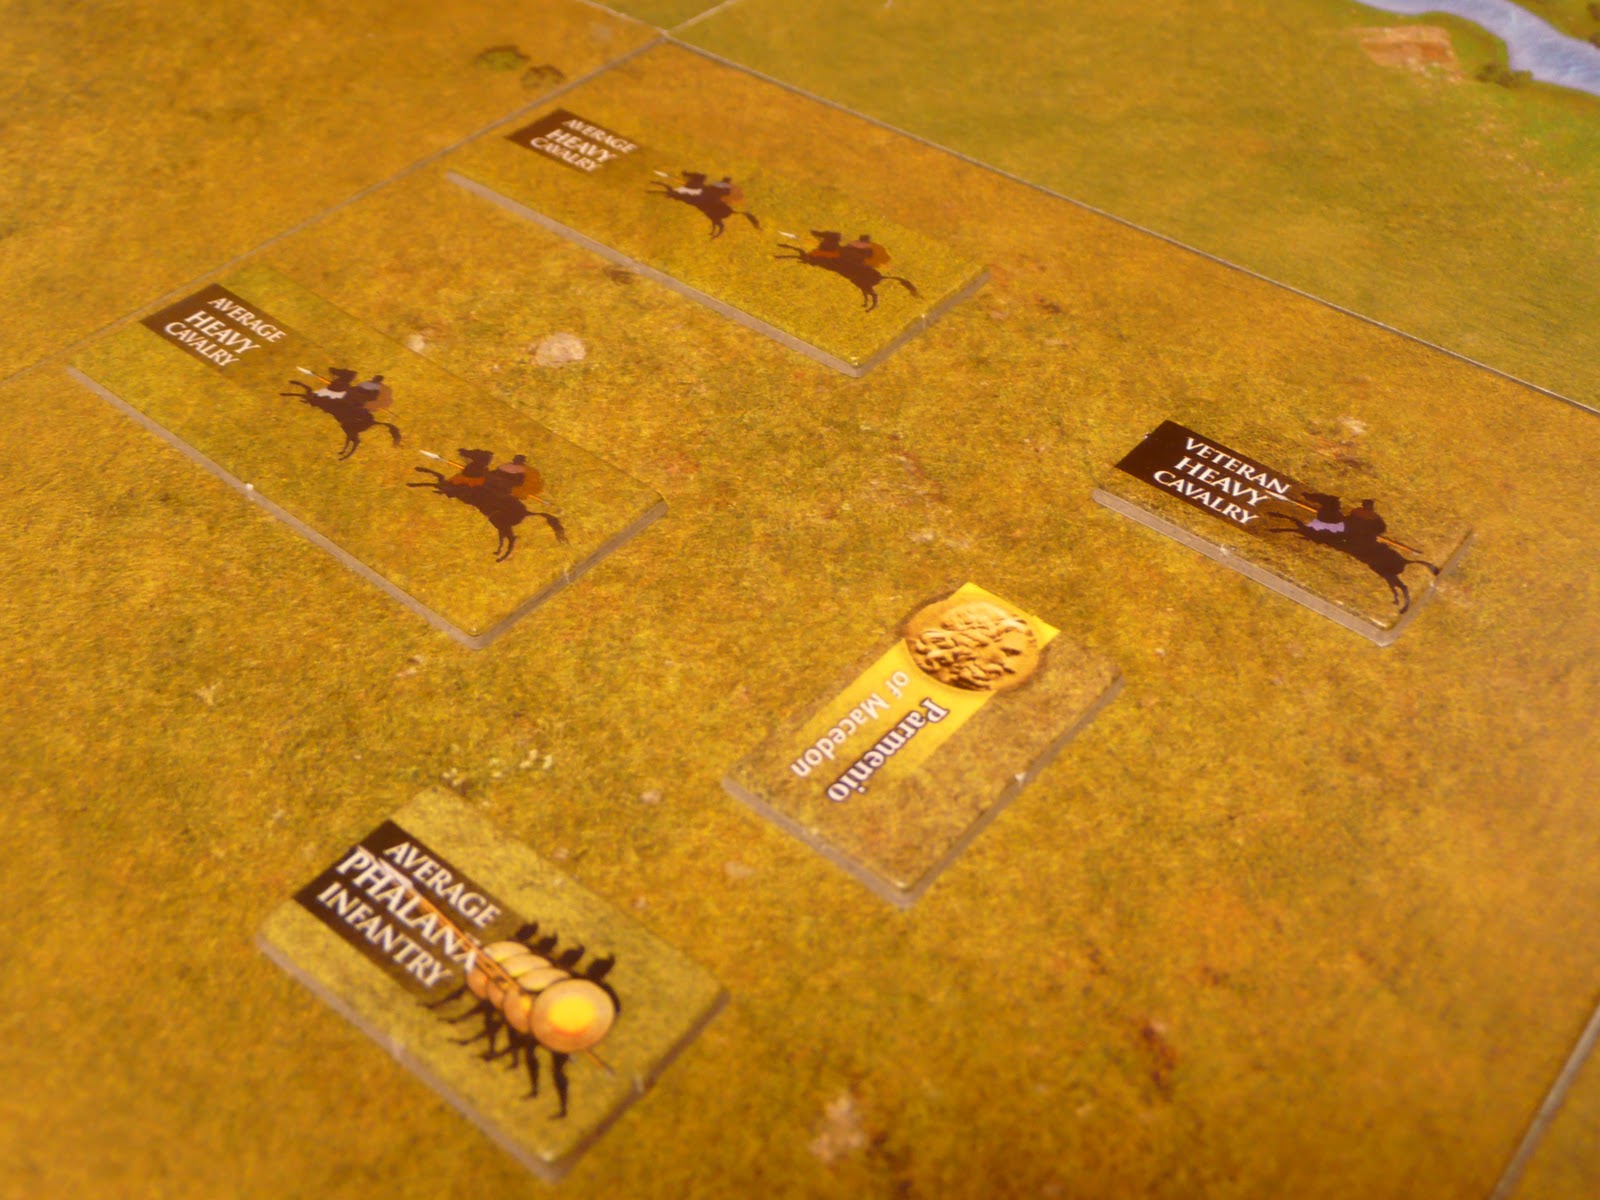
Initial dispositions.

Archelaus has a hill in his rear centre and rear right zones upon which he deploys most of his phalanx and his scythed chariots.  The right (currently splashing through a stream) is made up of two average and four levy units of cavalry.  The far left, just to the left of the hill, is enjoying the shade of a few trees and a last drink of unbloodied water.


Sulla, who is somewhat taken aback by how large a host the enemy has gathered, deploys his infantry in the three central zones in a four, five, four distribution.  He has supporting cavalry units on both wings and a solitary unit of light infantry in the centre to deal with the scythed chariots.  Murena, he decides, will hold the left.


The phalanx on the hill, supported by light infantry and the scythed chariots.


The mass of Pontic horse, which is already giving Sulla pause.


The battle.


Turn two (deployment is counted as turn one) sees a low command roll, but this does not put Archelaus off advancing his centre and right centre.  They will no longer get the dubious benefit of the high ground, but they will secure the key zone and give themselves first attack at the Romans (assuming these glorified Etruscans elect to advance).  Archelaus does not have enough commands to do anything fancy with his cavalry, so they just forge ahead and create a lot of dust.


Murena advances to meet the Pontic right centre, with the rest of the line following.


The Roman centre approaches the chariots and the light infantry readies for action.  On the right Sulla double (express) moves into contact with the enemy's refused left.


One unit of Roman cavalry is left behind to guard the rear; the other moves forward with Sulla.


Turn three sees the scythed chariots charge.  The experienced legionaries deftly open gaps in the line through which the chariots are funnelled, but the light infantry prove to be a little less sanguine and are forced to retire shaken.


Hey, watch out for the riv...


Archelaus' cavalry now bears down upon the Roman left.  Two units of light cavalry are sent to deal with the Roman rear-guard; the rest turn to threaten Murena's flank.


Sulla's advance is met with determined resistance.  The veteran legions - who appear to be a little disordered following their rapid advance - suddenly find themselves hit twice and under the cosh.


I thought you said these guys were levies?


On their own turn the Romans give better than they got, scoring seven hits along the line, shattering a levy heavy infantry unit on the left and forcing a supporting unit of light infantry to rout.  None of this can delay the inevitable charge of Archelaus and his left, however.

Turn four sees the Roman cavalry guard shattered immediately by the bows and javelins of the advancing light cavalry.


Who was the smarty pants that left us unsupported against those fellows?  Ah yes, Aaron Murena.  Thanks!

Archelaus' flank attack with the cavalry on Murena's zone is also successful as they bring their weight to bear.  The phalanx attacks see a flurry of all-out attacks being scored, which result in the Roman infantry line beginning to look a little fragile.  Now that they also have cavalry to their rear it might be an opportune moment for Sulla to think about hurrying up and finishing off the enemy left...


(A quick tour of the battlefield reveals that Archelaus' infantry are almost all spent.  Only one unit of phalangites remains on the left.  The centre has all its units on the field, but only two of them are fresh.)


(The Pontic centre right has only a bunch of bullied light infantry and some shaky thureophoroi left.)


(But there's no denying that they have a lot of fresh cavalry [and some weird musical instrument by the looks of it]!)


Returning now to the action, we pick things up during the Roman phase of turn four.  With the shouts and trumpetings from the discombobulated left reaching his ears, Sulla personally urges the men forward.  In the face of this assault the Pontic left finds it impossible to resist, and the levy heavy phalanx shatters  As this is the fourth unit to be sent from the field in this fashion the entire Pontic army is now at -1; on a morale roll of one the entire infantry line gives way.  Sulla has done it!


Think of the proscriptions, boys!  

Archelaus, however, is supported by units that are fresh, so the cavalry does not run.


But wait - there are still more...


Archelaus also uses his personal influence, and the men respond.  Two hits are scored in the charge and a veteran legionary unit is shattered.  There is bite in the Pontic canine yet!


Sulla rushes his men over in support, but it takes a turn before they can attack.  In that fateful turn Archelaus strikes again, shattering another legionary unit.


This cannot last forever though, and when on turn six the Romans shatter a fifth unit, the remaining Pontics are carried away in rout and the battle is over.  

Sulla must now count the cost...

Conclusion.

Roman victory points:
Units shattered: 26
Units routed: 36
Units withdrawn: 13 
Total: 75.

Pontic victory points:
Units shattered: 22
Units spent: 31
Handicap: 39
Total: 92.

Archelaus has pulled off a game victory.  Mithridates will no doubt take a little poison to celebrate.  

Sulla meantime will let his troops loose on the baggage, give that fool Aaron Murena an earful and brood over his wine.  

Final thoughts.

This was an excellent victory by the Pontics.  With the benefit of hindsight the Romans should probably have kept playing for time with the cavalry on their left wing, but to be fair that's what they thought they were doing - they did not expect to get shattered by light cavalry in just one turn!

Once the Pontic line had routed Murena could also have brought in fresh troops so that they would take the lead position.  Instead he risked attacking with a spent lead unit which resulted in another shatter next turn.  As it turns out this would not have been enough to win the game, but it would have given the Romans a better chance of winning.

The key to this battle is to be found in the third and fourth turns, on which the Pontic infantry managed to score a lot of hits (nine, I think).  That three of these were all-out attacks was not a disadvantage at all: a routed levy unit is worth 3 VPs and a spent veteran unit is worth 4.  When once side has a significant handicap advantage in its favour all-out attacks can be a real bonus.

Anyway, that's enough rambling - to finish, this was yet another very enjoyable game of Lost Battles.  As always, it's great fun solo and after a reasonably stressful few weeks it was good to kick back and relax with a battle.  It was quite nice to revisit this particular scenario as it was the first one I ever played with this system, when Luke first came down here way back in 2005 or 2006.  

Tuesday, November 15, 2011

Chaeronea, 86BC.

After a long while without a proper game I decided it was time to get the miniatures out tonight.  I had a hankering for something a bit different, so I looked through the old scenarios from Strategos (the precursor to Lost Battles) and settled on Chaeronea (86BC), in which Sulla took on Archelaus and the pride of Pontus.

The Pontics had a fighting value of 50, made up of the following units:

3 x average phalanx
4 x levy phalanx
2 x levy heavy infantry
4 x levy light infantry
2 x average cavalry, with Archelaus attached to one as an average leader,
2 x levy heavy cavalry
2 x levy light cavalry
1 x scythed chariots

Sulla and his merry men meanwhile had a fighting value of 77, comprised thusly:

13 veteran legion units
1 average light infantry unit
1 average heavy cavalry unit
1 veteran heavy cavalry unit
1 uninspired commander (Murena) and one inspired commander (Sulla himself).

Here are a couple of pictures of the refight.


Gosh, that's a lot of pike, and is that cavalry I see to the left of us?  I wonder what old Marius would make of all this...


A report will follow as time permits.

Saturday, October 29, 2011

Ancient and Medieval Wargaming playtest

Hello again; it's been quite a while between posts...  I recently picked up Neil Thomas' Ancient and Medieval Wargaming off the shelf for something to read while backpacking the boy to sleep, and in so doing reminded myself that I still had it!  I'd played it once before with a few drinking buddies, and once or twice with Luke, but had not revisited it since then so decided to give it a shove.

I did not set up any terrain; just a Polybian Roman force (5 x hastati/principes, 1 x triarii, 1 x velites, 1 x cav) against a bunch of Gauls ( 4 x warriors, 1 x fanatics, 1 x skirmishers, 2 x cav) in the open to see how it would go.

The game lasted four turns, with the Gauls having the better of it on the wings but the Romans cleaning up in the centre.  A&MW seems to be quite a limited game, but was fun nonetheless.  The cavalry combats take a lot longer to resolve relative to the infantry ones, so it's difficult to see there being much scope for envelopments of the Hannibalic variety unless the onset of the infantry clash is delayed.  There is clearly room for tactics, but light infantry are in for a bit of a tough time as they cannot evade (though they can break off after a turn of combat if they are faster than the enemy).  The Gauls need a bit of terrain to give them a fighting chance, so perhaps I'll give it a run through again with some woods on the battlefield.

Anyway, here's a shot of the board at battle's end, with the Roman centre having disposed of its opponents and marched a heavy infantry unit off the board to complete the victory...


Nice to get a wee battle in again after a while...

Saturday, September 24, 2011

Rugby World Cup is ON!

Things will be very quiet here on the old blog for a couple more weeks as I settle down to watch the rugby world cup in earnest.  It has been a great spectacle so far, but it's going to go up a notch or two tonight as our beloved All Blacks take on the might of the French.  It should be a real battle out there, and with a cracking few weeks to come I couldn't be happier. 

So, I raise my glass to all the rugby fans out there, and let rugby be the winner on the day (as Sean Fitzpatrick might have said)!

Cheers!

Wednesday, September 21, 2011

Lost Battles (the boardgame) arrives

It's been a quiet few weeks here on the blog front.  I had a quick visit home to New Zealand to celebrate the old man's 60th, and although I was only there for a week I've been a bit of a wreck since my return.  It was great to catch up with family and have a few too many beers but it really took it out of me.  I think I must be getting old!

Anyway, on to the wargaming...

On Sunday the long-awaited boardgame version of Phil Sabin's Lost Battles arrived on my doorstep.  It really is the box of goodness I'd been hoping it would be.  The artwork is stunning and the new rulebook is superb.

Here are a few in-progress shots of the Granicus scenario to give you a taste:


The only slight complaint I have is that the grassy areas on the river tiles are rather greener than those of their normal cousins, but once the counters are down I find that I don't notice it so much.  Phil Sabin, Mark Mahaffey and the Fifth Column Games team have done a great job on this, and I'm very happy I got my pre-orders in on this one.

Well, back to the game!

Thursday, September 1, 2011

Free Ancient Naval Wargame Rules

I just came across this on boardgamegeek.com - a link to a freely available game of galley warfare that only requires a few boxes of matches!  Looks like a great concept.   Might be worth checking it out!

Wednesday, August 17, 2011

Mago's last battle scenario (following Jim Webster)

Amongst the recent influx of new members on the Lost Battles yahoo group, I recognised a name from Slingshot - Jim Webster. This reminded me that I'd been meaning to convert his recent discussion of Mago's final battle in Insubria into a Lost Battles scenario. Jim's article, "The Italian Campaign of Mago" (Slingshot 276) gives an account of Mago's expedition to Italy and the battle there that resulted in the younger Barca's defeat in 203 and the subsequent evacuation of his army from the mainland. Incidentally, I can't actually find an accepted name for this battle. Wikipedia calls it "The Po Valley Raid", but given that there appear to have been four legions involved as well as a good 20-odd thousand Carthaginians, calling it a 'raid' might be a little insulting! Has anyone an answer to this?

Anyway, this OOB relies on Jim's research and conclusions, which are themselves based on Livy's account of the battle. Livy's treatment can be found in Book XXX.18 of his "History of Rome". Here is the relevant excerpt (Canon Roberts's translation) taken from the electronic text centre, University of Virginia:

********

During this summer P. Quintilius Varus the praetor and M. Cornelius the proconsul fought a regular engagement with Mago. The praetor's legions formed the fighting line; Cornelius kept his in reserve, but rode to the front and took command of one wing, the praetor leading the other, and both of them exhorted the soldiers to make a furious charge on the enemy. When they failed to make any impression upon them, Quintilius said to Cornelius, "As you see, the battle is progressing too slowly; the enemy finding themselves offering an unhoped-for resistance have steeled themselves against fear, there is danger of this fear passing into audacity. We must let loose a hurricane of cavalry against them if we want to shake them and make them give ground. Either, then, you must keep up the fighting at the front and I will bring the cavalry into action, or I will remain here and direct the operations of the first line while you launch the cavalry of the four legions against the enemy." The proconsul left it to the praetor to decide what he would do. Quintilius, accordingly, accompanied by his son Marcus, an enterprising and energetic youth, rode off to the cavalry, ordered them to mount and sent them at once against the enemy. The effect of their charge was heightened by the battle-shout of the legions, and the hostile lines would not have stood their ground, had not Mago, at the first movement of the cavalry, promptly brought his elephants into action. The appearance of these animals, their trumpeting and smell so terrified the horses as to render the assistance of the cavalry futile. When engaged at close quarters and able to use sword and lance the Roman cavalryman was the better fighter, but when carried away by a frightened horse, he was a better target for the Numidian darts. As for the infantry, the twelfth legion had lost a large proportion of their men and were holding their ground more to avoid the disgrace of retreat than from any hope of offering effectual resistance. Nor would they have held it any longer if the thirteenth legion which was in reserve had not been brought up and taken part in the doubtful conflict. To oppose this fresh legion Mago brought up his reserves also. These were Gauls, and the hastati of the eleventh legion had not much trouble in putting them to rout. They then closed up and attacked the elephants who were creating confusion in the Roman infantry ranks. Showering their darts upon them as they crowded together, and hardly ever failing to hit, they drove them all back upon the Carthaginian lines, after four had fallen, severely wounded.

At last the enemy began to give ground, and the whole of the Roman infantry, when they saw the elephants turning against their own side, rushed forward to increase the confusion and panic. As long as Mago kept his station in front, his men retreated slowly and in good order, but when they saw him fall, seriously wounded and carried almost fainting from the field, there was a general flight. The losses of the enemy amounted to 5000 men, and 22 standards were taken. The victory was a far from bloodless one for the Romans, they lost 2300 men in the praetor's army, mostly from the twelfth legion, and amongst them two military tribunes, M. Cosconius and M. Maevius. The thirteenth legion, the last to take part in the action, also had its losses; C. Helvius, a military tribune, fell whilst restoring the battle, and twenty-two members of the cavalry corps, belonging to distinguished families, together with some of the centurions were trampled to death by the elephants. The battle would have lasted longer had not Mago's wound given the Romans the victory.

********

Returning now to Jim's take on this, the reference point is a Roman army under P. Quintilius Varus and M. Cornelius Cethegus consisting of 4 legions plus allies. At a Lost Battles troop multiple of 4, this force could come out like this:

24,000 heavy infantry - 12 units of average legionaries.

c.10,000 velities - 2 levy and 1 average light infantry units.

c.5,000 cavalry - 5 average heavy cavalry units.

Quintilius Varus (uninspired commander; perhaps even uninspired leader) with the cavalry and Cornelius Cethegus (average leader) for a total fighting value of 79.

Mago's force could look something like this (again, these are Jim's numbers and my guestimates are just to fit them into the LB scheme):

12,000 veterans from Spain - perhaps 4 units of average heavy infantry and 4 units of veteran heavy infantry.

4,000 Africans - 2 units of average heavy infantry or 1 heavy and 1 light.

7 elephants and 2,000 light infantry - 1 African elephant unit with accompanying skirmishers.

8,000 Ligurians & 4,000 Gauls - mixing these contingents together we could say 2 average heavy infantry, 1 levy heavy infantry and one levy light infantry.

1,000 Spanish cavalry - 1 average heavy cavalry unit.

1,600 Numidian cavalry and c.400 Gallic cavalry - 2 average light cavalry units.

With Mago as an average commander (though I would perhaps think about making him an inspired commander to account for the positive morale influence Livy attributes to him in this battle) this would give a fighting value of 62 (or 68 if Mago is an IC).

So far so good. This OOB can be tweaked easily enough, but is hopefully a reasonable start given what is known of the forces involved and the way Livy reports the salient features of the battle. It would be possible to use a troop multiple of five and allow both sides more veteran units, but I'm not sure that the account warrants that (though playtesting might).
The terrain is, as Jim intimates, one of the the most difficult elements of the battle to attempt a reconstruction of, as there is not very much to go on. He suggests that Mago picked a site with restricted frontage so as to negate the Roman advantage in numbers, and posits terrain on the flanks to effect this. Regarding the reserve lines, no special considerations need to be made here, as Lost Battles already effectively accounts for reserves through the zone attack limits and the gradual attrition caused by units becoming spent and rotating out of the lead position.

As two legions with ala deployed side by side might take up around 1500-1600 metres frontage, we could probably go with 600m zones, giving us a battlefield 3kms across, an attack limit of three, and ample space for the other two legions to wait for their turn on the front line. To further restrict things as per Jim's vision we could add an impassable hill on one flank and perhaps another (normal) hill in the Roman wing zone of the opposing flank to interfere with the Roman cavalry deployment and give Mago time to bring the elephants in to support the cavalry on that flank if he so desired.

Alternatively, we could make the zones 500 across, do away with the impassable hill altogether, and consider the attack limit of three to be an adequate enough representation of a constricted battlefield as it is.

There does not seem any call for weather, fatigue, or surprise to have any special impact on the battle. Key zones should probably be in the centre as usual, though if the impassable hill battlefield is used the key zones could be shifted one zone farther away from that. Mago should certainly have the first move, and if he were classed as an inspired commander would have enough commands available to set up a strong defensive position with either battlefield configuration. Even as an average commander he would be able to do a fair bit with a deployment turn of 12 commands.

Well, there we go for a start. Thanks very much to Jim for an interesting article on such an overlooked battle.
This has also been posted on the yahoo group, though in an insufficiently proof-read form, I regret to say!

Saturday, August 13, 2011

Cannae refight

I went through a quick solo refight of Cannae using Lost Battles last night as I hadn't played a game for a while and felt that one was due.  Here are a few shots taken from during the game...

Opening scenes.


From the Carthaginian side, showing the Libyan veterans in their famous columns with the Gauls and Spanish out front to bait the trap and the cavalry to complete the encirclement.


The main Roman line, formed up in great depth, hopes to break clean through the Carthaginian centre.


Hasdrubal and his crack cavalry units approach the Roman right.


The Gauls shout and expose themselves, as was their wont...

The early going.


The Romans advance to contact, with the cavalry of the right scoring a double hit and putting Hasdrubal's men on their guard.


The centre, where both sides are hesitant in their initial attacks.


The Libyans on the Carthaginian right wait for their moment. 


Battle is joined all along the line.

Mid battle.


Both sides score hits in the infantry struggle with no clear advantage to either army.


Hasdrubal's cavalry fail to make any headway against the single unit of equites opposing them.


The Roman left centre inflicts a flurry of hits on the Carthaginian right centre, forcing it to contemplate a withdrawal or face a possible collapse.


Hasdrubal is still waiting for his breakthrough, and now all of his cavalry command is spent.  It is a brave effort by the determined Roman horse!

End game.


The Romans are having the better of it in the infantry battle, and their cavalry have held on both the left and the right.  Varro successfully rallies his troop on the left, but in trying to do so again is struck down and killed, taking a unit of heavy cavalry with him.  The advantage on that flank is now transferred to the Numidian lights.  Foolish Varro!


The Carthaginian right centre is about to crack, but in the nick of time Hasdrubal breaks through on the left.  Hannibal now takes his flip-flop move which reverses the turn order and gives the Carthaginians a second turn in a row.  He uses it to envelop the Roman centre and to withdraw his own under-pressure right centre.


With the encirclement complete and shatters beginning to mount, Paulus also falls in a rally attempt.  The legions take some Gauls and a unit of African veterans with them, but with both consuls dead and the army surrounded their spirit finally gives out.

With the Romans routing from the field the battle went to Carthage.  Despite the seeming inevitability of that result, it was very close, and for this the Romans can thank the heroics of the cavalry of the right whose resolute defense was only exceeded by their brilliant attack.  If Varro had not allowed himself to get killed in a vanity rally attempt on the other flank Rome may in fact have won the field.

As it turned out, once the VPs were tallied up the Romans did win on points under the handicap system by virtue of having inflicted so much damage upon Hannibal's host.  The Carthaginians scored 92 VPs, but the Romans beat them by 8.  This was no doubt a great consolation to the mothers, wives and children of those who lost their lives in the subsequent slaughter!

Again, another engaging game of Lost Battles.  It rarely disappoints.
Related Posts Plugin for WordPress, Blogger...