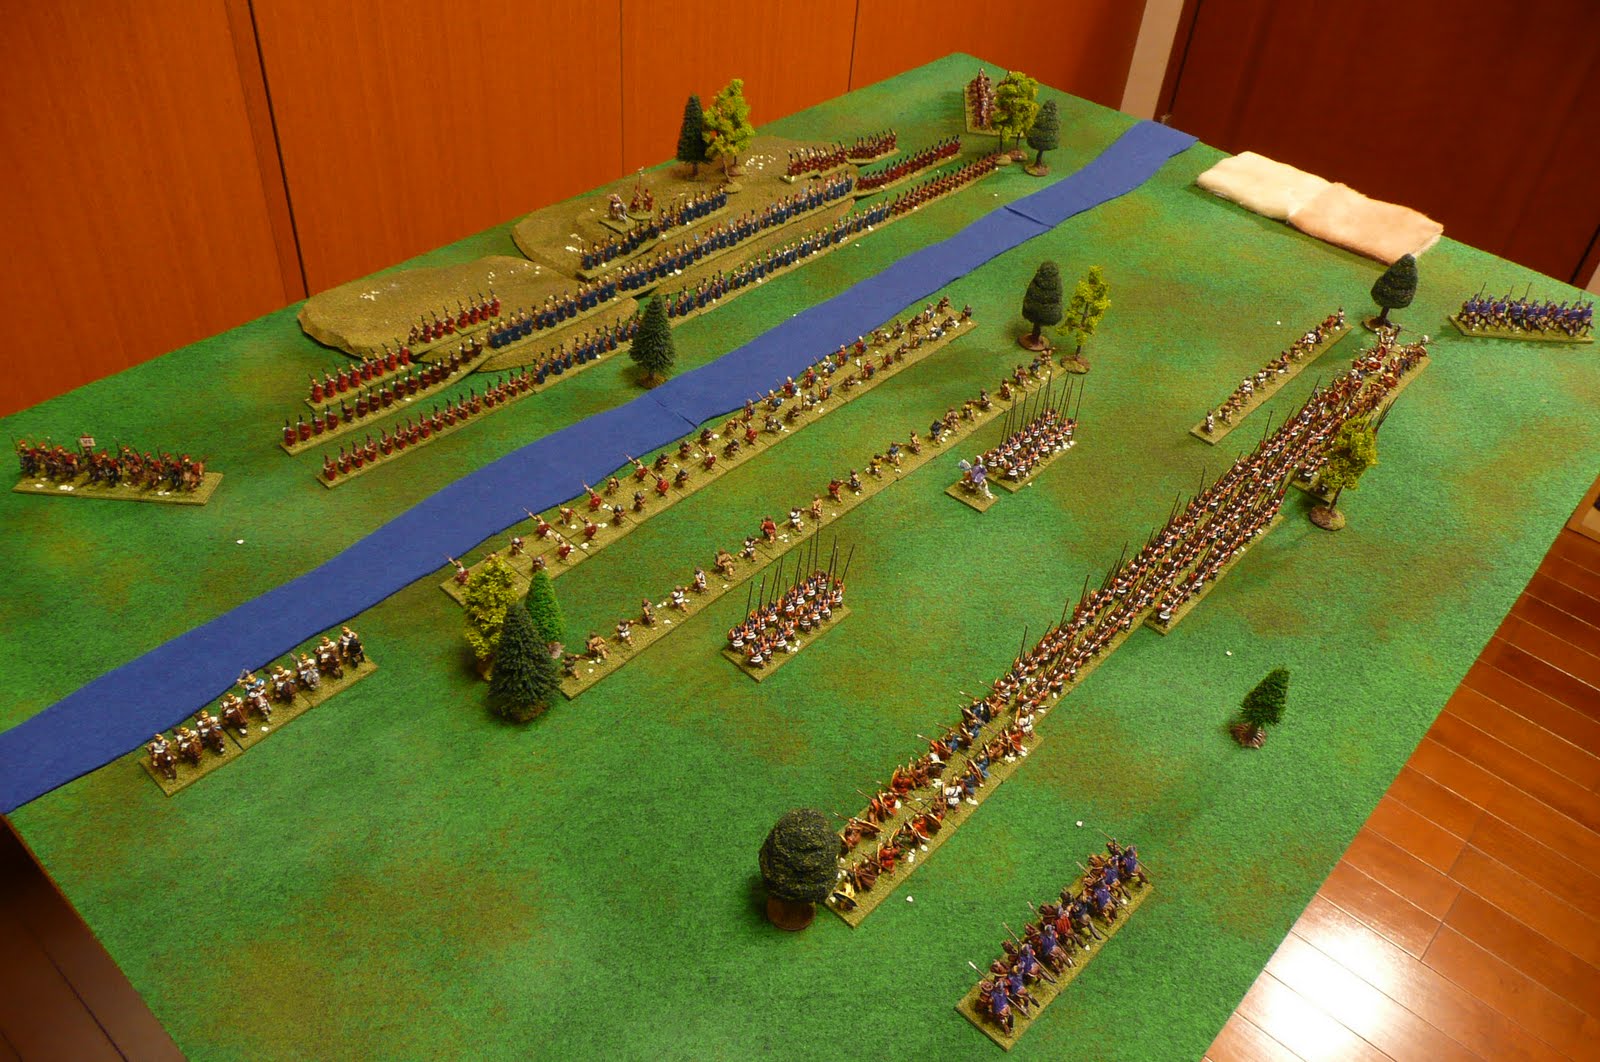
It's been a while since I've used the "Generating Lost Battles" scenario generation system for a battle, so I decided to revisit it and play out a Romans versus later Macedonians encounter. Both armies were of average army quality, meaning that each had a fighting value of 70. The rout the enemy victory condition was in place, so whichever army controlled the field at game end would be the winner.
The forces.
The Roman army ・a similar mix of unit types to that used at Cannae ・was mostly classed as average, but with some Greek cavalry added in as a concession to the theatre of war. Made up of twelve average legionary units, two levy light infantry units, four heavy cavalry units and an average commander, it was a typically solid Roman force, but with a little more punch than usual in its cavalry arm. At a troop multiple of three, this would equate to a consular army of around 18,000 heavy infantry, 6000 light infantry and 3000 heavy cavalry (including 750 Greek allies).
The Macedonian army was based upon that employed at Sellasia, with four units of veteran phalangites, seven units of average phalangites, four units of average heavy infantry, three units of average light infantry, two units of heavy cavalry and an average commander. Again using our troop multiple of three, this would have come to approximately 13,500 phalangites, 6000 thureophoroi, 4500 light infantry and 1500 heavy cavalry.
The scenario details.
The scenario generation process saw the fatigue and surprise check came up negative, while the battlefield terrain roll brought up the Granicus map*
(see note below). With an attack limit of three, fine weather, and both key zones in the centre, the Macedonians won the deployment check and elected to have the Romans enter from the Persian edge of the field. For their part, the Romans decided to take the first move.
Looking at the situation as a whole, the Macedonians have a slight edge through the quality of their veterans and lights ・as well as having more units on the field ・but to offset this the Romans have clear cavalry superiority and the legionary morale bonus. A betting man might favour the Romans on account of the cavalry, but another might back the Macedonians with their advantage in infantry and first choice of terrain. The attack limit however is low, which probably suits the Romans in their quest to prolong the infantry battle and give their cavalry time to complete an encirclement. On the surface the armies appear closely matched.
The opening dispositions.
The legions deployed symmetrically, with four legionary units in each of the rear (hill) zones. The velites advanced to the river bank in the centre and right centre, while the Roman/Italian cavalry split 2/1 in the left and right corner zones, with the single unit of Greek cavalry having been double-moved into the right flank zone to man the river bank.
View of the Roman centre.
In response to this the Macedonians placed the bulk of their phalangites in the centre rear and right rear zones, with two units of thureophoroi on each flank. The first unit of heavy cavalry tucked in behind the infantry of the left, and the second advanced on its own into the right wing zone on the other flank. Two of the light infantry units and all of the veteran phalangites double moved into the centre left and centre, leaving the stage set for the commencement of hostilities.
View of the battlefield after deployment.
The battle. On the second turn of the game the Romans reinforced the velites with heavy infantry and advanced the cavalry on both flanks. This outflanked the phalangites and in so doing lessened the number of combat factors in the phalanx's favour.
The Macedonians replied by advancing the infantry line and withdrawing the exposed unit of cavalry on their right. The Greek lights now won the skirmish battle, driving off the velites, who retreated back behind the triarii.
The infantry lines engage (turn 2).
Overview of the field (turn 2).
On turn three the heavy infantry lines began battering each other, with the Macedonian veterans and paired phalangites in the centre inflicting heavy damage. Their right also gained a degree of ascendancy, but on the left the Romans had the better of it. On both flanks the Roman cavalry had now advanced into contact with the enemy horse.
On turn four the Roman cavalry had immediate success, shattering the guard cavalry of the Macedonian right and advancing on and threatening the rear of the infantry line.
The Roman cavalry begin their encirclement of the Macedonian infantry (turn 4).
The Macedonian centre however attacked effectively, dramatically shattering two units in the Roman centre and forcing a withdrawal on the following turn.
The Roman centre under pressure (turn 4).
Turn five saw the Romans shatter another unit ・the thureophoroi supporting the cavalry of the Macedonian left ・but (as mentioned) they were also obliged to evacuate their key zone to forestall a total collapse in the centre. The victorious Italian cavalry were unable to take immediate advantage of their earlier success because of the rule preventing cavalry in enemy edge zones from turning inwards and attacking on the same turn, but they did position themselves to attack on the following turn. The Macedonians in their activation pressed the attack with their infantry as far as they could, advancing in the centre to take the Roman key zone, but leaving behind a token unit of light infantry to delay the predatory cavalry.
The Roman centre withdraws, and the Macedonians follow up into the gap. Despite the withdrawal, the cavalry encirclement is complete (turn 5).
Far from being overawed by the prospect of being set upon by the equites, the inspired lights about-faced to their rear, attacked, and scored a mighty double hit, shattering the following cavalry and turning the battle decisively.
Equites in for a nasty surprise (turn 5).
On turn six the other Italian cavalry unit shattered a unit of light infantry on the Macedonian right, but the pendulum had swung and in their own turn the Macedonian pike pushed on, causing yet more shatters. The effect of these strikes was exacerbated by the earlier loss of the Roman key zone, and this led to the dispersal of the remaining Greek and Italian cavalry. There was brief resistance from the Roman centre, but another shatter saw legionaries begin to rout and the remaining Roman units were now outnumbered 2:1. With more than four units shattered, the remainder being spent, not in possession of their key zone, and outflanked to their right, the Roman collapse was not long delayed.
The Roman left buckles (turn 6).
And the right follows suit (turn 6).
The conclusion.
The phalanx was absolutely devastating in this battle. I thought that the attack limit of three would give the Romans enough time to get around the flanks with their cavalry ・and so it proved ・but the centre had taken a flurry of hits and had to withdraw a turn too soon. This gave the Macedonians the freedom to move out of their own key zone, occupy that of the Romans, and then use the light infantry remaining behind to launch an attack on the following cavalry. The success of this double hit struck the Romans at their strongest point and was probably what decided the affair.
The scenario generation system worked well and created the opportunity for some xtra thinking around the battle (choosing board edges, working out deployments on the fly, trying to make best use of the terrain, dealing with the low attack limits, juggling the strengths and weaknesses of each army and so on. Although the battle was played solo, there was a freshness to it that appealed to this veteran of the historical refights, and the opportunity to pit a strong later Macedonian force against a solid Roman one was too good to pass up. It was interesting to see the legion and phalanx match up in a hypothetical encounter, and I think Lost Battles produced a credible result.
*
EDIT: Regarding the Granicus map, in setting the table up from memory I put the river in the wrong place. The actual Lost Battles Granicus scenario has the river in the 3rd row of zones (i.e., on the Macedonian side of half way), not in the 2nd. Thanks to Phil for pointing that out, and apologies to any other LB afficionados who may have been left scratching their heads due to my faulty memory!