It's the Labour Day long weekend in New Zealand and I've just got back from a two-day trip to Picton to take part in Navcon, a new naval wargaming convention organised by Picton local Paul Dalley. Paul is a naval wargaming enthusiast of the highest order, often posting in wargamery spots on the interweb, running wargame teaching sessions in person and over VASSAL, and generally doing his best to promote the hobby.
I first met Paul earlier this year after he had imported a shipment of Littoral Commander Indo-Pacific and Baltic games to be distributed to buyers in New Zealand. He dropped my copies of the games off in person and stayed for a day of gaming. We've since kept in contact and when Paul invited a number of naval wargamers to attend Navcon he kindly extended the invitation to me as well.
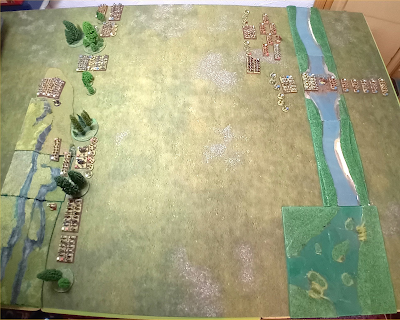
Saturday was arrival and set-up day. I got to Picton around lunchtime. Some were already there; others were arriving by plane or ferry. It was immediately clear that Paul does not do things by halves: he had commandeered the workshop and smoko room of a well-known Picton nautical museum as the venue! It made for an impressive setting.
Saturday afternoon two of us played games of Attack Sub, and three others played Flashpoint South China Sea. I was one of those three and liked the game. It is another in that expanding list of nouveau card-driven games using cubes for markers and cleverly calibrated to produce tense, closely fought, fast play games that are easy to learn and hard to master. Curiously, it is an economic and political game. There is no fighting at all.
Over three turns of six card plays per side players jostle for influence across five countries and three disputed areas. Cards are used to place influence cubes, play events, or score. Interestingly, cards are all either/or decisions. There are no combination actions.
There are tough decisions to make and not using dice forces a real battle to get ahead. You can't rely on getting the odds in your favour and then asking lady luck to decide things for you. Opportunities must be created.
In the end, China won this game by getting and keeping just enough scoring advantage to stay ahead of the chasing US.
It's a game that I will keep an eye out for.
Saturday evening Paul took us to a secret location (which shall remain secret as it is not generally accessible to the public!) to brief us on the following day's play, a three-threatre, three-round tournament for six players and umpire using the Littoral Commander Indo-Pacific game.
I was assigned to team USA, fighting for a foothold on the Island chain north of Luzon. It's a map I know well!
Game 1.
With two taskforces under my command, one made up of a guided missile destroyer and the other of an advance infantry force - HIMARS section, MRIC section, Infantry Platoon, FARP platoon - on an LHD landing ship, were to get to and hold a particular position on Calayan Island. With the weather poor airpower could not be used, sea movement was slower than usual, and cyber networks were struggling to cope with the ramping up of hostilities.
Commanders were given briefings papers showing situation, forces at their disposal, objectives, special rules, and the points available to buy Joint Capability Cards.
We had the evening to consider options.
Fortunately, as I was staying at an old friend's place nearby, the evening was occupied catching up with him and his family, drinking beer and messing around with guitar equipment, so I had no time to overthink things.
Slightly fragile the next morning I selected my cards and we were into it just after 9am.
As usual with Littoral Commander, the encounter was absolutely brutal. I knew my best bet was to get to the objective as directly as possible and to use deception JCCs to soak up initial enemy attacks. I focused solely on the objectives. These being: primary: to get a FARP unit established on Calayan Island; secondary: to inflict disproportionate losses on opposing forces; tertiary: to use territory gained as a staging ground for future operations, so try and keep your guys alive.
The first three of five turns were spent getting to the objective. Both sides were using command points to remove disruptions to the cyber network. My plan was to get there, hit the enemy any way I could while aiming for logistics units and sea assets primarily.
By the end of turn five I had secured the objective, sunk a destroyer and frigate and killed the logistics unit at the cost of my own destroyer sunk. Unfortunately, the opposition (the canny Darryl) had also landed on the island. Not where they wanted to be, but pretty close. Could I have done more to prevent this from happening? Yes, I could have, and I was later to rue not having done so!
After game 1 then we had a US victory in the Luzon sector. In the two other sectors, Ryukyu Islands and the Taiwan Strait, things were in stalemate, if I recall correctly.
Sadly, I did not get good photos because a) I had left my digital camera battery charging at home in Nelson, now some 150 kms distant from the camera itself, and b) I had inadvertently left my mobile phone torch on overnight, and only had 3% battery left!
The only photo of my game, at end:
And the situaition in the Taiwan Strait:

Game 2.
For game two (a couple of weeks after the initial battle) both sides had received reinforcements. The US had to maintain its hold on the islands and keep alive at least one HIMARS section to prevent PLAN shipping from being able to get through. I had my original force plus another two island defence taskforces. One landed with the original, one on a nearby island.
The PLAN had original forces plus two naval taskforces to pound us into oblivion. The fight was on right from the beginning. The land forces engaged, killing two Chinese platoons immediately, but at the cost of some of my own. Ammunition on Calayan was quickly used up. Darryl had targeted my logistics units, so there could be no ammunition replenishment. Darryl's naval assets pounded my infantry from distance, and then when offensive missiles ran out, by coming in to use his guns. In a moment of outrageous audacity, PLAN seaplanes brought in missile resupplies for Darryl's forces on Calayan, and succeeded.
By the end of turn six I had lost half of my forces killed. I had sunk a frigate and damaged a destroyer, as well as getting some of the infantry, but the butcher's bill was horrific. By virtue of one of my three HIMARs sections surviving this was also a victory for my US forces, but it did not much feel like it!
Seven out of my fourteen units were destroyed. Daryl proved again to be a formidible player and it was a pleasure to be able to watch him in action from close quarters. Thankfully, someone had an iphone charger so I was back in the game for photos.
 |
| A savage battle. US secure in one location, and still holding on in Calayan, but with PLAN destroyers pounding us at will and PLAN infantry in place on the island. |
In other theatres the Taiwanese Strait was still contested, but the PLAN had opened up a sea lane through the Ryukyus.
Game 3.
The final battle, this would be for mainland Taiwan.
This game I sat out because I had to return to Nelson, so Paul relinquished his umpire duties to take command of my taskforce.
The objective was simple: control Kaohsiung.
Both sides has three taskforces to put towards this objective, one naval, two land. The US had the advantage of occupying Kaohsiung at game start, but reinforcements were some distance away, and with PLAN forces in between.
Again, the fight was brutal. Missiles, ground combat, Joint Capability Card interventions saw both sides heavily reduced. Reinforcements were airlifted in for the US, and were destroyed as soon as they landed. At game end Kaohsiung was a wasteland. The US troops had been killed or moved out; the PLAN had not managed to step in yet.
It seems that the final battle was an apocalyptic draw.
 |
| Game start |
 |
The situation develops
|
 |
| Massively destructive land battles occur. Can the cards help? (Note the photos are much clearer after I wiped the dust off my phone camera lens!) |
 |
| The bloodbath continues. Remind me not to join the Marine Corps! |
And so my part of the weekend ended. The other six still had gaming planned for Monday, but I was jumping into the car and heading back over the hill to a nice warm shower and a comfortable bed.
It was an epic weekend superbly organised by the inventive and indefatigable Paul Dalley. A triumph on his part, and ably assisted by his wife who very kindly supplied us with food and beverages at regular intervals throughout the weekend.
It was great to meet some other Kiwi gamers. To take part in such a well organised and thoughtfully planned event was a treat.
Thanks very much to all who participated, and to Paul especially. I hope we have a 2026 version.