Prufrock's Wargaming Blog

Prufrock's Wargaming Blog
Showing posts with label 15mm. Show all posts

Saturday, September 14, 2024

Spartan cavalry done

The latest batch to come off the painting line is now ready for flocking. These are more Xyston cavalry with light infantry mixed in. It took me a while to get through these but last night helped by a little cider and some loudish music we got them finished off.


I used three shades of brown alongside grey and black for the horses. 

Tunics and cloaks were crimson with washes and highlights used selectively.


The light infantry I used crimson for either tunic or cloak and then other colours to add some variation.
  

I finished them off with my magic wash and a dousing in matt varnish.


Xyston are just lovely to paint. They have a lot of character and you never feel ashamed to plonk them on the table. Just as well - I have plenty more of them to do yet!

In other news, I'm off to Auckland tomorrow to meet up with my brother, who's coming from Adelaide, to go and see Iron Maiden. The old metalhead in me is getting quite excited. If you're wondering what the loudish music that attended last night's painting session was, you can now probably guess! 

I'm also really looking forward to catching up with my brother. We've not seen each other (apart from video calls, of course!) since 2019, so it will be a mighty reunion. We might even have a beer or two. 

Sunday, September 1, 2024

Tunis 310 BC, the battle.

Before we get to the action, there are two points to note. One is that for this game I am playing Lost Battles pure; that is, without the Favour of the Gods rule that allows players, when conditions are right, to demand the re-roll of an attack result. Suggested by Charles Vasey, this rule variation was adopted by Phil Sabin for the deluxe board game edition of Lost Battles. Since I am playing solo and feel there is a chance I will use the Favour rule more in aid of one side than the other I have decided this time to play pure, to reduce the chance of - shall we say - authorial intrusion.


Lines meet in a grassy area of North Africa....

The second point is that I will be mentioning lead units. Lead units are a Lost Battles game mechanism requiring one unit to be nominated to take the point position for each zone in the battle line and remain there until either the unit suffers a hit or is replaced by a different lead unit on a subsequent turn. 

This mechanism allows advantageous match-ups in attack, but as the lead unit will be the focus of enemy attacks on the other side's turn it is key in defence as well. While in attack, for example, it may seem like a reasonable idea to have a levy heavy cavalry unit in the lead position, it can seem quite unreasonable when it comes time to defend! Decisions around which class of unit to put into the lead position when are part of what makes Lost Battles such an engaging game. 

Anyway, enough of that. To the action! We have already seen in a previous post the initial deployment positions (turn 1), so let us move on from there.

Turn 2 - Carthage. 10 commands plus those of the two generals. 

In the right centre the chariots take the lead and attack the opposed Syracusan unit of veteran hoplites. Usually requiring a 9 on two dice to hit heavy infantry, the lead unit bonus and a combat bonus purchased from army commands reduces this to 7. A roll of exactly 7 sees the chariotry decide to prosecute an all-out attack (a hit to both the attacking and defending units) to hurt the precious veteran hoplites. Agathocles must attempt a rally. The rally fails, and his own veteran guard, being the only other unit currently in the zone, now takes the lead position. A Carthaginian light infantry attack follows in support of the chariots, but is unsuccessful. 


View from the Syracusan side.In the picture above a spent marker is visible next to the veteran hoplites. The Carthaginian chariots, also spent, have retired from the lead position they held at the start of the attack and are now at the rear of their zone. Since the attack the reinforcing infantry have moved up.

In the left centre no attacks succeed. The levy heavy cavalry in the central zone demonstrates only in order to allow the more defensively capable infantry to come up and move into the lead position. This was a tricky decision: if Carthage had used the cavalry to attack, they could have scored a hit on a 9, or all-out attack on an 8, but would then themselves be hittable on the Syracusan turn on a 7 (or 6 for an all-out attack) and an increased chance of a double hit (a score 4 above what is needed for a single hit). In this instance caution prevailed.

After the attacks are complete the infantry is brought up into the line in all three central zones.


View from the Carthaginian left after their turn. Each carpet tile is a separate zone.


Turn 2 - Syracuse. 12 commands plus those of Agathocles.  

The Syracusans are slow to action. Attacks by the forward units in the centre and centre right fail. On the centre left, Agathocles declines to attack so as to preserve himself fresh for later in the battle. If he had attacked, he would have been in the lead position in the next Carthaginian turn and with a corresponding increased risk of being hit or even killed. 

The rest of the infantry comes up into line. 


View from behind the Syracusan left center as the lines close. Agathocles can be seen on the left, having left the lead unit duties to some less valuable troops.


Turn 3 - Carthage. 8 commands plus those of the two generals. 

An attack in the centre yields a successful hit. The next attack roll is 12 - 3 above the required 9 - and it is converted into a double hit by an all-out attack. From five fresh units Syracuse is down to two - both hoplites - and Carthage has four of five units fresh. The Syracusans are somewhat rocked by the onslaught.

The attack from the left centre hits the Syracusan veteran light infantry. The roll is actually a double hit, but as the defending lead unit is light infantry supported by wholly fresh heavy infantry, only the first hit counts. No other attacks from this zone are successful. The veteran lights have done their job.

On the right another hit is scored against Agathocles' zone. If he had been in the lead position he would have taken the hit and been forced to attempt a rally. 

Five hits to one over the turn. Carthage is inflicting damage.


Spent markers litter the field after the ferocious Carthaginian attack.

Turn 3 - Syracuse. 9 commands plus those of Agathocles. 

Agathocles' left centre attacks, scoring a double hit on the vulnerable levy light infantry in the lead. Being levy, and with a spent unit in the zone already (meaning they are unable to ignore the second hit like the Syracusan light infantry could the turn before), they are automatically shattered rather than being able to pass the second hit to another unit in the zone. The morale roll is a 2 - safe so far.

The right centre and its formidible hoplites score three hits. The centre scores another. Six hits to none over the turn. 

The Syracusans are settling into their work, but there is more to do. Carthage still has three fresh units in its centre left and centre, and four fresh units on the right centre, where Hanno leads the veteran Sacred Band. Syracuse has four, two, and three respectively in the zones opposite.


Spent units now on both sides.


Turn 4 - Carthage. 10 commands plus those of the two generals. 

The Carthaginian left centre attacks. The average grade units are all spent, so a unit of levy grade infantry is put into the lead role. The attacks score two hits, leaving only two fresh units for the Syracusans in that zone, but the levy will be vulnerable when attacked themselves. 

In the centre another two hits see the whole of the Syracusan central zone now spent. All five units spent in just two rounds of attacks. Future hits there will cause units to shatter. Is it time for the Syracusan centre to pull back to buy some time? This will be a question for next turn.

The Carthaginian right then attacks. Tension is high, but the attack fails to score any hits. Carthage has managed four hits to none this turn. Agathocles' army is running out of fresh units, but his own zone is still relatively intact. 

Hanno and Bomilcar are in a strong position.


Turn 4 - Syracuse. 11 commands plus those of Agathocles. 

Agathocles loads up on attack bonuses where he can. His right centre attacks the lead levy heavy infantry and scores a double hit, shattering the unit outright. The morale test this causes sees the spent light infantry in the same zone rout. Elsewhere, morale holds. No more attacks on this zone succeed.


View of the Syracusan right centre on the attack.

In the left centre, Agathocles decides that it is now time for his guard to take the lead position. With his centre in danger he decides to force the issue. His guard unit is assigned a double attack bonus. He is hitting on a 6 (9 for a double hit) or 5 for an all-out attack. He rolls a 10 and a double hit is scored. The next attack also succeeds by converting it to an all-out-attack. The remaining attacks are unsuccessful, but even so there is now only one fresh unit - Hanno with the Sacred Band - left in the zone. It will be a fight between the two leaders' guard units next turn.

In the centre, the Syracusans ponder whether to stay in place or pull back. If they were only facing infantry, pulling back would be a good option. They would about-face and retreat one zone. The enemy following up next turn could move into the vacant space but would not be able to attack; in effect, this would buy a turn's grace for the left and right to try to win the battle. But in this case Carthage has fresh cavalry, and cavalry can move and attack in the same turn. Cavalry attacking spent heavy infantry from the rear would not be a happy proposition. Moreover, to about-turn and move the hoplites out of the zone would require four commands (they don't like to turn around in Lost Battles), so they decide to stay and fight it out.

Their opponents in the lead role are levy heavy infantry. Once more they are vulnerable: another double hit is scored on the lead unit, which shatters the levies outright. A poor morale test then sees the other levy units in the zone flee the field. A subsequent attack also scores a hit, shattering one of the remaining average quality units. 

The Carthaginian centre is now reduced to a single spent unit. The decision to stay in place has been vindicated!

Turn 5 - Carthage. 4 commands plus those of the two generals. 

With the centre melting away, the chance to defeat the Syracusan there is gone. For Carthage to win now, the formula is simple: Hanno must kill Agathocles. A roll of 1 for commands does not, however, give too many options for attack bonuses.

The left centre attacks first. Two hits are scored, leaving the Syracusan right completely spent. A third hit, which would have caused a unit to shatter, proves elusive.

It is now Hanno's turn. He is in the lead position and needs a 7 to hit Agathocles' guard. He rolls an 11, a double hit! Agathocles is forced to make a rally roll. A high score will cancel the hit; a low roll will kill him. The roll is high and the hit is cancelled. He makes a rally roll for the second hit. The dice are shaken in the hand... again he rolls high. Again the hit is cancelled. Fortune has a favourite! The remainder of the attacks from this zone fail.

There is just the centre to activate. The lone unit there makes its attack. Success! At last a Syracusan unit is shattered. 

Carthage is left to rue what might have been.


The field after Carthage's attacks.


Turn 5 - Syracuse. 11 commands plus those of Agathocles. 

Leading off the with right centre, Syracuse mounts its attack. A double hit is scored on the levy unit in the lead. The unit shatters. As there are four or more Carthaginian units shattered now, the morale test is taken at a -1. A 1 is rolled; there is is a catastrophic morale failure, and the entire army streams from the field.


A double six does the trick!

Results:

Carthage scores 6 points from units shattered, 38 from units spent, 18 from the handicap.

Syracuse scores 22 points from units shattered, 42 from units routed, 12 from units and leaders withdrawn.

62 vs 74 - it is a narrow victory to Syracuse. 

Thoughts:

Initially the battle seemed to be favouring Carthage, but once Syracuse had punched through the better infantry, the poor quality of Carthage's levy second-line troops told. A succession of double hits allowed Syracuse to quickly reduce Carthage's fighting fitness. The brutal dismantling of the Carthaginian centre in turn 4 turned the battle, but another key moment was Agathocles managing to rally both hits scored against him on turn 5. 

It was interesting to see how many double hits were scored across the game. When playing with Favour of the Gods, many double hits are cancelled and re-rolled. Here, playing 'pure', the double hits had a noticeable effect and the battle finished more quickly than I have been used to.

It was enjoyable to play a lesser-known battle in a lesser-known war, and to have such an interesting mix of troops on the table. Fresh hoplites are deadly against heavy infantry!

I might leave the table set up and see if SP and I can find time for a game this coming weekend. 


** with thanks to Duncan Head, the original account of the battle can be found in Diodorus, here.

Monday, July 1, 2024

A new approach to painting.

As a painter, I've tended to be one of those people who works in big batches. In my case it has made for periods of great progress followed by long fallow patches. Having just come out of a fallow patch that, for various reasons, lasted about five years, I've been wondering if it's time to change my approach.

Back in May I took stock of the leadpile and thought about what I was going to do with all these figures I had yet to paint. Was I going to give up further progress as a bad job and start selling things off or was I going to get back on the metaphorical horse? I wondered if I could set myself a goal of painting two figures a day until the end of the year. If I could do that, I thought, it would give me a) more figures to game with and b) a potential way to move forward with the rest of the unpainted collection.

As per usual, my default was to go into big-batch mode. I got about 80 foot painted, and then started on a large cavalry lot, which I have just finished. All of this of course requires decision-making at scale, time spent prepping in large numbers, and then painting one or two steps a session (64 spears in brown, 32 tunic base colours in light grey, 32 in a variety of others, etc...) until the batch is finished.

What this means in practice is my hobby space is completely taken up with prepped figures, paints, bits and pieces, and the sense that you are on a big job. You can't, for example, set up an evening game if you feel like it, because to do so would require you to pack everything away to clear space, play the game, and then put everything back out again.

So I decided to try a new approach. For the moment, I'm calling it 'four for now'. Four to a base is how my infantry figures are organised for painting, so why not just do four figures to (almost) completion in a session? You see immediate progress, you shorten the time frame for playable numbers, and you can do it all in a much a smaller space footprint. I can store prepped figures elsewhere, so when I want to play a game, I can. 

I suppose the idea is to make painting less of an all-or-nothing thing, so that I can work on getting through the figures I have but without making it all-consuming, and by making painting something I am always doing in little bits. 


My first 'four for now'. Washes, base painting and shield patterns to come when I'm up to bigger numbers.

We'll see how long I last! 

Friday, June 28, 2024

Next batch of figures

I had previously harped on here about how keen I was to next get stuck into painting some Persians. Well, so much for that: this next batch (due for magic wash tomorrow) is Greek cavalry and hamippoi of the Theban variety. 


Xyston figures. My goodness, they are a treat to paint. I am a workman, not an artist, so am not able to quite do them justice, but even so, they are wonderful to work with. They do take a bit of prepping, mind....

I'm also working on some 3d printed elephants and from the Xyston pile have another 50-odd Greek cavalry and 80-odd Theban hoplites prepped. 

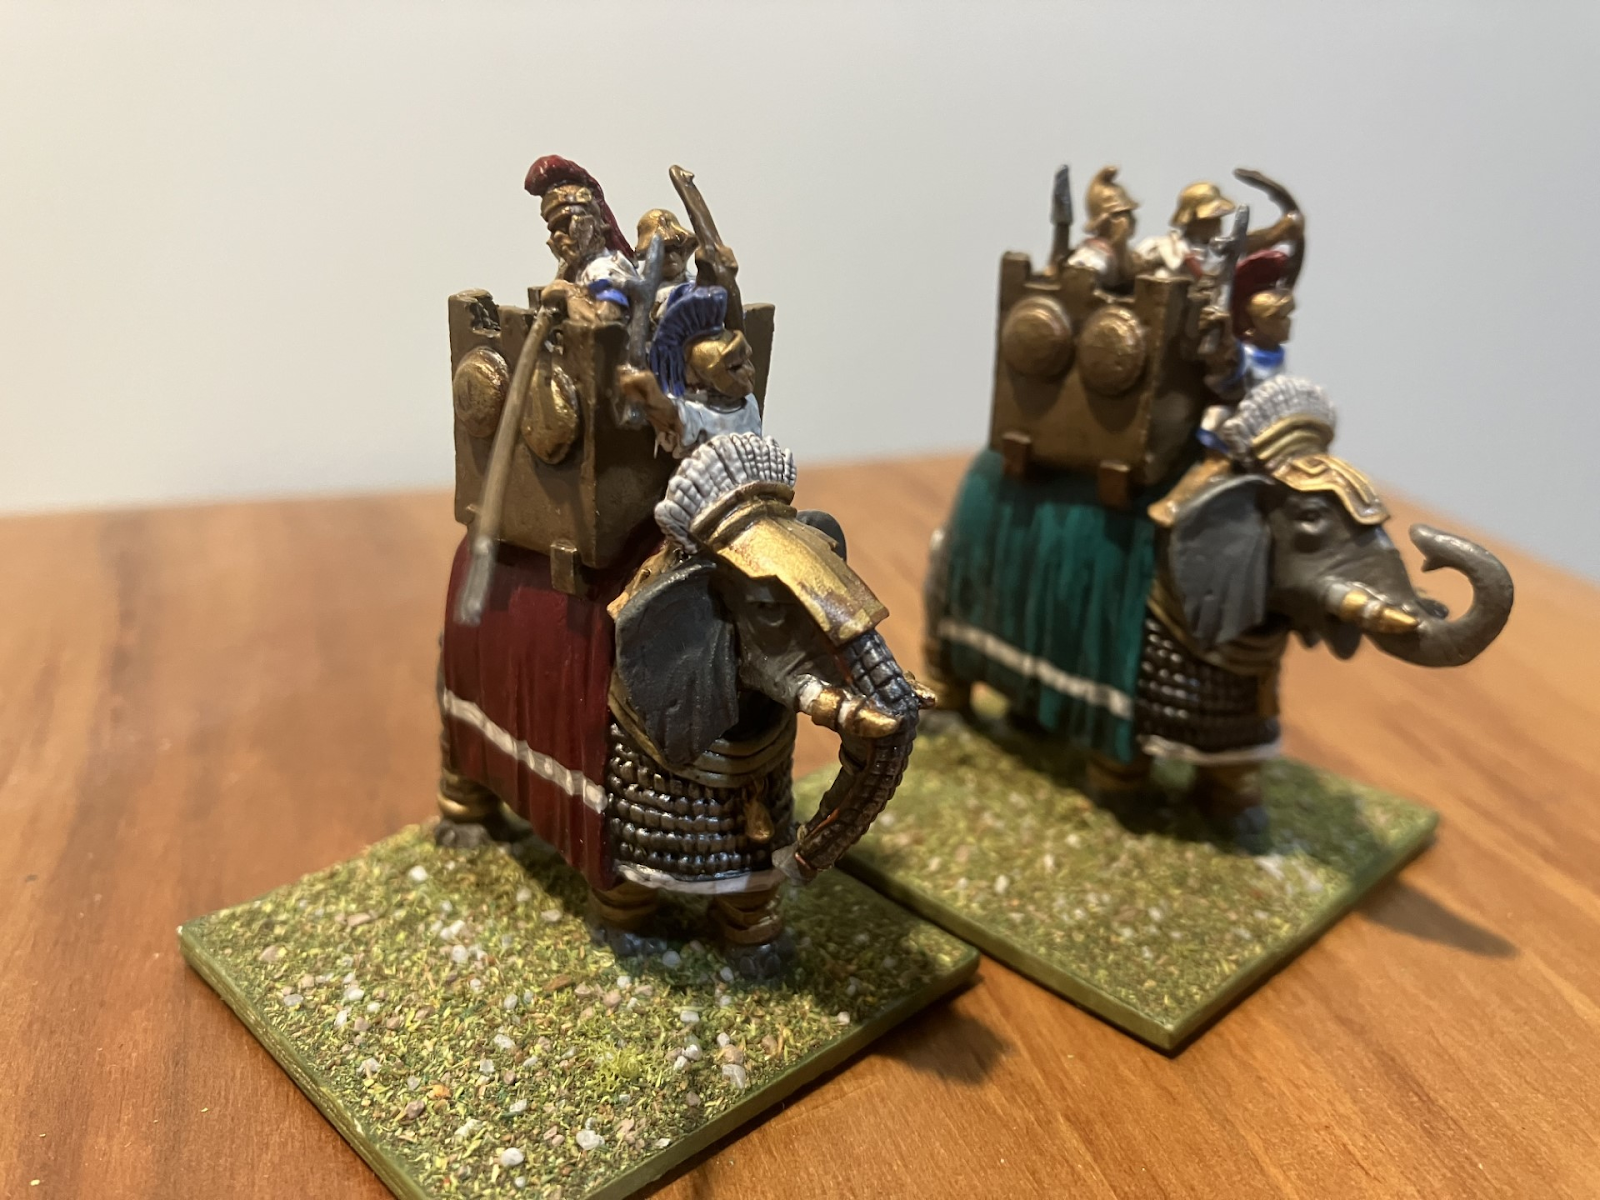
Successor beasts from Potbelly. Drybrushing underway.

With work extremely busy at the moment but without much tangible to show for it it has been nice to come back home to practical hobbying and feel like you are getting somewhere in at least one aspect of your life!

Monday, June 3, 2024

Sentinum 295 BC with Lost Battles

SP came around tonight for another session of Lost Battles. Our last ancients game was, looking at blog records, late last year, when we played Zama and SP carried off the Washbourn Trophy in triumph. This time around we would play Sentinum. 

SP elected to play the Romans. They have an advantage in fighting value, 69 as against 60 for the Samnites and Gauls, but most of that is taken up with superior Roman generalship. The armies themselves are pretty even - five units of cavalry for the Romans - one veteran, the rest average; five units of mounted for the coalition, four heavy cavalry, one chariotry.

In infantry the coalition has fourteen units of heavy infantry against the Roman ten legionary units and two levy light infantry units. The numbers favour the coalition, but the Roman legionaries have better morale and when fresh are harder to hit.

The Romans have an average commander in Fabius and an uninspired cavalry leader in Decius Mus. The coalition has Gellius Egnatius as an uninspired infantry leader.

So far there is not much between the armies, but at Sentinum the coalition is classed as fatigued: that is, their staying power is compromised. Once a Gallic or Samnite unit has taken a hit, it attacks thereafter at -1, meaning in effect that all things being equal a fatigued heavy infantry unit up against a legionary unit will need 11 or 12 on two dice to to score a hit, so the coalition troops have to try to make an impact early and keep as many units fresh as possible for as long as possible.

Looking from behind the Roman right.

As it eventuated, there was not too much need for deep strategy: it was one of those rare games when everything went right for my side and nothing for my worthy opponent. 

Our right wing engaged immediately, and the infantry in the three central zones advanced. I kept the cavalry on my left refused. They were outnumbered and I felt it was best to be circumspect at the outset.

One wing and the centre engaged. My refused left can be seen on right of the picture.


The Gauls on my right quickly made inroads and the chariots burst through after just two turns of combat, shattering one unit and routing the guard for the unfortunate Decius Mus and denuding the Roman left of any meaningful defenders.

A double hit is scored, Decius Mus is unable to rally either of them, and the Roman left is lost.

Why did the Romans not invoke Favour of the Gods and force a re-roll, Lost Battles afficionadoes may ask? The reason for this is that I had already had such frighteningly good dice in the centre that SP had invoked the gods there, and with the token now in my hands, could not do so again until I had issued an invocation of my own. 

The action continued apace.

Galvanised by the early loss of his left wing and cognisant of the need to fight fire with fire in the centre, SP put as many command points into combat bonuses as he could. This paid off with hits against the Samnite left centre under Gellius. But in doing this he neglected to make use of his cavalry superiority on the right.


The refused Samnite cavalry wing is left unmolested.

Gellius Egnatius leads the Samnites as the centres continue the fight. The victorious Gallic cavalry and chariotry can just be seen in the distance in behind the Roman left.

The Roman rear is now exposed and with three units to use for this purpose, the Gauls focus on getting deep in behind the Romans to interfere with their morale and prepare to strike in future turns. SP pulls two units of cavalry out of the line on his right to respond to the threat.

A double hit by Gellius on the Roman right centre sees another unit shattered and the levy light infantry flee.  

With options running out for Rome bold attacks are initiated by the cavalry, now split across two zones to meet threats from two directions, and by the legionaries in the central zones.


Black arrows show direction of Roman attacks in turn 6.

The chariots are hit, but do not break. The other cavalry fails to hit at all. In the right centre, a mighty effort smites Gellius's unit, but in a scene which epitomises SP's luck tonight, Gellius rallies the hit. There is another successful attack in the central zone, but not enough to turn the tide. 


A series of attacks by the coalition sweep away the remaining Roman cavalry and Fabius's sector of the infantry line. The rest of the army holds on for the remainder of the turn, but Gellius administers the coup de grace on the turn after.


Final attack: Gellius rolls up the Roman line, already beset front and rear, with an attack from the flank.

It was a rather unfortunate game for SP. He stuck at it but you can't do much when the dice are your enemy.

From my perspective The Gauls and Samnites were able to keep just enough units fresh to avoid the worst effects of fatigue, and seemed to manage to align their most important attacking moments with their most potent dice rolling. The luck went entirely my way, but it was interesting to see a Lost Battles Roman army unexpected defeated on the table: beat the cavalry, surround the infantry, wear them down until morale starts to fail. 

It was pretty much the historical formula.

Victory Points:

Rome: 

The coalition spent: 3 x average heavy cavalry, 1 x average chariot, 9 x average heavy infantry equates to 52 points

Samnites & Gauls:

Roman shattered: 2 x average legionaries, 2 x average heavy cavalry, 1 x veteran heavy cavalry equates to 32 points

Roman routed: 2 x levy light infantry, 8 x average legionaries, 2 x average heavy cavalry equates to 46 points

Withdrawn: 1 x average commander, 1 x uninspired leader, equates to 9 points. 

Handicap: 18 points

Fatigued: 20 points

Total points for Rome: 52; for Samnites & Gauls: 125, for a major victory.

I now get to keep the Washbourn Trophy for a spell, which makes a bit of a change!


Sunday, June 2, 2024

Libyans on base

There have been a few delays but we've finally got to the fun part - taking the freshly varnished figures off their temporary strips and arranging them on their bases. I think I've said it here before, but it's the part of the painting process I enjoy most. 

The hard work is done and the game - as it were - is almost afoot.

To delay things further, the reason it took about four weeks to get these chaps to this stage is two-fold: one, I decided to bolster the ranks a little, and two, it has been difficult to find the right paints I use during the basing process.

The extra figures I got are from Potbelly Miniatures, a 3d printing enterprise based in New Zealand, of whose existence Mike of Bucellarii kindly apprised me a few posts ago. They are nice figures, but the resin used presented a challenge - none of my glues would work! It took me a bit of time to find the solution, which turned out to be Cyanoacrylate from Avetek NZ. 

The other problem (still not resolved, unfortunately!) is paint. In Japan I used to finish figure bases in Tamiya Flat Green, cardboard bases in any variety of green or khaki, and the edges of said bases in Mr Hobby H58, Interior Green. In order to maintain consistency, I wanted to use the same colours over here, but had not got them yet. I therefore ordered a few pots of the H58. These took about a week to arrive. When I went to use them, I found to my surprise that it is no longer the same colour. I wondered if I'd ordered the wrong code, and went to check: apparently Mr Hobby changed the formula in 2019. 

So I was stuck. I had two pots of paint that won't do the business. Do I order some black and try to mix them to the right colour or find something from another manufacturer that's closer? In the interests of saving time and shipping costs I tried buying a Humbrol pot from a local store, but that is not quite right either. Hmm.

It wouldn't be so bad if this were Japan. It would take ten minutes to find an alternative hobby paint at the local Joshin, and even if you got things wrong it would cost you about $10 for the various paints and thinners I've picked up so far. In New Zealand these mis-steps have cost me $80 and I still don't have the right colour. Oh well. It's never going to do much for your equilibrium comparing prices of hobby products between NZ and Japan!

So I will just use the wrong colour in the meantime and hope it is only me that notices the difference.

The figures drying on their bases (with the offending H58 in the background!)

One thing I have reason to be thankful for is that I was able to bring my non-hobby acrylic paints back here from Japan with me, so it's rare for me to need to actually buy any paint. I shouldn't grumble too much!

Anyway, on to the flocking stage, and I have a game planned for tonight with SP, so it should be a good long weekend.

Wednesday, May 15, 2024

Ventures into the leadpile and other matters

Now that I seem to have got myself back into a bit of a painting routine* and have nearly finished my latest batch of figures, I've naturally started to look at a) what to prep next and b) what next to buy. 

I would dearly like to get my Achaemenid Persians to the point that they could be fielded for a Lost Battles scenario or two, but it would also be an asset to have more Hellenistics painted up. Greek City State and Successor scenarios make magnificent spectacles, but Plataea, Issus and Gaugamela would look fairly presentable as well.  

What to do.

Well, I had a look at the lead pile, or at least the most relevant portions of it.

Hellenistics

Geez, that's a lot to paint... 


The Persians

And so is that... 

For the Persians, ironically enough, what sticks out is what I don't have. There are no Immortals or Sparabara in the pile, and I want to be able to cover Early Achaemenids as well. I've placed a test order with Potbelly Miniatures at the suggestion of Mike, author of the excellent Bucellarii blog, and am also going to look at putting in an order at Museum for some of their Z range Persians. Right at this moment I am probably more interested in gaming the Persian invasion of Greece than I am in Alexander's expeditions (for which I have, unpainted, the Persian figures already). I don't however want to rush in and buy figures that may not fit with the rest of the collection. I will get a few samples and make sure I'm going to be happy with what I do finally order.

As always, the painting focus is on economy of action: the quicker I can get to playing status the better. Coming off painting Libyan foot, more phalangites (for Raphia and the bigger Successor battles) is tempting - it's basically the same colour scheme but with pikes - but that is also the challenge: would painting ennui await? 

While economy of action is all well and good, at some point, with any army, you simply have to knuckle down and do the work. I think that's about where I'm at with the Persians. I have quite a few skirmishers, archers, Egyptian spearmen and cavalry done already, but nowhere near enough to field a Lost Battles army. If I want to make decent progress I need to just sit down and do it.

That said, at the moment I think I will prevaricate, prep some Greek horse, and see what the new orders look like when they arrive.

One of the things I have to be wary of (and seeing the huge amount of lead in the Hellenistic pile above provides proof!) is a tendency towards the never-ending army syndrome. For a variety of reasons, I buy figures for armies that are, by most reasonable measures, finished. A sensible person would be devoting their dosh and time to working on their other armies that are not. 

But who said that you have to be sensible in wargaming? 

State of my 15mm Ancient-era armies.

Complete:
Polybian Romans (x2). Marian Romans (x2). Gauls. Iberians. Early and Later Carthaginians. Macedonians/Successors (x1.5). Latins/Samnites.

Incomplete but fieldable for some scenarios or as contingents:
Hoplite Greeks. 

Fieldable as contingents, or for half-sized games:
Parthians. Numidians. 

Awaiting the brush:
Achaemenid Persians. Second Successor army. Polybian Romans (to replace some figures I'm not happy with). Second hoplite Greek army.

Looking at this, it is clear what I need to do: just get on with the Persians, and throw in some Successors / Greeks in small batches every now and then for a change.

 *at the cost, sadly, of my guitar-playing routine!

Thursday, May 9, 2024

On the painting table

A little later in the year than I'd hoped, but we're finally making a spot of painting progress at the house of Prufrock.

I had planned to have these ready to do Ilipa for the Society of Ancients Battle Day, but as so often happens, the plan did not come to fruition!

These are work in progress Carthaginian spearmen with hoplon, who can be used as Sacred Band for earlier periods or Libyan infantry for Hannibal's war. They are from the Corvus Belli range, but produced in plastic by the Plastic Soldier Company. They are lovely figures. I'm a little pickier with their cavalry, but the Corvus Belli infantry ranges are superb. Unfortunately, they seem to be out of stock at the Plastic Soldier Company now, so when or whether they will be available again I don't know.

Getting close to completion...

Which means I'd best make the most of the ones I have. There are enough for four 16-man units, but as my initial purchase was a couple of figures short, they sent me an extra 8, meaning if I scrounge the bits box and repurpose some command figures I can probably field 72 altogether.

Batch 2 still has more work to do


I'm yet to decide whether to leave the shields as they are or add designs. 

Painting guide:
Dark grey undercoat
Mid brown for spear shafts, sandals, shield backs
Flesh for arms, legs, hands, faces
Light grey for linen armour and shields
Red brown for straps, scabbards
Red for tunics
Dark silver / iron for spearheads
Antique bronze for helmets, shield edges.
White highlight for linen armour, shields
Gold to highlight bronze, shield edges
Silver highlight for spearheads
Highlight for tunics
Green for bases
Magic wash
Highlight for flesh, other areas that might need a touch up
Spray varnish x 2

I haven't been in a painting routine for a long time so am just trying to do a bit each night before dinner and/or after the kids are in bed. I'd like to get some Greek cavalry done next and then try to make a dent in my Achaemenid Persians.

We'll see how we go!


Tuesday, April 9, 2024

Review: Forged in Battle 15mm Later Seleucid Elephants

 (This review was originally written for Slingshot, the Society of Ancients' Journal, after a review pack of elephants was passed my way. For whatever reason, the review was never published. I happened upon it while going through some old files and thought I would post it here)

Forged in Battle 15mm LATER SELEUCID ELEPHANTS (code MS05) review.


Contents

The pack comes in ten pieces: two identical elephant models with attached towers – the towers are filled in, not hollow – two elephant heads, one with armoured trunk, one without; two identical mahouts in tunic wearing crested Attic helmets (though there may be variations – the website image shows a differently-attired mahout in what appears to be tunic and headband), and six crew figures modelled from the torso up, to be attached to the top surface of the tower. The crew figures are comprised of two archers, two javelinmen and two pike-bearers. They are in various combinations of linen armour, breastplate, and tunic, and wear Boiotian, Attic or Phrygian helmets. In my pack the two sarissa bearers are in different poses, but the archers and javelinmen are not.


Assembly

The pieces required a bit of filing to fit, but that is to be expected. The head of the elephant is attached to the body by means of a male/female joint, but the mahouts had to be filed thinner, their legs positioned carefully and glued to the front of the tower to allow the heads and bodies to meet. I used epoxy putty to fill in the gaps and ensure a strong bond.


The towers are cramped and I could only fit two crewmen per tower, but others may have better skills and more patience at fitting the third figures in than me. I also attached pikes before checking the crew positioning, which resulted in one pike being angled too steeply and the figure thus unusable. Lesson learned.


Modelling

After assembly it became apparent that there was a modelling oversight: the left-hand side of the elephant has the covering cloth right up to the elephant's front shoulder, but the right-hand side does not, so that when viewing from the left the mahout is sitting on the cloth, but from the right he isn't. Ideally you would want to use putty or green stuff to give the impression that the coverings meet, and do it before the mahout is attached. Unfortunately, I didn't notice this until too late, so I have used paint to try to do the same job. Otherwise, the sculpting is crisp, the details are good, and the proportions are attractive.


In terms of dimensions, the elephants are taller and slimmer than the other Seleucid or Indian elephants in my 15mm collection but they are still within the possible size range of the breed so they make for good variety.


Comparison with Chariot elephants (two in centre)


There are no straps across the elephants' rear ends, so people wanting those will need to add them in with putty or paint.

Comparison from the rear


Summary

They are a little tricky to put together, but they look grand. The folds in the cloth, the elephant armour, and the ridges on the elephant skin are very nice to work with and respond well to dry-brushing and washes. They are a very good addition to the current 15mm Successor elephant options, and the sculptor should be commended for going for a slightly different look. These models will work alongside Chariot elephants, for example, and the army will look much the better for their presence. I would certainly recommend this set and am now considering putting in a Christmas order with Forged in Battle, even though I shouldn't really be buying up even more lead…


Saturday, November 11, 2023

Zama with Lost Battles

Old school mate SP was free tonight so we arranged to play a wargame. Being a bit tired of the various iterations of Undaunted, it seemed like a good opportunity to set up a game of Lost Battles, and Zama an excellent choice to blood my new Carthaginian elephants. 

Simon took the Romans. They are more straightforward to manage when it has been some time between games, and I was quite happy to have some nellies under my command again!

We used the historical scenario rather than the free deployment version to speed things up. To briefly describe the situation, both armies have a core of veteran infantry, but the Romans have significant cavalry superiority, and the Carthaginians have had to bring in less able troops to make up numbers, these not being a match for the veteran legionaries. 

Carthage hopes to hold out on the flanks as long as possible, damage the Roman veterans to score points, and maintain a bit of flexibility to respond to circumstances as they develop. For Rome the plan is to negate the elephants with light infantry, hold with the legions, win on the flanks, and grind the Carthaginian infantry down. 

View from the Carthaginian right during turn 2.


And view from the left.


It begins well enough for Carthage - a smattering of successes as the elephants and cavalry engage. Hannibal, feeling the pressure to hurt Rome fast, attacks with desperation; by contrast, Scipio, whose initial anti-elephant tactics prove wickedly adept, relaxes into a watchful and measured prosecution of the battle.

The elephants have been beaten back, injurious to their own side, by the Roman skirmishers.

The battle develops a pattern - ambitious Carthaginian efforts thwarted by careful Roman response, then countered by Roman riposte. In this way the Carthaginian right wing is bested. The Roman line, tested in the centre and on the right, holds. The Numidians on the other wing, countrymen matched against one another, circle and feint.   

The Roman heavy cavalry breaks through.

Carthage pulls infantry from the line to prevent cavalry encirclement at the very moment Rome presses with the legions. The cavalry breakthrough is contained, but the line buckles. Everywhere Carthage strives for effect, but everywhere it is held just short of success.

Hannibal urges the men on.

Carthage's last infantry reserves are thrown in - the veterans of the Italian campaign. Again, Rome holds. 

But on the left there is success at last - Masinissa is threatened by Hannibal's Numidians. One more hit will bring the wing to crisis. The hit does not come.

The fight on the Carthaginian left.

All along the line the pressure mounts. 


Rome outlasting Carthage in the infantry fight, but there is hope on our left.

Abruptly, Masinissa breaks his opponent. He is through! Hannibal pulls elephants back to head off the victorious horse.

The cavalry is contained - just - but the main line is weakening.

Rome remains steadfast. Hannibal rallies his troops under pressure. On the right, there is a chance to see off the Roman cavalry.

One chance! But Rome passes the test.

And with that, the line collapses. Multiple hits in multiple locations have driven the Carthaginian army to breaking point.

The left and right centres have been denuded of troops. The collapse starts on the right, and all run.

The moment just before Carthage is swept away.

And Scipio takes the battle and the points, 116 to 83. A clear victory.

Well done to SP. He played a strong, calm hand. He used favour of the gods rerolls judiciously, aiming to reduce potential damage over pressing for success, and kept giving himself chances to hurt me until eventually he did.

It was a tense, exciting game throughout. I felt I was just one good turn away from doing some serious damage, but SP made sure that that turn never came.

Really good to play Lost Battles again, and SP is keen to go again as soon as we are able.

Saturday, October 21, 2023

First figures painted in five years

There is a minor celebration underway at house Prufrock - we have painted out first figures for, as the title suggests, five years. It doesn't seem that long, but it is. 

Anyway, the figures are from the Fighting 15s (old Black Hat) Punic Wars range: their Carthaginian elephants and crew. 

The painting is a bit rough, and although I have glasses now, four years working with computers eight hours a day has taken its toll, and I just don't see the detail as well as I used to. These photos do show me that washes are going to have to be even more of a friend than they have been previously! I might also have to look at contrast paints. I can still 'paint between the lines' but I don't see well enough to highlight in a way that is not blobby. That may improve with practice, but definitely some technical adjustments are in order. 

Anyway, I'm glad to say the duck has been broken, and I will now have enough Carthaginian elephants to be able to stage Bagradas in Lost Battles. 


The next picture really shows the 'blobbiness' of the face highlight I did post-magic wash. I will be able to improve this by adding another wash to bring out the detail. Possibly more damning, it also shows my failure to properly file off the seams in the models, which I will have to watch out for in future.


And a comparison to a Chariot 15 Hellenistic jumbo painted some years ago. Size works well, but you can see the difference in the painting. The old painting was not especially good, but the more recent ones are clearly less carefully done.


But, to be honest, I don't really mind. Given that my painting output has been zero for as long as it has (and for a while I wondered if I would actually paint anything again at all), I'm just pleased to be back on the horse - or elephant, if you prefer.

While I was rummaging around I also tidied up a few other figures that had lost shields or spears in the move over to New Zealand. My next plan is to look at the Numidian horse and bring those bases up to standard. I painted them a very long time ago and they never got a coat of varnish. Some paint has flaked off, and the mixture of matt, satin and gloss finishes from the various paints used is not very pleasing. The idea is to patch them up a bit, give them a bit of the magic wash, and then hit them with a matt spray. 

As for what's after that, we'll see what happens. 

Monday, March 2, 2020

Unboxing figures

For the Big Move ™ down south I was quite worried about how the figures were going to manage the journey. I wasn't entirely sure of the best way to pack them, so like a good libra I settled for three different approaches.

Method 1: magnetised bases in steel-lined drawers.

This was recommended by various people. I didn't have enough space to send as many drawers as I would like, but I used this for elephants, chariots, pikemen, and figures which had a variety of poses on each base.

Method 2: magnetised bases in biscuit tins.

This is an extension of the first method. Used for baggage trains, cataphracts, heavy cavalry.

Method 3: intensive packing.

This was something I thought would save space, and might actually protect the figures provided I had varnished them as well as I thought I had.

This is a brief explanation of the method:

1. Box measuring approx. 330 x 300 x 100 is found and labelled in pen for easy reference and in the hope that it will deter the customs man at the New Zealand end from opening it...


2. In the box matching base is stacked on top of matching base so that the figures are horizontal and the base edges themselves are holding any weight. Sometimes the figures slot together; other times they sit head touching head.


3. Bases are stacked along bottom of box in rows, with some variation to make sure they are packed tight enough that they will not move around.


4. Figures mounted singly on coins are inserted into the gaps head first.


5. Contents are covered with packing material so that nothing can move.


Box is closed, taped, and subjected to several species of incantations chanted in an ancient and barbaric tongue.

6. Contents are pulled out of box at destination and inspected.


And it's not too bad: two shields and a pilum came unglued, and one Miniature Figurine bendy spear broke. Otherwise, no damage.

Three more boxes' and an ice cream container's worth to go!


Hopefully they will come out in similarly good nick.


Related Posts Plugin for WordPress, Blogger...