Prufrock's Wargaming Blog

Prufrock's Wargaming Blog
Showing posts with label Short reviews. Show all posts

Monday, July 20, 2026

July 1st, finale.

Turns 8 and 9. 3:45 - 6:15.

With the battle in the balance (see here for part one and here for part two if so inclined) and the Union aiming to defend below the Culp/Cemetery heights while reinforcements continue to come up, Pender, Early and Rodes' divisions attempt to get to grips with the Union line. The Union left pulls back but the fighting around Gettysburg itself is intense (the victory hexes for this first day scenario are denoted by wooden cubes). 


In the first round of fighting the Union centre is blown out. 

The advantage is with the Rebels after the first round of fighting.

In the second round, the weakened Rebels are fought off and the the Union line pulls back to the heights.

Both sides take a moment to catch their breath.

The remnants of Heth's Division go in against the Iron Brigade but encounter withering fire and are shattered in the attempt. 

The Iron Brigade stands firm.

Heth's Division is no more!

The attack is pressed again.

Battle is joined all along the line.

The fighting is murderous. Both sides take high casualties but Ramseur gains the heights for the Rebels after a successful advance after combat. 

Ramseur makes it onto Cemetery Hill.

Turns 10 and 11, 6:15 - 8:45

A counter-attack is launched. There is high-stakes fighting on Cemetery Hill (so engrossing I forgot to take photos!). The Rebels will not be denied.


In the dying moments of the day the Rebels get three brigades onto Cemetery Hill, which is enough to secure a substantial victory. The cost however has been very high, and the army is spent.

Conclusion

It was a breathless end to a fascinating refight. It was not until the last turn that it seemed possible for the Confederates to achieve a win. In throwing men into attacks towards the victory objectives as night drew near it felt as if the horrendous losses would all be for nothing. The initiative rule which allowed the Rebels to chose the timing of their combat chit and some unfortunate ordering of chit pulls for the Union meant that the Confederates were able to concentrate and prosecute attacks better at the very end of the day and the brave efforts the Union troops had put in fell away at the close due to exhaustion. 

Casualties

The Union had almost three entire corps shattered. 23 points of infantry casualties (c.6900 men), 1 point of cavalry casualties, 72 points of men demoralised and shattered.

The Confederacy for its part had almost four entire divisions shattered. 26 points of infantry casualties (c.7800 men), 1 point of artillery casualties, 52 points of demoralised troops in shattered units and 6 points in demoralised men in units still on-table. 

I think it would be unlikely that the Confederates could hold the ground taken on day one on day two given the high number of units shattered, but overnight rally-attempts could alter that equation if the game were to continue (and I was wrong in my estimation of the Confederate chances to take the heights as well!).

Thoughts on the game

There is a lot to like about Battle Hymn. Apart from the combat rules, everything is pretty straightforward, and the fact that it is chit-pull is great when playing solo. Combat is dice-intensive, and there are quite a few stages to work through. This makes it difficult to predict results, but also gives the combat turns an epic atmosphere. A problem I found was that remembering who has fired and who has not became an issue in later turns. I fear that once or twice I may have fired twice for one unit and not at all for another! Oh well, I will put it down to the chaos of battle....

Next time I play I will use markers to show when a unit has fired as well as using dice to record the hits on each individual unit.

I do have a couple of reservations though - one being that it is very difficult to get rid of artillery. I wonder if there needs to be a rule that ties artillery units to their parent formations so that they will retire if the rest of their formation does. By the end of this game most of the units left on the field were artillery!

But all that aside, I really do enjoy a good Gettysburg game, and this playthrough will rank up there as  one of the most engrossing I have played. 


Friday, August 15, 2025

Luzon Pass - Littoral Commander, Indo-Pacific

I set up scenario two of LC-IP last night to try a solo game. In this situation war has broken out between the US and the PRC. The PRC is trying to force access beyond the First Island Chain; the US is trying to deny that access. 

US marines have landed at Luzon and the islands to the north to defend against a PRC ground force aided by a naval flotilla.  


The marines have four platoons of combat infantry, six sections of long range missiles, six missile defence sections, and a logistics company.

American deployment looking west


The PRC force has four infantry platoons, a light armoured platoon, a heavy weapons platoon, two multiple rocket launch sections and two logistics platoons alongside three destroyers, a frigate and an amphibious assault vessel. 


The US has to defend the line between Luzon and Taiwan; the PRC has to breach it. There are seven turns. 

***

It is hard to do justice to how interesting this game is to play. On top of the units on table, there are also attached force packages, represented by off-table Joint Capability Cards (JCCs). These can represent anything at all, from surveillance drones to special forces troops to submarine attacks to CAP fighters to ballistic missile strikes and just about anything else you can think of. They all have a points cost, and you get to choose which JCCs you will purchase before the game starts. This means that you have a vast range of options for your game strategy.

The game pieces themselves all have a roster card as well, showing hit points, assault ammunition, long range fire ammunition, defensive missile ammunition, logistics replenishment points and so on.

Card rosters for the PLAN ground task-force, with attached JCCs, and various ratings for hits and different types of ammunition, which will be tracked in-game by coloured cubes:


Probably the best way to give a feel for the game is to go through a few turns. 

Turn 1: Initiative is with PRC. They elect to begin by activating Task Force Shanghai, their land-based force. They have three action points to use. One is used to play a JCC (AI-enabled targeting) which will be reusable each turn; and two points to activate both stacks of land units to move one hex each.

The US then activates Task Force New York. With no enemy yet revealed to fire at, they play JCCs only, to get Combat Air Patrol and their own version of AI-enabled targeting onto the table for future use.

The PRC then activates their flotilla, Task Force Beijing, to move. They move wider to try and avoid the US missile umbrella and sneak around to the west and north to exit the First Island Chain.

The US then activates their second task force, Chicago, which is deployed in the island chain offshore. They do nothing, having no revealed enemy to shoot at and no JCCs to play at present.

Turn 2:

Task Force Shanghai plays a Social Media JCC, revealing the whereabouts of the US logistics company and a HIMARS section. A second JCC is played, AI targeting, which is successful, meaning that the effects of decoys can be disregarded. The two MRL systems open fire using their full capacity, for five salvos against the logistics company and one against the HIMARS section.  Missile defence is engaged by the US, with four defensive fires for the logistics company and one for the HIMARS section. One of the PLAN missiles gets through, resulting in a hit on the logistics company. It has two hits remaining.

Task Force Chicago activates. It attempts a fighter attack on two of the PLAN ships, but is nullified by PRC Combat Air Patrol (in the form of a Joint Capability Card). An attack is launched against the missile unit. Of the six attacks initiated, one is successful. There are corresponding reductions in munitions for both sides. The logistics company is concealed so that it cannot be attacked.

Task Force Beijing moves the flotilla; Task Force New York elects to do nothing as all enemy units are either out of range or, if in range, unrevealed.


Flotilla navigates towards the gap while keeping out of range


As you can hopefully see from the samples related above, the turns are interactive. There are moments to lead, moments to wait, moments to intervene, risk-reward calculations to make.  

The pre-planning (in the form of Joint Capability Cards and positioning of on-table forces) means that there are radically different strategies to employ. 

We ended up here with the US being outgunned and out-manouevered. The PRC achieved their objective of getting through the First Island Chain with turns to spare. My assumptions about US ability proved to be overly optimistic, and the pre-battle positioning was accordingly flawed. 


US strength


Strength decimated, enemy passes by


US casualties

I highly recommend the game. It isn't cheap (not that many games are now!) but what is in the box is of excellent quality, and the decisions players are forced to make are of a most visceral quality!

Saturday, January 11, 2025

Boots on the Ground

A while ago I picked up Boots on the Ground by Worthington Games in a trade. It had been sitting in a trunk for the best part of 2024, but while I was searching for something quick-ish to play in order to test out my new plexiglass sheet, I wondered if it might be a good time to give it a try.

The rules are about six pages long, which is always a good start when you are looking for 'quick-ish'.

The game is designed to be played solitaire against a card-activated opponent, co-operatively against the same, or competitively, but I have not properly digested how the latter format works.

The system is simple: set up map of generic city; cover with your new plexiglass; populate map with markers (civilians, vehicles, items, insurgents) as per scenario instructions. Deploy your squad; activate the whole squad with limited action possibilities or activate an individual to use their special abilities; draw card for instructions on insurgent actions, perform actions. Repeat.

I chose the first scenario, requiring my squad of six to navigate their way down a long street to reach their objective, and to do so with at least four of the squad still alive. It's a 30 card (30 turns, in effect) scenario.

The first thing you notice is that the game's components are not especially appealing. The map has a sort of grainy 'satellite view' aesthetic with superimposed square grid. The counters are functional rather than artistic. But my set has already been clipped tidily by the previous owner, so that is an improvement on my own irregular clipping habits!

Game flow is similar to a first-person shooter. Insurgents suddenly appear in doors and windows to shoot at your team. You respond. You move close to a vehicle; you can't avoid it. Is it useful cover, or does it contain an IED? You approach civilians - are they harmless or insurgents in disguise? You flip the counter and see. There are lockboxes. Do you want to risk opening it? If yes, flip the counter and see.


And this one is an IED! Fortunately, our demolitions expert was able limit its effect. Can't say the same about the insurgent who appeared in the window; he has wounded the squad leader.


A wider view of the map. 

Player input is mainly about positioning your team so that they can respond to threats while also looking to work towards the objective. Combat odds favour the player - your soldiers are elite - but with opposed die rolls and situational modifiers the advantage is not certain. It is only my first game but tactics here were not particularly sophisticated. Move towards the objective, shoot anyone in the way, keep your medic close by to treat wounds. 

The card pull is the fun part. What will it be? Will it be an insurgents move and shoot card? Will it be an insurgents appear and shoot card? Will it be an insurgents take cover card? Will it be something else? 


Two thirds of the team wounded and still two blocks from the objective. Do we halt and patch wounds,  hoping for a lull in insurgent activity, or do we press on? 

In this scenario there seemed little need to use individual counter abilities. We wanted to keep everyone together and move then as a group if we could. The only one I activated individually was the medic,  who was called upon to deal with the wounded and get them back on their feet.  

At times it is brutal.


Another ambush. Our sniper killed!

At this juncture we are fortunate enough to get some air support (two card-pulls in a row) which forces the insurgents to keep their heads down long enough for our medic to get around the rest of the team.

We keep moving. We have killed or wounded the visable insurgents, but then find the civilian in front of us is not a civilian after all. Oh dear!


Insurgent revealed.  Another man wounded; we are lucky it wasn't worse. 

As we approach our objective the tension rises. Just half a block to go. We leave one of our wounded behind and press on with the four who can move as a group. Metres from safety disaster strikes.


An insurgent appears in the last doorway and shoots our demolition expert dead. 

The leader. medic and scout move to the objective; they call to the wounded heavy weapons expert to join them. He is wounded again in the sprint; the medic has to go and carry him to safety. 

They make it, but only just.


Four survivors at the objective. 

The long road travelled. 

So what of the game? It is light and a little cartoonish. But that is good for me. I prefer it to be non-specific and based on generic situations rather than real events. I don't want to play a serious game on this topic; it is still too close and too many people are still affected. 

As mentioned earlier, the play in this scenario was not sophisticated. The other scenarios will add complexity and no doubt the special abilities of the various squad members will come to the fore when there are different objectives and problems to surmount. 

On the whole, it was a nice little diversion, and a great way to start two weeks off work.

I will look to play it again and will try the next scenario and see how it goes. 

As for the plexiglass sheet, it really did the business!


Monday, December 9, 2024

300: Earth and Water

Between purchases on Amazon for Memoir '44 expansions (yes, I have gone deep down the rabbit hole - free shipping to New Zealand is a big draw!) and picking up various books and things I came across a little game on the Persian invasions of Greece called 300: Earth and Water

I have always been interested in these campaigns, right from when I was a youngster reading about Leonidas at the Hot Gates, or Themistocles at Salamis. I think I borrowed the Peter Green book from the library when I was at Intermediate school, and even wrote a poem in an 'epic' style for English class, which amusingly enough relied entirely on a (mis)pronunciation of Thermopylae (Therm-o-PY-lae) for its meter. 

It is a nice package. An attractive mounted map which extends to a little over A4 size, well-produced cards, and coloured wooden cubes and rounds representing armies and fleets make up the playing area and pieces. The rules are only a few pages long, supplemented by some historical commentary.

The cards - just sixteen of them - drive the game and are used either as events or to activate armies or fleets for movement and/or combat. 

There are five campaigns (or turns if you like) during which players purchase armies, fleets and cards to play, play them, and then score points for areas occupied at turn's end. The Persians have greater purchasing power and a larger stock of armies, but the Greeks have advantages in combat and more efficient lines of supply.

The object of the game is to occupy the two enemy home cities or else win on points at the end of the five campaigns. The rules are simple, but offer wide scope for different strategies to be employed by both sides. 

I have played one test game so far, which was won by the Persians. I was just learning the rules and the cards rather than playing optimally, so I wouldn't read anything into the result. 

Once you know what you are doing I think you could easily finish a game in half an hour. If you had the armies in miniature it could work well as a campaign game battle-generator. 


The board at end of my learning game.

I'm quite pleased with it. It is compact, clever, and will require thoughtful play. I hope that the system will be used for other campaigns as well, and it could be used to generate home-made scenarios with a bit of tweaking. 

Now I just have to convince someone to play it with me!

Thursday, June 30, 2022

Entertainment in a time of COVID

The bell finally tolled for me on Sunday. I'd had a minor sniffle come on Friday night and thought nothing of it. It then progressed to sneezes on Saturday, so on Sunday I decided to get a test before heading out anywhere other people might be. I was sure it was just a bit of a cold, but the RAT test immediately clanged out 'COVID!'  

With the wife and kids away in Japan visiting family, I did not have to worry about passing it on to them, so I just got in touch with work, ordered some food to be delivered from the supermarket, and settled down to wait it out for a week.

In my favour was the fact that there was a cricket test on. Sadly, we were getting royally thumped, so it was a slightly blue Prufrock looking out the window on Monday who saw a package had been delivered. 

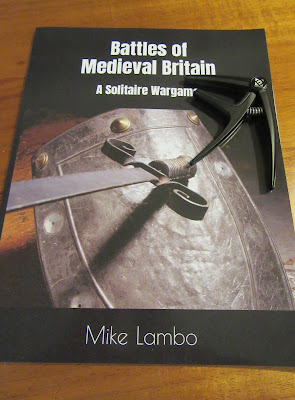
Wouldn't you know it, it was Mike Lambo's Battles of Medieval Britain, for which I'd put in an order about six weeks previously and almost despaired of ever seeing. As it turned out, its arrival couldn't have been better timed. 


The book includes ten pages of rules and solitaire game representations of twelve British battles. These being:

  • Brunanburh, 937
  • Fulford Gate, 1066
  • Stamford Bridge, 1066
  • Hastings, 1066
  • The Standard, 1138
  • Lewes, 1264
  • Evesham, 1265
  • Orewin Bridge, 1282
  • Stirling Bridge, 1297
  • Falkirk, 1298
  • Bannockburn, 1314
  • Shrewsbury, 1403

Each battle comes with a one page full colour hex map and an accompanying description of the information necessary to play out the battle. The rules are clear and simple, need only d6s, and contain nothing that could cause (or exacerbate!) any headaches.

Set up is not fixed: the defending units are positioned by dice roll, as are any reinforcements when they arrive. With only five types of units, you can retain all the unit characteristics in your head and just focus on beating the game. The order generation mechanism is quite neat, and combat is of the 'score x on 2d6, with various +/- modifiers' type.

Turns work as follows:

- mark off turn on turn track

- roll for and place any applicable defender reinforcements 

- activate each player unit one by one by rolling a number of dice to generate orders. Use (or don't) orders as desired

- when all player units have been activated, defending units attack all player units in range

And that's it. Defending units don't move (although defending reinforcements will appear during the battle), so it is up to you as the attacker to calculate the best way to defeat the enemy in the number of turns available. 

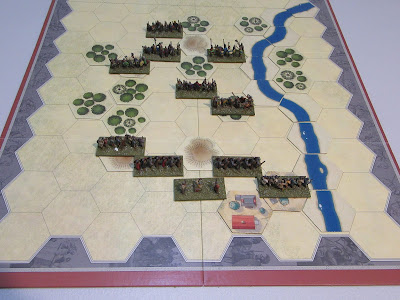
Fulford Gate using Commands & Colors terrain and 15mm figures.

The battles are essentially military-themed interactive puzzles, somewhat akin to chess problems, but with variable set up and random elements to consider. To make it easier you can give yourself an extra turn to achieve the objectives. To make it harder, give yourself one fewer.

I've played through the first two scenarios already, and they are a cool way to pass a bit of time. Simulations they are not, but if you want to spend a half hour exercising the brain and rolling a few dice, you could do a lot worse. 

And as for providing entertainment while isolating with COVID, it does the job!

Tuesday, June 21, 2022

More Undaunted Normandy - it's a winner, folks.

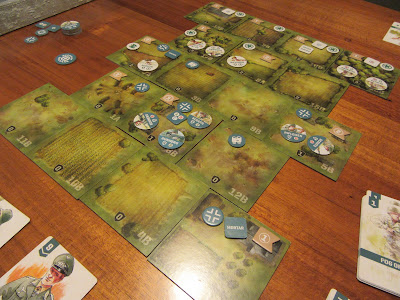
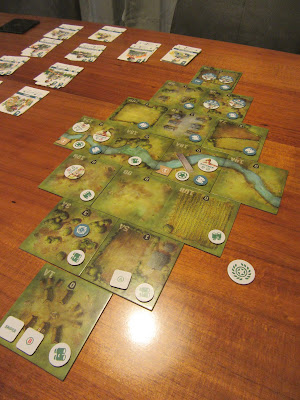
Well, to follow on from my previous posts on this game, I have to say that both myself and SP are sold on it. We've had, I think, three sessions playing it now, and have progressed through to scenario seven of twelve. All the bells and whistles are now in play - riflemen, scouts, snipers, machine gunners, mortars - and the mix of card play, board movement and dice rolling keeps you engaged throughout. I have not had this much fun with a boardgame since the early days of Commands & Colors: Ancients

Plenty of meat in scenario seven.

It seems simple, but as you work through the scenarios and more elements are added you start to see how well designed it is and how smoothly all the parts combine to create an immersive, easy to learn / hard to master game system. 

I have tried platoon and company level WWII wargames before and really wanted to like them, but as with most of my games, they have ended up on the shelf gathering dust. They take too long for dimishing returns, the enthusiasm wanes, the decisions pall. This one however just begs to be played. 

The mix of luck and planning is complex. The initiative comes and goes, fortunes ebb and flow, and you finish a scenario thinking about all the things you could have done differently, wondering whether they could have changed the result. There is a lovely tension between active and passive play, and because the scenarios are so tightly contested there is room for that wonderful thing 'player morale' to do its part. You can bluff your opponent and be bluffed; out-think and be out-thought; take the risk or defer it; make the play or resist it; drive for the win or deter it. 

In a part of the world where I routinely have to pay well over a hundred dollars for a boardgame, the games in this series cost about seventy. It is astoundingly good value. Not only on price but, crucially, on gameplay and enjoyment. I have gone ahead and bought both Undaunted expansions (Undaunted North Africa and Undaunted Reinforcements) and will no doubt get the upcoming Stalingrad set as well. 

Mortars are introduced in scenario five.

As I say, for me it is the best game since Commands & Colors: Ancients. As with C&C:A you can find your own style. By the time you get to the meatier scenarios you find you can switch the point of focus, find different ways to upset your opponent's play, try different ways to win. Skill is important, but it goes not guarantee victory. Undaunted sets up fast and moves fast, but packs a lot of decisionmaking into that time. It does not grind on or overstay its welcome. You do not come away thinking 'well, that was a bit pointless' or - worse - pack it up unfinished because you can't be bothered continuing. It is a light player, but a very good one, and that suits me down to the ground at the moment.  


It looks good on the table, the cards feel fine in the hand, and as you come to be able to read the board and the situation, the options become almost delicious. 

I recommend it without hesitation. 

Sunday, June 5, 2022

Short reviews: Undaunted Normandy

I had the chance to play through the first two scenarios of Undaunted Normandy with an opponent last night and (as promised) thought I would share some observations. See here for initial thoughts. Note that we have not used all troop options yet - only scouts, riflemen, machine gunners. There are still mortars and snipers to come.

1) Deck building. When opportunites arise you can add cards to the deck. It seems like quite a good way of stacking future options in your favour. In your turn you draw a random limited number of cards out of the deck you've built and play with what you draw. Once you know what's in your drawn hand you (obviously!) can plan and play accordingly. 

2) Card activation. Both games were won against the board position by runs of cards which gave the opposition no ability to interfere with the winning outcome. With no real time 'opportunity fire' deterrent, it gives certainty to actions which perhaps real life wouldn't.

3) Card removal. An interesting way to simulate casualties by removing activation cards.

4) Bidding for initiative. As per 1, 2 and 3, you can calculate odds, decide whether it's an action or holding turn, and bid based on that.

5) Line of sight. There is always line of sight, no matter the terrain. Rolling a ten is always a hit on the enemy, no matter how skewed the shooting odds. Intervening terrain matters only for range, and cover is only for the terrain the target is in: i.e., it is not cumulative.

6) Victory points. VPs are gained by controlling certain areas on the board. Scenarios and sides have differing objectives, but winning on VPs only takes into account the territorial objectives, not casualties sustained in achieving them.

So far it is proving to be an interesting light war-game. We are both keen to play more, but the game has its problems as does every other tactical game of its type. So far the fact that both games were won against the run of play by good immediate card hands which the opposition was powerless to interfere with once initiative was determined is a potential negative (but may turn out to be a strength). 

It certainly has something. Again, I came away with an urge to pick up the expansions but am still resisting until I see whether I really like it or not. At this stage I would rate it a 7 out of 10. More to follow once we get further through the scenarios.


Tuesday, August 10, 2021

Two short reviews: The Song of Simon de Montfort and Being Napoleon


I haven't done a huge amount of book finishing recently, but the most recent non-fiction book I've got all the way through was this one, The Song of Simon de Montfort, by Sophie Therese Ambler. It is a biography focused on two main points: how de Montfort conceived of his role in opposing and controlling the king, and how he appeared through the eyes of those that followed him.

The book begins with the end: Simon preparing to die on the field at Evesham, and everything that follows then leads us back to this moment. It's a neat trick to engage the reader, and it works. 

On the whole I found the book informative - to my shame I didn't know a great deal about de Montfort before reading this - but it is also something of a hagiography, as inevitably it must be given its stated aims. Simon is shown as a great revolutionary driven by his cause, standing up for the common people, wronged by his king, and in the end by his confederates. That his own arrogance, selective morality, manipulative tactics and dubious methods of obtaining funds contributed to his demise is largely overlooked. 

The book is engagingly written, nicely weighted and well paced, but if a man's qualities are to be as lauded as much they are here, for his faults to be glossed over so consistently eventually generates a kind of low level rumble of resentment in the reader. When the book was done, it was that sense of discontent that stayed with me.

I'd give it 3.5 out of 5. It's a good read-on-the-plane kind of book, and has motivated me to look more into gaming the period, as well.


The second short review I have is for a 2018 documentary on Netflix called Being Napoleon. The Netflix blurb is for a quirky, offbeat piece, and I can't really improve on that as a description. It follows the fortunes of various oddball characters as they build up to a reenactment on the 200th anniversary of Waterloo. There is the occasional lurch towards mockumentary, but it always manages to remain on the right side of that line.

It ended up an affecting watch, with the emotional heart of the film turning out to be not quite where you would have expected it to be.

4.5 out of 5 for me. If you have Netflix and haven't seen it already, I would suggest giving it a look.

Monday, July 20, 2020

Quick Review: Table Battles, by Hollandspiele

Hollandspiele has gained a reputation for innovative, fast-playing board wargames with more to them than meets the eye, and Table Battles is so far proving to be the epitome of that approach.

Using just a dozen or so cards per army, coloured sticks, and six dice per side, the game allows you to recreate dozens of historical battles on your table, each playing out in somewhere between ten and thirty minutes of real time.

The rules are very succinct - just four pages - but they are flexible enough for all kinds of situations and eras to be gamed.

Take Pharsalus, for instance. Pompey begins the battle with four cards on the table representing the commands in his army, being, from left to right, Labienus, Pompey, Sulla and the Cilicians. He rolls his six dice, and can allocate these dice to his commands according to the rolls, the card limitations, and his design. Allocated dice allow him to activate his commands to attack or react to enemy attacks.

His command has two wings - Labienus and everyone else - and he can give dice to one card per wing per turn.


The oval number tell us how many blocks (hits) a division has. Labienus can be activated by doubles, Pompey by fives or sixes - but only one or the other, and only one die per turn (brackets limit number of dice placed per turn to one), Metellus Scipio by threes or fours, and the Cilicians by ones or twos. The orange headed boxes indicate which enemy the division can attack, and the damage it does. The pink headed boxes indicate reactions, which are performed when the enemy attacks.


After the dice are rolled the best choices are to load Labienus and the Cilicians so that Pompey has two good options to activate next turn.

It is now Caesar's turn to roll and allocate dice (note that the turn is just two parts: act [or react], roll and allocate dice; then the other side does the same), with his various possible actions all laid out on the cards as Pompey's were.


An an additional subtlety, Caesar has his Fourth Line in reserve, meaning they can only be activated once Caesar's horse have retired. A close look at the cards shows that the horse cannot attack, with the best they can do being to react to an attack on themselves by forming a screen (screens have the effect of negating an attack and preventing hits on either side).


In this case, Caesar elects to use the horse to screen any potential attack by Labienus and to add one die to Anthony so that he can hopefully deter an attack by the Cilicians.

The game now begins properly, with Pompey activating the Cilicians to attack, doing three hits, taking one themselves, and then another when Antony reacts with his command. Dice are rolled again and allocated, and because Caesar had to respond to Pompey's attack, Pompey is able to retain the initiative and choose where he will activate next.

And that is pretty much way things run.

The game is won when a) one side has no morale cubes left,* or b) the active side has no target remaining that they could, given the right dice, legitimately attack.

* when a division loses its last block that side must surrender a morale cube - or two if it is a 'star' division - but if both divisions - attacking and defending - lose their last block at the same time, no cube is surrendered

Game play is mandated by the rule that if a side can attack, it must [correction - I am wrong here; attacking is a may action] - though it can choose which attack to employ if there are more than one option - and if a side can react, it must [this part is correct!] - though again it can choose among multiple options.

When a side reacts, this counts as its own action, and play returns to the other side. Initiative therefore is very important. If you make a play which does not require a reaction, then the other side now takes the initiative and can choose where to attack, including planning where or how to force reactions themselves. This creates intense dynamic interplay over a number of turns as players try to set the conditions for a devastating attack or else attempt to wrest the initiative from the enemy so that they can dictate play for a period.

In our test game, Pompey's Cilicians and Antony's division cancelled each other out, losing their final blocks at the same time...

Neither side loses a morale block because the removal of the cards was simultaneous.


But Pompey was able to largely keep the initiative and defeat Domitius' division which, having a star on it, was worth two morale cubes, thereby giving Pompey the victory.


The game is short, but the interplay is dynamic and there is a nice range of options in how to approach each battle. The games I've been playing are all solo, but I can see how much fun it would be to settle down with a friend and play out a series of battles over an afternoon or evening.

Verdict: a really fun game. It all fits together so nicely you sort of feel like you could have come up with it yourself. But of course, you didn't - Tom Russell did, and he deserves a bit pat on the back for having done so. As an added bonus, it is available cheaply in a print-and-play version on Wargame Vault if things are a bit too tight to be paying for shipping, and with (at current count) four expansions available, there is a lot of play to be had.


Friday, November 9, 2018

A review of NATO AIR COMMANDER


Having just finished my second game of Brad Smith's NATO Air Commander, I feel ready to set down some initial thoughts.

To be up front, I know Brad, like him, and communicate with him. I have no commercial interest in his game or the company that produces it, but I am likely to be biased in his favour rather than not, so please take that into account when reading this.

Components

They are fine and functional. The paper map tends to sit high, so you'll want some kind of clear cover to hold it flat. The rule book - error free and a breeze to navigate - is one you could use as a model of its kind, should you ever need one, and if you play many board wargames, you will know this is a rare thing indeed. The counters are thick and sturdy, and the rulers and cutting / trimming devices normally used for extracting counters from their sheets are here superfluous: you can just punch them out with no fear of tearing or damage. This was a great speeder-upper of pre-game prep, and the heft and solidity of the Hollandspiele cardboard is pleasing.

The cards are good, with a satiny finish that helps them to shuffle well. They may need to go into card covers to preserve them for long use, but for the moment I won't worry.

I also like the box art. It's evocative of the era, alienating, and sinister.

There is a bit of a solvent smell from the ink used, but being a miniatures gamer and accustomed to making allowance for hobby stinkages that sort of thing doesn't bother me too much.


Getting started

As with most dedicated solitaire games, the system is very much about following a process. Turn order is strict, and while there seem to be a lot of options at first, as you get used to the system, you see that there are normal options and there are exceptional ones. The common choices quickly become routine, and by the second game I was not needing the rule book at all except to check special situations, and even then one check was usually enough. The player aid is very good and soon will be all you need.

One big advantage of procedural games like this is that you can just sit down, start playing and worry about getting things absolutely right later.

For those who don't know, a point of difference here is that there are no dice used in NATO Air Commander: it is all cards and player decisions that drive the play.

Situation and play

The NATO player is faced with a Warsaw Pact invasion of Western Europe, set in 1987. The WP will be advancing along six avenues (shown on the map shot below and called thrust lines in the game) and NATO will be trying to stop them. WP forces gain victory points for taking certain spaces, and it is the player's job to utilise resources to slow, halt and counter-attack the WP advances.

Game map showing the six routes of advance.

Each turn the NATO player will undertake a number of raids for various purposes. What follows is a quick summation of the main options available.

Standard 'primary mission' options

Close Air Support (CAS). Air units are assigned to strike at WP ground units. This to try to halt WP advances in particular areas and to achieve objectives handed down by high command.

Destruction of Enemy Air Defenses (DEAD). Air units strike at enemy ground-based air defenses. This is a theatre-wide effect, which, if successful, degrades WP ability to stop NATO air to ground attacks.

Offensive Counter-Air (OCA). Air units are assigned to work towards obtaining theatre-wide air superiority. If successful, this makes it harder for the WP air forces to prevent you doing what you want to do.

Special options

Follow-on Forces Attack (FOFA). Air units attack WP reinforcements before they get to where they are needed on the front lines.

Decapitation Strike. Air units attempt to hit WP command and control.

Raid process

Raids all have a primary mission (as listed above), and players may assign up to three aircraft counters to that primary mission. Each raid also has two support missions, these being air escort and suppression of enemy air defences (SEAD is the acronym used for the latter). The catch is that a maximum of five aircraft counters can be assigned across the three missions of a raid, so you have to choose your aircraft and their roles carefully.

In resolving a raid, two cards are used. The first card is matched against the air escort support. If the card is equal to or higher than the air escort factor, the raid fails. If the air escort is up to the task a second card is drawn, and this is matched against the suppression of air defences support (SEAD) value. Again, if the card number equals or exceeds the defence factor, the raid fails. If it is lower than the defence factor, the raid succeeds, and hit(s) are scored against the target by the primary mission aircraft.


Sample Close Air Support (CAS) type raid directed against one Warsaw Pact thrust line.

The historical dilemma faced by planners regarding overlapping NATO aircraft roles is very neatly captured here by the design: the factor used for Close Air Support is the same factor used to suppress enemy air defences and the same factor used to disrupt the arrival of enemy reinforcements, so to concentrate on one role is to neglect the others. It is a neat and uncomplicated way to force players to consider relative mission importance at any given time.

As an aside, while there are various ways to load the raid resolution in your favour, discovering what they are and how best to use them is half the fun, so I won't spoil that by going into details.

After the raid segment of the turn, the WP begins its ground attacks. On each thrust line you compare attack factors vs defence factors, subtract any Close Air Support raid hits from the WP attack strength, and draw a card. If the WP draws or wins, the NATO ground force is eliminated and the WP force advances one more space down the track. If NATO wins, the WP force loses a cohesion point.

There are some additional subtleties, but those are the basics.

Ground attack is a particularly brutal phase for the NATO player, especially early in the game. Even strong NATO defences can be undone without the assistance of successful Close Air Support raids.

Following ground combat there are various reinforcement phases, replenishment phases and the like to deal with. If you want to know more about this, you can read the rule book on boardgamegeek.

General trends - in the first, and easiest scenario at least - are that the WP will advance steadily along one or two lines of attack, but resistance will stiffen over the other four or five.

See pictures below for some in-game examples:

Advances after turn 3.

Advances after turn 4.

Advances after turn 6.

Tension and player decisions

NATO Air Commander is pretty tense. You are constantly weighing risk and reward and dealing with greater and lesser pressures which must be prioritized in some fashion. Do you focus on achieving your high command objectives - at the risk of failure and higher casualties, but with success promising extra resources to spend - or go for more limited objectives that may (or may not) pay off longer term?

To compound things the game has 'guaranteed success' built in - so if you overcommit to a particular raid, you will be certain of success. Yay. But if you guarantee success in one area, you will have fewer resources to use elsewhere. Is it better to make fewer, surer attacks, or more, riskier attacks? It is a constant balancing act.

As an example of the sort of decisions a player must make, here is an extended play report from the final turn of my second game, played using the easiest scenario.

Sample play

To set the scene, at turn start we had strong ground forces in four of the six avenues of advance, but to turn a minor defeat into a minor victory, NATO had to take back Hamburg (worth 2 victory points) in sector Alpha, and Hannover (also worth 2 VPs), in sector Bravo.

In the first case NATO would need to push the WP forces back one space, in the second, two. In our favour, we had the AWACs event, meaning we could redraw a failed air support mission card for each raid.

Target spaces, and a handy event card.


We also pulled the two best objective cards we could have hoped for: if we could complete the missions, the auto-retreat results would allow us to push back the WP forces in sectors Alpha and Bravo, recapture the key cities shown above, and win the war.

We would need to pull off seven raids, but would get some nice positive modifiers from earlier OCA (to help air escort missions) and DEAD (to aid ground suppression missions) track progress.


To complete the task, NATO went for one OCA raid using the stealth capable F-117 (it would only fail on a card pull of 10), meaning that to fulfill objectives NATO would need to lead six other successful Close Air Support raids, one of which, in sector Alpha, must do three points of damage. A big effort would be needed, but there were the resources to do it.

This is how the aircraft assets were arranged. Provided that the Offensive Counter-Air (OCA) mission succeeds (remember it can be scotched with a 10 card), all raids but raid four, which can be derailed by a 10 card on the Air Escort mission, are guaranteed success, due to the OCA (air superiority) and DEAD (killing off of enemy ground-to-air defences) progress which has been dearly bought in the previous nine turns.


Assigned raids.

Here are the thrust lines the raids targeted. This arrangement ensures that - assuming successful raids - the WP will not be able to make any ground-combat progress in sectors Alpha, Bravo, Charlie or Echo.

Thrust lines targeted. Note the concentration in the north!

And so we started, raid by raid.

First off, the OCA raid succeeded, pushing up our OCA level to safety for all raids except raid four.

Raid four rolls around: a 10 card is pulled for Air Intercept. It's a failure.  No matter, we can use our AWACS event card to draw a new card. Lucky for us!

Nice to have an event card like this to give us a helping hand!


Unfortunately, our second card was a repeat of the first! This equalled and therefore defeated the raid's air escort factor of ten, which meant the raid failed.

Ouch! Smashed twice!


The other six raids succeeded, and while we were able to achieve our three close air support raid hits in Alpha sector and push the WP out of Hamburg, that one failure meant that reclaiming Hannover was beyond us.

So the WP pull off a minor victory by the narrowest of margins!

Victory for the Warsaw Pact!


As you can imagine, this was a very enjoyable gaming experience, and engaging on many levels.

Thoughts

I really enjoy the game and look forward to exploring it further. There are gameplay aspects I have not properly looked at yet, two more official scenarios, variant suggestions, and likely user-generated content which will all help to sustain interest. It is also a meaty game: it's not a fifteen minute filler - it's up to two, two-and-a-half hours of thoughtful play interspersed by periods of going with your gut to deal with crises.

Yet it would be remiss to not remark on areas of potential weakness. In this regard there are two things that nag at me. One is Warsaw Pact success. Once the WP have got to the end of a thrust line, that's it. There's nothing you can do about it as a player, and nothing else happens except for a loss of a VP per turn until turn 6. In effect, you get stronger once the WP has made a breakthrough because you no longer need to (or can, for that matter) throw forces at that thrust line. This frees up your forces for use elsewhere. In practice, instead of using 20 odd assets to defend six lines of attack, you are now using those assets to defend five lines, and things get much easier. Provided it's in a less important area (sector Delta or Foxtrot) a breakthrough is not a body blow: it's a sigh of relief, and that seems counter-intuitive to me.

It would make sense to see a continued requirement to commit air resources to lost sectors. Perhaps a simple directive to complete a successful raid in the lost sector each turn, with an additional VP penalty for failure, would be enough. Another option might be to give a ground attack bonus to WP forces attacking along thrust lines adjacent to the one lost, so as to force NATO to commit stronger forces to preserve the outflanked areas.

I feel thematically it would make sense to make players worry about containing the breakthrough rather than just accepting it, ignoring it, and gratefully employing the freed-up assets elsewhere which is the default position at the moment.

Compounding this, given that you can still win the game even if you lose control of a thrust line or two, there is not the same desperation to defend all along the front that there would have been historically. As C J Bowie noted in his article in Air Force Magazine, July 2007:

The greatest concern was the inner German border. 
Defending the border region was a daunting prospect. Land forces usually prefer to fall back and trade territory for time, but West Germany could not accept any strategy that accepted a Soviet thrust - however brief - into its national territory. 

The other thing I'm not convinced of is attrition. Unless you fail a raid, or pull an unlucky event card, your forces suffer no losses at all. Even in a failed raid, the worst that can happen is two step losses, and while that is not pleasant, it is not destructive unless cumulative.

I don't know what projected casualties would have been exactly, but at least one USAF officer felt they would have been considerable:

In the event of a WP attack, high aircraft attrition is expected on both sides and the fight for air superiority may well be decided in three or four days. (p.35)

Assuming then that combat attrition would take its toll on experienced pilots, on aircraft, and on ground services, having a higher attrition rate than that present so far in my games would seem to me to be likely, but I was playing the easiest scenario, and my ideas around what the normal attrition rate is might change dramatically when using the more demanding starting situations.

If it turns out that attrition rates are too low, I don't think it is an insurmountable issue. To get away from the guaranteed win / guaranteed no attrition options, it would be easy enough to bring in a low-odds casualty test after each successful raid.

It may not be needed, but would be a non-intrusive solution if a variant were desired.

* * * 

I have taken some time here to go into potential issues, but I hope that the space spent on these does not give the impression that the game is a faulty one: it is not. It is innovative in its mechanisms and exciting in its scope. If it does indeed require adjustments along the lines here suggested, they would be cosmetic, and would not detract from the core mechanisms and innovative elements of the game itself.

Others' complaints about the game

I have seen a quite astonishing complaint about the game that I feel obliged to address before finishing here. The complaint is that the use of acronyms is difficult and off-putting.

I really do find this hard to understand when it is coming from experienced wargamers.

All wargames use abbreviations and acronyms. This game has about six. They were all in official use, they are all explained early in the rule set, they are all self-explanatory, and they all add to the atmosphere.

If a person can read a CRT with its EX, A1, DR2 and so on results, a person can deal with these acronyms. We wargamers will happily bang on about PzKW IVs, M60A3s, tribunes and triari, and will use 'wrecked' in an ACW context without a second thought, so to complain that CAS or DEAD are impenetrable terms seems to me a complaint too far.

So please don't think acronyms are a reason to avoid the game. They are not. Just grab a pen and six post-it notes and it'll be problem solved.

Final comments

In my view Brad Smith has done an excellent job with NATO Air Commander. It is a grand theme, it uses new and innovative mechanisms, it is immersive, it is exciting, it is testing, and it is tense. The components are good, the rule book is excellent, and from opening the box you can be playing in about thirty minutes.

It looks already to have good replay value and I have a hunch the system used here will be influential in future game designs.

Well done Brad, well done Hollandspiele, and I hope that this is the start of a beautiful friendship.


Related Posts Plugin for WordPress, Blogger...