Prufrock's Wargaming Blog

Prufrock's Wargaming Blog
Showing posts with label naval. Show all posts

Monday, October 27, 2025

NAVCON 2025 - Picton

It's the Labour Day long weekend in New Zealand and I've just got back from a two-day trip to Picton to take part in Navcon, a new naval wargaming convention organised by Picton local Paul Dalley. Paul is a naval wargaming enthusiast of the highest order, often posting in wargamery spots on the interweb, running wargame teaching sessions in person and over VASSAL, and generally doing his best to promote the hobby.

I first met Paul earlier this year after he had imported a shipment of Littoral Commander Indo-Pacific and Baltic games to be distributed to buyers in New Zealand. He dropped my copies of the games off in person and stayed for a day of gaming. We've since kept in contact and when Paul invited a number of naval wargamers to attend Navcon he kindly extended the invitation to me as well.

Saturday was arrival and set-up day. I got to Picton around lunchtime. Some were already there; others were arriving by plane or ferry. It was immediately clear that Paul does not do things by halves: he had commandeered the workshop and smoko room of a well-known Picton nautical museum as the venue! It made for an impressive setting. 

Saturday afternoon two of us played games of Attack Sub, and three others played Flashpoint South China Sea. I was one of those three and liked the game. It is another in that expanding list of nouveau card-driven games using cubes for markers and cleverly calibrated to produce tense, closely fought, fast play games that are easy to learn and hard to master. Curiously, it is an economic and political game. There is no fighting at all. 


Over three turns of six card plays per side players jostle for influence across five countries and three disputed areas. Cards are used to place influence cubes, play events, or score. Interestingly, cards are all either/or decisions. There are no combination actions.


There are tough decisions to make and not using dice forces a real battle to get ahead. You can't rely on getting the odds in your favour and then asking lady luck to decide things for you. Opportunities must be created. 


In the end, China won this game by getting and keeping just enough scoring advantage to stay ahead of the chasing US. 

It's a game that I will keep an eye out for. 

Saturday evening Paul took us to a secret location (which shall remain secret as it is not generally accessible to the public!) to brief us on the following day's play, a three-threatre, three-round tournament for six players and umpire using the Littoral Commander Indo-Pacific game.

I was assigned to team USA, fighting for a foothold on the Island chain north of Luzon. It's a map I know well! 

Game 1.

With two taskforces under my command, one made up of a guided missile destroyer and the other of an advance infantry force - HIMARS section, MRIC section, Infantry Platoon, FARP platoon - on an LHD landing ship, were to get to and hold a particular position on Calayan Island. With the weather poor airpower could not be used, sea movement was slower than usual, and cyber networks were struggling to cope with the ramping up of hostilities. 

Commanders were given briefings papers showing situation, forces at their disposal, objectives, special rules, and the points available to buy Joint Capability Cards. 

We had the evening to consider options. 

Fortunately, as I was staying at an old friend's place nearby, the evening was occupied catching up with him and his family, drinking beer and messing around with guitar equipment, so I had no time to overthink things.

Slightly fragile the next morning I selected my cards and we were into it just after 9am. 

As usual with Littoral Commander, the encounter was absolutely brutal. I knew my best bet was to get to the objective as directly as possible and to use deception JCCs to soak up initial enemy attacks. I focused solely on the objectives. These being: primary: to get a FARP unit established on Calayan Island; secondary: to inflict disproportionate losses on opposing forces; tertiary: to use territory gained as a staging ground for future operations, so try and keep your guys alive. 

The first three of five turns were spent getting to the objective. Both sides were using command points to remove disruptions to the cyber network. My plan was to get there, hit the enemy any way I could while aiming for logistics units and sea assets primarily.  

By the end of turn five I had secured the objective, sunk a destroyer and frigate and killed the logistics unit at the cost of my own destroyer sunk. Unfortunately, the opposition (the canny Darryl) had also landed on the island. Not where they wanted to be, but pretty close. Could I have done more to prevent this from happening? Yes, I could have, and I was later to rue not having done so!

After game 1 then we had a US victory in the Luzon sector. In the two other sectors, Ryukyu Islands and the Taiwan Strait, things were in stalemate, if I recall correctly.

Sadly, I did not get good photos because a) I had left my digital camera battery charging at home in Nelson, now some 150 kms distant from the camera itself, and b) I had inadvertently left my mobile phone torch on overnight, and only had 3% battery left!

The only photo of my game, at end:


And the situaition in the Taiwan Strait:


Game 2.

For game two (a couple of weeks after the initial battle) both sides had received reinforcements. The US had to maintain its hold on the islands and keep alive at least one HIMARS section to prevent PLAN shipping from being able to get through. I had my original force plus another two island defence taskforces. One landed with the original, one on a nearby island. 

The PLAN had original forces plus two naval taskforces to pound us into oblivion. The fight was on right from the beginning. The land forces engaged, killing two Chinese platoons immediately, but at the cost of some of my own. Ammunition on Calayan was quickly used up. Darryl had targeted my logistics units, so there could be no ammunition replenishment. Darryl's naval assets pounded my infantry from distance, and then when offensive missiles ran out, by coming in to use his guns. In a moment of outrageous audacity, PLAN seaplanes brought in missile resupplies for Darryl's forces on Calayan, and succeeded. 

By the end of turn six I had lost half of my forces killed. I had sunk a frigate and damaged a destroyer, as well as getting some of the infantry, but the butcher's bill was horrific. By virtue of one of my three HIMARs sections surviving this was also a victory for my US forces, but it did not much feel like it!

Seven out of my fourteen units were destroyed. Daryl proved again to be a formidible player and it was a pleasure to be able to watch him in action from close quarters. Thankfully, someone had an iphone charger so I was back in the game for photos.

A savage battle. US secure in one location, and still holding on in Calayan, but with PLAN destroyers pounding us at will and PLAN infantry in place on the island.


In other theatres the Taiwanese Strait was still contested, but the PLAN had opened up a sea lane through the Ryukyus.

Game 3.

The final battle, this would be for mainland Taiwan. 

This game I sat out because I had to return to Nelson, so Paul relinquished his umpire duties to take command of my taskforce.

The objective was simple: control Kaohsiung.

Both sides has three taskforces to put towards this objective, one naval, two land. The US had the advantage of occupying Kaohsiung at game start, but reinforcements were some distance away, and with PLAN forces in between.

Again, the fight was brutal. Missiles, ground combat, Joint Capability Card interventions saw both sides heavily reduced. Reinforcements were airlifted in for the US, and were destroyed as soon as they landed. At game end Kaohsiung was a wasteland. The US troops had been killed or moved out; the PLAN had not managed to step in yet. 

It seems that the final battle was an apocalyptic draw. 

Game start

The situation develops

Massively destructive land battles occur. Can the cards help? (Note the photos are much clearer after I wiped the dust off my phone camera lens!)


The bloodbath continues. Remind me not to join the Marine Corps!

And so my part of the weekend ended. The other six still had gaming planned for Monday, but I was jumping into the car and heading back over the hill to a nice warm shower and a comfortable bed.

It was an epic weekend superbly organised by the inventive and indefatigable Paul Dalley. A triumph on his part, and ably assisted by his wife who very kindly supplied us with food and beverages at regular intervals throughout the weekend.

It was great to meet some other Kiwi gamers. To take part in such a well organised and thoughtfully planned event was a treat.

Thanks very much to all who participated, and to Paul especially. I hope we have a 2026 version. 

Tuesday, June 5, 2018

Midway refight

Over the last couple of weeks boardgame mate Pat and I have been using Skype and VASSAL to play the occasional session of Avalon Hill's game Midway (1964 version). It's been good fun. I'd not played Midway before, but the game is quite simple (by board wargaming standards), and there is a nice tension between planning, decision-making and luck. There were a couple of times when I really had that 'this is what wargaming is all about!' euphoria.

Over the course of the game, which lasted from June 3rd to June 6th, there was a combined total of six air attacks. In the first, launched at 0500 on June 4th, the US caught the IJN unprepared, sent the carriers Soryu and Zuiho to the bottom and damaged the Kaga, but took fearfully heavy losses in aircraft, particularly torpedo bombers.

First US strike on the IJN main fleet.

With the location of the US task forces now pinpointed, the Japanese retaliated with a strike which sunk the Enterprise but in which Hornet, crucially, escaped any damage. Both sides launched simultaneous attacks on the afternoon of June 4th, and, again, it was the US Navy that had the better of the exchange. The battleship Haruna and carriers Hiryu and the partly damaged Kaga were destroyed, and while the IJN was able to damage both Hornet and Yorktown, neither was sunk (how different this result could have been had a hit or two registered against Hornet in the first strike!).

Both sides lost each other overnight and it was not until June 6th that further strikes were able to be launched. With both fleets now desperately low on aircraft, the US aborted its final attack in the face of formidable anti-aircraft factors, and the IJN, despite the best efforts of its gallant pilots, was unable to penetrate the anti-aircraft screen to get at the Hornet and Yorktown.

At game end Midway was safe: the IJN had lost four carriers and the vast majority of its experienced pilots; the US its entire torpedo bomber force, half of its dive bombers, and the carrier Enterprise. It was a very bloody affair indeed.

Thanks to Pat for a close-fought and entertaining game!

Friday, November 24, 2017

Naval Thunder in Hyogo

I was lucky enough to get an excellent day's gaming in yesterday with Luke and Pat up at Luke's new pad in Hyogo. Things though didn't start too well - I overslept, missed the train, and had to drive there to make up time. Fortunately, the car navi did what it says on the tin and helped me thread my way through the traffic hell of Osaka; less fortunately the rush to get moving meant that I completely forgot to take up my sea cloth and a book I needed to return to our host.

Anyway, I got there about 10:00, and when Pat arrived shortly afterwards we began looking at fleets for some Naval Thunder action.

We decided on early Pacific war, so Luke and I made up an augmented Force Z (Prince of Wales, Perth, Arrow and Ardent for me; Repulse, Houston, Shark and Scourge for Luke) while Pat worked out his IJN contingent. I'm not sure what the exact composition of the Japanese force was, but there were two battle cruisers (Nagato and Hiei), a couple of light cruisers (Jintsu and Furutaka) and three or four destroyers.

It began badly for us as Nagato found her mark early and pounded an outranged Repulse, taking her apart turn by turn. Prince of Wales closed to firing distance but found hits initially hard to come by.

Repulse under fire early.

Houston engaged the Japanese light cruisers who took damage.

A menacing lot of Japanese vessels!

Fine aggressive work by Japanese destroyers distracted Perth and Prince of Wales long enough and well enough to prevent closing of the range to concentrate fire on the Nagato while she was busy finishing off Repulse.

Japanese destroyers close in to torpedo range. They wrong-footed my destroyer screen and gave Perth and Prince of Wales a scare.


By the time Nagato was listing and removing herself back out to her extreme range we had lost Repulse, Houston was effectively dead in the water, and Scourge and Shark had been hunted down by secondary-battery fire. Jintsu and Furutaka were Japanese casualties, but Hiei and Nagato were together able to outgun Prince of Wales, and although she traded fire gallantly, once critical hits put two main gun turrets out of action the game was very clearly up.

So, lots of fun, some great moments of drama, and some good play by Pat to win with the Japanese. There were a few things about the rules we might want to adjust, but they gave us an excellent four hours of play. Pat and I were playing for the second time and Luke for his first, but we were running the charts like veterans within a couple of turns.

To finish the day we gave the boardgame Conquest of Paradise a go. We managed to play it to conclusion in about 90 minutes, despite Luke and Pat having to learn the rules on the fly, so it was a good way to end the day.

So, good gaming, good company and fine hospitality. A great day all round.


Sunday, October 29, 2017

1/3000 naval progress

I've been making a bit of progress with my 1/3000 naval project over the last week or so.

The British.


 Bismarck and Prinz Eugen.


The IJN.


Still a few more to do, but we're starting to get somewhere.

As a small observation, this project has really brought home to me how just useful the internet is. I don't know how many books you'd have had to have bought to get the info for each ship / ship class that one google search will bring you. This project would still be a mere pipe dream without the 'net.


Wednesday, December 28, 2016

Denmark Strait

Today saw a spot of naval action as Pat H. made the trip down to house Prufrock for a day of gaming. First up was the boardgame Flying Colors, in which Pat gave me an absolute thrashing at the Dogger Bank, 1781. He broke my line, killed my admiral, sank two of my ships and utterly demolished my poor Dutch. I think I need to work on my tactics!

For the second game we tried out Naval Thunder, employing some newly launched vessels from out of the Navwar yards.

Prinz Eugen and Bismarck observe the enemy.

Long range shot from Bismarck immediately disabled Hood's main turret forward, which gave rise to hopes of a quick ending, but Hood was made of stern stuff today. Events soon settled into a routine: Hood and Prince of Wales would bracket Bismarck with shell; the German monster would pound Hood; her assistant Prinz Eugen would worry Prince of Wales.


Hood and Prince of Wales under fire.

As flood and engine damage slowed Hood down, she switched her fire to Prinz Eugen.

Prinz Eugen herself caused an ammunition explosion on Prince of Wales with a lucky shot.

Prince of Wales fighting fires.

Hood then returned the favour, setting Prinz Eugen temporarily ablaze.

Prinz Eugen gets a taste of her own medicine.

A the ranges close, Prince of Wales' fire on Bismarck begins to find its mark more regularly. There is a bridge hit; flooding; explosions in secondary armament. Hood abruptly turns away from the fight, but even so Bismarck is forced to switch fire from the Hood to give Prince of Wales something to think about.


Both German ships continue to fire on Hood. Finally, she sinks beneath the waves. But Prince of Wales has used this time to absolutely pound Bismarck.


Last sighting of the valiant Hood.

Prince of Wales is now on her own, but it may not matter: Bismarck is in difficulty. She is flooded, on fire, and a main gun turret is out of action.


Prince of Wales has Bismarck's range.

Bismark attempts to run, but, increasingly waterlogged, it becomes apparent that she must sink Prince of Wales or be sunk herself. Accordingly, she turns back to the fight. Meantime, Prinz Eugen, who has been attempting with some success to distract Prince of Wales, closes to torpedo range.

Bismarck survives another barrage of hits, but Prince of Wales must be close to her limit as well.

Eugen fires and awaits the results of her handiwork.

Torpedoes away...

The crew of Bismarck holds its collective breath...

And the torpedo strikes. Prince of Wales breaks in two!

The Germans have won the day, but it has been a painful fight, and there is a lot of work needed to stabilise Bismarck for the necessary run back to safety and repair. She is just ten hull points off sinking; another broadside would likely have been the end of her. Prinz Eugen is hurt but in comparatively good shape. It will be a long journey home, and they will be the hunted....


****


Flying Colors I already know and like, but I thought Naval Thunder gave a cracking game. It is fairly fast moving, and although it took a while to get through the turns, it was a first game, and the ships involved were tough old nuts to crack. I'm very keen to get more ships painted for this, and will need to figure out the rules a little better (I've already found a couple of critical things we (more likely I) did wrong, and once I've done this I'll probably do a fuller review.

It was a rush to get the ships finished in time (and the basing is still of the temporary variety), but necessity is the mother of invention, and the urgency helped me to get past my 1/3000 painters block and just get on with it.

Wednesday, November 2, 2016

Flying Colors: Cape Ortugul scenario

The last couple of weeks have seen a re-acquaintance with play-by-email boardgaming with my old mate Andrea, whom I have gamed with on and off for about ten years now. We've never actually met in person, but after squaring off during the early Commands & Colors: Ancients online tournaments, we've kept in touch and he has always been a great fellow to play against and yarn with.

The game this time was Flying Colors by Mike Nagel and published by GMT games. It's an age of sail game and although I've had it on the shelf for quite some time I am still a novice.

I won't go into great detail (which would only expose my shameful ignorance regarding warfare of the period), but do want to say that it makes for an interesting game with plenty of difficult decisions.

The turn sequence is as follows: roll for initiative, move and fire (and suffer defensive fire), and then pass play to the other player who moves, fires, and endures defensive fire in turn. If it's a large game with more than one command on each side, players will alternate command activations until all commands have moved, and then the end of turn things are done, such as checking for morale failures, wind changes, on-board fire effects, etc.


The early stages as the English close in on the French and their ailing flagship.

Fire can be aimed at the enemy's rigging or at his hull, with the former when taken to its conclusion resulting in a dismasting, and the later in a sinking. There is also the chance to board enemy vessels and capture them (or not), but we were both too cautious to venture into that in our game.

Thankfully, there are no critical hits, but things like fire or hits on marines are factored into the firing tables.

After eight turns of fairly frenetic action we had the three English vessels dismasted, two of the French ones very badly damaged, and both admirals wounded.

Mid battle: all very messy and close-quartered.


In the end the French limped off too weak in the face of withering defensive fire to close in to land the weight of shot that would be required to damage the English ships. For their part the English, lacking masts, could not manoeuvre as needed to target and finish off the more vulnerable of the French vessels.

The French depart.

As I say, I'm no expert on this period but I thought the game was gripping and the actions quite evocative of the age of sail fiction I've read. I'm not well enough versed to enjoy this solo, but I certainly hope to play some more against Andrea or other opponents.

There is a small problem with this game PBEM in that the VASSAL module seems to have a few bugs in it, which produced misunderstandings and do-overs (to be honest, the do-overs were probably more due to my rules ignorance than the fault of the module!), but the annotated movement we ended up using reduced confusion and seemed to work OK.

The verdict? A good, solid game. Not sure about how it relates to the reality, but it plays well, gives you a bit of a thrill, and has me reaching for some Patrick O'Brien again.


Monday, June 20, 2016

1/3000 naval sets

And now for something completely different...

It's birthday season in house Prufrock, and while the kids were ransacking the local toy shop for MineCraft accessories to spend some of their gift money on I trotted over to have a quick look at the plastic models section. Would you believe it, but they had four 1/3000 WWII dock sets in. 1/3000 naval is something I've wanted to get into for some time now so this fool and his money were quickly parted.


At home tonight I opened up the Yokosuka naval base set to have a gander and liked what I saw. There are ten ships and a diorama base, so you get quite a lot for your money.

The models are very finely made, and everything seems to have been engineered with typical Japanese exactitude. The battleships are absolutely lovely, but I decided to start with something a little simpler.

Here is the sprue for the carrier Shokaku.


And another for the Fubuki class destroyers.


The three pieces for the carrier went together very nicely, and only slight trimming was needed.


Definitely similar to the real thing!

By Unknown - 広島県呉市海事歴史科学館所蔵品。(Hiroshima Prefecture Yamato Museum collection), Public Domain, https://commons.wikimedia.org/w/index.php?curid=3579869

An excellent find, and I'm very pleased. I'm not confident in my painting on hard plastic and in this scale, however, so hopefully I won't stuff things up too much in the next step!


Tuesday, September 3, 2013

Getting that mojo working.

Have been slowly getting my enthusiasm back after a couple of months of low gaming libido.

The catalyst has been my reading of the Aubrey/Maturin series from Patrick O'Brian. With Flying Colors and its expansion, Ship of the Line, on my shelves, the novels had had me eyeing up learning the system, but without finding the will to actually sit down to do so.


But I finally plonked myself at the table other night and have now played through a couple of one-on-one ship battles in an attempt to get the basics of manoeuvre and combat fixed in my head.  This seems to have gone well, and I began to enjoy it enough to try a larger scenario, Dogger Bank, 1781.

For this naval combat newbie the system has enough detail to feel as if you are playing an age of sail game - and are learning something - but not so much that you get bogged down in minutiae or that there are so many things to consider that you can't with a bit of thought tell a good course of action from a dud one.  I'm still working on the latter, but it's not overwhelming.

Here are a couple of shots of the progress in the first five turns.


The British, with the wind gauge, are bearing down upon the Dutch line.


Forming into line to fire on the Dutch.


The Dutch are hoping to tack back and gain the wind themselves for a second pass, but it's not going too well at the moment.  Perhaps my tactics are to blame - as one instance I should probably have had the Dutch target the rigging instead of the hulls in order to break up the continuity of the British line.

Anyway, it's nice to be enjoying a game again!

Wednesday, May 22, 2013

1/700 Warships

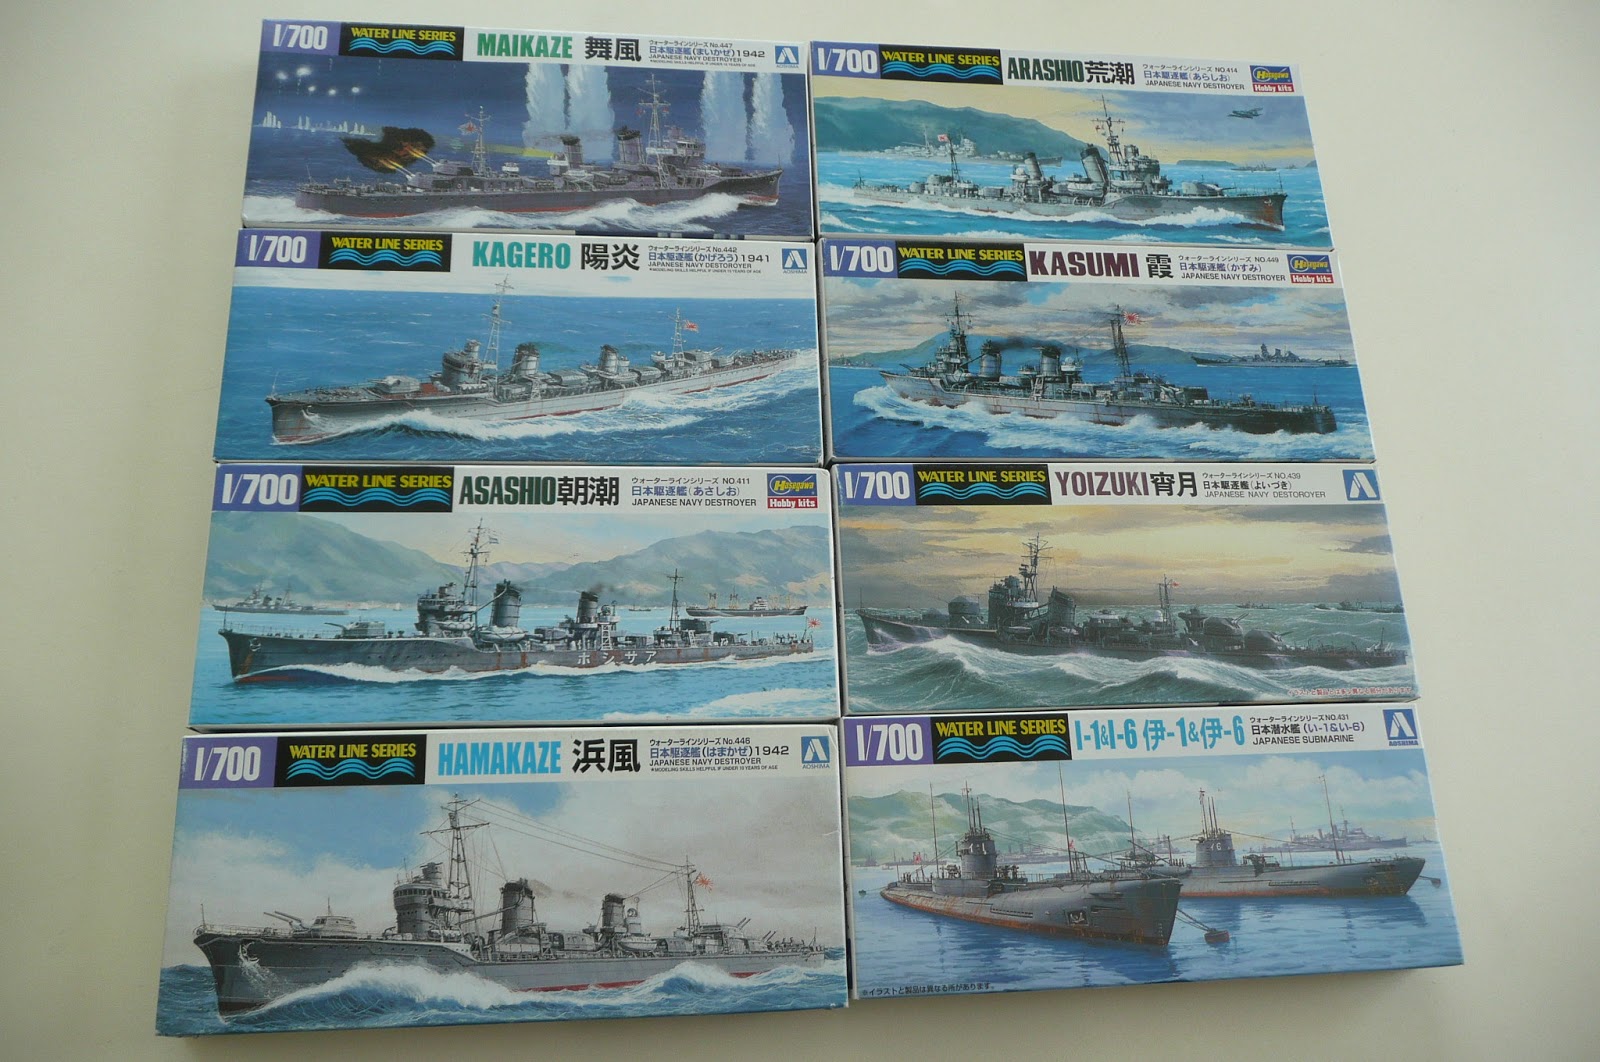
There is a wonderful variety of 1/700 ship models available in Japan manufactured by companies such as Aoshima, Tamiya, Hasegawa and Fujimi.  They are quite reasonably priced, and after putting this collection together for a chap in the UK who wants to do a naval game in this scale I find that I'm strangely reluctant to part with it!

Perhaps I will need to start collecting some models for when I move back to New Zealand and space is not such an issue...

Destroyers and a sub


Light Cruisers


Heavy Cruiser


The lot


If anyone reading is interested in 1/700 models and would like me to have a look down at the local hobby shop for you, feel free to ask.


Wednesday, January 16, 2013

6th Fleet shock - Admiral Prufock demoted!

Scenario 1: 
Anti-Submarine Warfare in the Western Mediterranean.

"To ensure the safe passage of NATO merchant shipping through the Strait of Gibraltar and on to Isreal, EUCOM (European Command) has ordered the US 6th Fleet to conduct high-tempo ASW operations against Soviet submarines in the western Mediterranean.  With most of 6th Fleet's forces committed in the Aegean Sea, COMSIXTHFLT (Commander, 6th Fleet) currently possesses only two subs with which to commence this sweep...

        Meanwhile, the Soviet Black Sea Fleet has received intelligence that the US submarine strength in the western Med is weak.  With  four submarines currently on station in this area, Commander, Black Sea Fleet has ordered the US submarines to be hunted down immediately."

Day 1.


On the morning of day one the Soviets assign their single squadron of Tu16s to detection duties and it begins tracking the USS Baltimore, just north of Naples.  The US assigns two units of Orions to follow the Sumy and the Byngi.

Baltimore shadows Sumy, hitting it south east of Sicily and causing severe damage.  P3 Orions on ASW duties continue the attack, which sees Sumy sink early afternoon.


Baltimore is in turn shadowed by the Nezhen.  Unable to locate the enemy, Baltimore makes for the Corsican coast.


Nezhen's superior speed allows her bring Baltimore to bay under the very noses of the air cover on Sardinia.


Baltimore desperately seeks to locate the enemy but is unable to do so and is sent to the bottom with all hands.

Day two.

The Soviets shift focus to the USS Drum, which is detected in the AM by Tupolovs.  The US assigns two units of Orions to the Drabv and the Byngi.

Confrontation is not long in coming.


The Drabv is engaged and damaged by USS Drum, but the Byngi is in close proximity.


Drum is on her own for the time being and without air support to aid her she sustains damage as Byngi closes and strikes.


Fortunately, Drabv is too far gone to aid in the attack, and the Drum employs evasive tactics in the hope that an opportunity to strike will open up.

In the meantime, the Orions make an attack at 3:30, but are unable to hit the Drabv.  This is almost the last chance for the Drum, and tension is high as the Soviets close for the kill.


By 5:30 Drum has been sunk.  The Soviets, now unmolested in the western Mediterranean, can begin hunting the supply vessels coming through the Strait of Gibraltar.

USS Drum under attack.
This was my first game of 6th Fleet and my amateur tactics are testament to the fact.  By not assigning a unit of Orions to detect Nezhen on the first morning I made a real hash of the strategic air mission choices.  This meant that after destroying the Sumy Baltimore was blind and a sitting duck for the Nezhen, whom she couldn't outrun.    

It has been a valuable lesson in the importance of setting the right units to do the right jobs at the right time.

This was a good and enjoyable introduction to the Fleet system, and while it's clearly going to take me some time to figure out good strategies the rulebook is not at all as daunting as you might think at first glance. That the first scenarios introduce players to the concepts in manageable progressive chunks is very useful, and I think 6th Fleet is the best example of this approach I've yet seen.

Next up will be Scenario 2, but I'm not sure if I'll be able to get it done before I'm off on holiday.  We shall see!


Related Posts Plugin for WordPress, Blogger...