Prufrock's Wargaming Blog

Prufrock's Wargaming Blog
Showing posts with label painting guide. Show all posts

Thursday, May 9, 2024

On the painting table

A little later in the year than I'd hoped, but we're finally making a spot of painting progress at the house of Prufrock.

I had planned to have these ready to do Ilipa for the Society of Ancients Battle Day, but as so often happens, the plan did not come to fruition!

These are work in progress Carthaginian spearmen with hoplon, who can be used as Sacred Band for earlier periods or Libyan infantry for Hannibal's war. They are from the Corvus Belli range, but produced in plastic by the Plastic Soldier Company. They are lovely figures. I'm a little pickier with their cavalry, but the Corvus Belli infantry ranges are superb. Unfortunately, they seem to be out of stock at the Plastic Soldier Company now, so when or whether they will be available again I don't know.

Getting close to completion...

Which means I'd best make the most of the ones I have. There are enough for four 16-man units, but as my initial purchase was a couple of figures short, they sent me an extra 8, meaning if I scrounge the bits box and repurpose some command figures I can probably field 72 altogether.

Batch 2 still has more work to do


I'm yet to decide whether to leave the shields as they are or add designs. 

Painting guide:
Dark grey undercoat
Mid brown for spear shafts, sandals, shield backs
Flesh for arms, legs, hands, faces
Light grey for linen armour and shields
Red brown for straps, scabbards
Red for tunics
Dark silver / iron for spearheads
Antique bronze for helmets, shield edges.
White highlight for linen armour, shields
Gold to highlight bronze, shield edges
Silver highlight for spearheads
Highlight for tunics
Green for bases
Magic wash
Highlight for flesh, other areas that might need a touch up
Spray varnish x 2

I haven't been in a painting routine for a long time so am just trying to do a bit each night before dinner and/or after the kids are in bed. I'd like to get some Greek cavalry done next and then try to make a dent in my Achaemenid Persians.

We'll see how we go!


Tuesday, September 12, 2017

W.I.P and other happenings.

I'd been planning on doing a solo game over the weekend, but it didn't happen. Instead, I've been beavering away on a batch of Xyston 15mm pike.

They're almost done, but are proving to be quite a lot of work. It's actually the first batch of phalangites I've painted myself: the first bunch of 200 was done by Fernando in Sri Lanka. I think I'll appreciate this lot more having painted them myself, and I'll also be forever grateful to Fernando now knowing how much work must've gone into the other batch!

So this is why I used a painting company first time around!
Just for my own records, this is the painting process (please feel free to skip to the next section!):

1) Prep, drill out hands, attach shields, undercoat in light grey.
2) Wash metal bits with dark brown ink wash or Tamiya smoke.
3) Block in flesh and do bases green.
4) Undercoat linen armour in Turner Acryl Gouache Grayish Green.
5) Do tunics in Turner Light Blue.
6) Do back of shields, belts, scabbards in Turner Burnt Umber.
7) Do waist band with Turner Crimson
8) Do shields in Steel.
9) Highlight linen armour with Turner White.
10) Do helmet feathers for officers in Crimson or Mixing Purple.
11) Highlight Crimson with Permanent Red.
12) Do metal areas in Turner Antique Bronze.
13) Wash flesh and metal with my brown dip.
14) Nervously attach pikes (previously undercoated and sprayed brown).
15) Highlight shields and spear tips with silver, helmets with gold.
16) Give a gloss / semi-gloss spray varnish.
17) Klear / Future wash.
18) Matte varnish.

Other things I've been doing include finishing off an overdue book review for Slingshot and doing the odd turn for a couple of ongoing play-by-email games using Vassal.

The games are the Age of Sail game Flying Colors by GMT, which I'm playing with my Italian mate Andrea, and the WWI Tannenberg game A Victory Complete by MMP, with my mate up in Kobe, Pat.

I don't really know a great deal in depth about either period, but am certainly learning a bit more through the games.

Anyway, that's all for now.


Tuesday, December 6, 2016

Hundred Years War books

About a year ago now I picked up a couple of armies for the Hundred Years War from Black Hat Miniatures. It's not really my area, and my usual method of sorting myself out (that is, 'consult appropriate WRG Armies and Enemies books') will not work, because finding a copy of the Armies of the Middle Ages is a bit of a tough ask.

In an effort to make some progress I decided to ask the good folks at the Society of Ancients and more good fellows on TMP for some assistance in choosing books to help a brother gearing up to paint.

After some very helpful suggestions, I've ended up plumping for the following:

The Armies of Agincourt,  The Armies of Crecy and Poitiers, French Armies of the Hundred Years War, The Armies of Medieval Burgundy - all Ospreys - and a one-volume history of the war, The Hundred Years War: The English in France, 1337-1453, that was recommended by a kind chap on TMP.

There have also been some excellent internet resources suggested, and I'll link to them now so that I don't forget, and because they might be useful for others as well. Thanks are due to Duncan Head and Anthony Clipsom for suggesting these.

Period illustrations are here ("Armour in Art" section as well as manuscripts) and on Druzhina's site here and, for example, here.

Flags are here and can be used for coats of arms on surcoats and shields.

Historical articles can be found here, and include some famous names.

The Internet Achives site has downloadable versions of Froissart, and I must particularly thank Jarrovian on TMP for bringing him to my attention.

Books to look for in future to help with the painting include Funcken's Age of Chivalry 1, the Almark Agincourt book, and Friar and Ferguson's Basic Heraldry.

For the history, Jonathan Sumption's series comes highly recommended, as do a couple of other books, The Agincourt War and The Crecy War, by Alfred H Burne.

So that gives us quite a bit to go on. The Book Depository order should be here in time for Christmas, so, all going well there will be the chance for a bit of learning to go on!


Monday, March 14, 2016

First Spartans

Have finally completed a few more of the many hundreds of 15mm Greek figures I have about the place. Here we have the first 48 Spartans. This is a gray undercoat, block paint, acrylic dip, highlight job. Pretty quick and easy. I do have decals for the shields, but after considering the amount of hassle it would take to apply them I thought doing the lambda freehand was a better idea.

Figures are Xyston. Very nice to paint, though a bit of a pain to prep.


For my own records, here is the painting process.

Spartan unamoured hoplites:

Undercoat gray.
Do hair and beards with dark brown.
Tamiya smoke on helmets, spear tips and any greaves.
Use Tamiya black line on shields to bring out edging.
Block in tunics with crimson or carmine.
Block in flesh.
Shield backs and footwear brown.
Spear shafts in a different shade of brown.
Base green.
Clean up any spills on flesh or tunic areas.
Do belts and scabbards.
Antique bronze on helmets, shields, greaves.
Antique silver on spear tips, swords.
Brush on brown acrylic 'dip'. Clean up excess with kitchen paper.
Highlight tunics with bright red, highlight flesh on faces, elbows, knees.
Three step lamba on shelds: Deep red, red, bright red.
Highlight bronze areas with gold.

Armoured hoplites:

Use the same process except that the linen armour is highlighted white, washed with a black dip, and then highlighted again. I wasn't happy with how the linen came out; I really need to find a better white.


Wednesday, April 29, 2015

Speed Painting results

Here's a bit of a follow up to an earlier post inspired by the very talented  Monty, who blogs at 'Twin Cities Gamer', on experimenting with priming troops in a useful undercoat shade.

To recap, I'm painting up thorakitai (who I will also use as eastern levied Roman legionaries when needed) and went with a spray-primed brown - rather than my usual gray or white - as the base colour.

First step post priming was to colour the armour with dark iron and dry brush with silver (figures are Old Glory 15s, for reference).


Next I blocked in the base coats for the tunics (cream here) and the helmet plumes (a darkish red). Other figures in the unit use different colours, but I'm showing this one lot for consistency.


Next up was flesh (a mixture of peach and raw umber) and then the greening of the bases.


After this the scabbards and the baldricks were done and the helmets gone over with bronze and a Devlan Mud wash. 


Spear shafts were tidied up, shields drybrushed with both a base and a highlight, and the helmet plumes highlighted. The shields shown here are a muted brown, but others are done in purples, reds, yellows and greens.


It's now time for the finishing touches: spears are tipped with old silver and highlights are applied to tunics.


The lot is given a wash of Klear and Devlan Mud on the shields, tunics and flesh areas.


As a last step the spear support struts are cut off and the figures put onto their bases. A final coat of Klear and matt varnish will follow prior to flocking.


So, how did it go?

Well, I do like the results. I don't know if I saved a huge amount of time with this batch because there was a bit of trial and error - especially with the metallic areas - that I haven't shown in the write up. The key for me (as a very limited painter) is to pick a couple of things to emphasise and try to make them pop with highlights. I chose plumes and tunics for this bunch, and I reckon they came out all right. Another important thing for me is to think about the overall effect. I'm not sure that I got the shields quite right in this respect, but the predominantly white tunics and predominantly red helmet plumes will hopefully do enough to unify the lot as a group.

I was worried over the first wee while that they were looking a bit boring, but once the washes did their job and the highlights were on I was converted; so thoroughly in fact that I quickly sprayed up my next batch of figures in brown before the sun set!

Thanks to Monty for the example, and while I've a fair way to go to match his mastery of the technique I hope to use this method a few more times yet.

Wednesday, March 18, 2015

Getting back on the painting horse

Well, it's that time again. With the amount of painting I need to do matched only by an increasingly epic capacity to procrastinate, I need to pull finger and get started.

First thing to do is finish my Roman Civil War project. The cavalry and the blue army are done, so we're over half way there. All I need to do is paint up about 70 figures and touch up another 170 odd and all will be completed.

There's really no excuse not to do it!


But still, to concentrate on the trees rather than the wood, for the ordinary legionaries we should go something like this:

1) base coat the flesh areas
2) block paint shield backs, pila hafts and footwear brown.
3) give the armour, shield bosses, helmets and pila heads a black wash
4) do belts in a lighter brown and use this shade to also highlight other browns
5) base coat tunics, helmet crests and shields red
6) wash the armour again, this time in a mixture of black and Tamiya smoke
7) drybrush armour with silver
8) touch up and highlight belts
9) paint scabbards red-brown
10) paint sword hilts and shield bosses bronze
11) paint helmets - some bronze, some silver
12) highlight tunics and helmet crests
13) highlight shields
14) highlight flesh
15) paint pila heads silver
16) paint stands green

Then it will be two coats of Future/Klear followed by a matt varnish.

So, 19 steps to glory and a triumphal parade!

I hope to be able to report back with some progress in a week or so...

Saturday, June 29, 2013

6mm painting guides: WWII infantry

German infantry.

Undercoat the figures Mr. Hobby Color Spray No. 117, RLM76 Light Blue.

Paint weapons black.

Paint helmets Hobby Color H32 Field Gray 1

Mix two different washes, one based on Field Gray XF-65, and the other on a H32.  Apply washes in different strengths to different figures.  Finish up with a strong XF-65 wash and use that to paint the bases of the miniatures.

Dab flesh areas with Turner Acryl Gouache Apricot.

Paint gas mask cases H36 Dark Green.

Paint entrenchment tool handles and pistol holsters Turner Burnt Sienna.

Paint jackboots, officers' gloves and entrenchment tool holders black.

Highlight trousers and officer caps in Turner Neutral Gray 5 or Tamiya XF54 Dark Sea Gray.


US infantry.

Undercoat the figures Mr. Hobby Color Spray No.70, Dark Green.

Paint weapons black.

Dab flesh areas with Turner Apricot.

Paint helmets XF-62 Olive Drab.

Paint webbing XF 60 Dark Yellow

Paint webbing, entrenchment tool handles and pistol holsters Turner Burnt Sienna.

Paint trousers XF-49 Khaki.

Paint every 3rd or 4th tunic as a  jacket using XF-57 Buff.


(Figures are all from the Heroics and Ros ranges)

Wednesday, April 24, 2013

Prufrock's painting guides: 15mm Republican Romans.


Republican Romans.


Step one - prep figures.  Remove flash using a hobby knife and / or a small round file.  If the figure cannot stand properly, file the bottom of the base flat using a flat file.  If the figures need spears, javelins or pila added, now is the time to drill out the hand using a dremel tool or pin vise.

Step two - wash figures in warm soapy water.  Rinse well and leave to dry.

Step three - now is a good time to attach any shields, javelins, spears or pila to the figures as metal-to-metal bonds are stronger.  If you are painting cavalry, you must decide whether to attach man to horse now or  after the painting is done.  Don't get stressed about this though; both ways work fine.

Step four - affix figures to a temporary painting stand.  I use strips of cardboard and stick them on with double-sided tape.  Make sure that the figures will not come off in normal handling, but don't put them on so well that you can't easily remove them later.  The key word here is temporary!

Step five - spray prime the figures.  I use a light primer, either white or light grey.  Make sure you get decent coverage but there's no need to spray it on too thick.  Be sure to cover your nose and mouth while spraying, as too much in the lungs is not a good thing.  Leave to cure, preferably outside for the first couple of hours.  As a rule of thumb, once the paint has cured, it will be odourless.  If you can still smell the paint, wait another day before beginning to paint.  If priming horses separate from their riders, a good time-saving trick is to prime the horses in their base colours, which will save you a painting step.

Step six - give the figures a brown wash all over.  Use whichever wash you prefer.  I like to go with a paint, water, Future / Klear mix.  This is to cover up the white patches and to provide shadow for flesh areas and tunics.  It is also a good colour from which to build up mail armour.

Step seven - if you think they might be tricky to get to later, it can be a good idea to do the backs of the shields now.  You may have to touch them up later on to get rid of splashes, but it's better than having your splashes come the other way around.

Step eight - block in the flesh areas using a darker shade of the final flesh colour you want.  Don't paint into the shaded areas; you want the earlier brown wash to show through here and give depth to eyes, mouth and sundry other bodily creases.  As an aside, it's a good idea to decide before you begin how many flesh coats you want to give the figures.  Two is probably enough, but I like to give three.  Whatever you decide, you need to factor this in when selecting how dark to have the colour at each stage.  Obviously, if you are only having two coats, you will probably have a slightly lighter first coat.  If you are having three, you will have a darker first coat, a good middle coat, and a light final coat.  There are also flesh washes you can use, so your technique for doing flesh will probably change as you get a better idea of what products are around, what suits your style, and how you can save on time.

Step nine - give metal areas a dark wash.  I use Tamiya Smoke mixed with a little black and watered down with thinner.  Experiment to get the colour and flow you like, because this will make or break the mail on your triarii and principes.  Cover swords, spear / pila tips, helmets (and I do helmet crests, too), greaves and shield bosses as well as the armour.  You will probably want to give another coat to the mail at some stage, but you can wait till later so that you can disguise any paint slips from later steps.  The smoke dries quickly, so you might prefer to break this into two batches - weapons and helmets in batch one, armour and shield bosses in batch two.

Step ten - block in the tunics.  I use two colours: red for Romans and white for allies.  I will also add in the occasional buff or sand tunic for a little variety amongst the whites.  You can use pretty much any colour you like for the things, but do some research beforehand just to be sure some new evidence hasn't come to light.  Again, you can leave deep creases alone if the brown wash is strong, and I find you can sometimes almost drybrush the white on if your original wash was an especially good one.  As with the flesh, you want to keep a lighter colour in reserve for your highlight, so my "white" here is more likely to actually be a buff, a light gray, or an off-white.  Do be careful not to get excess paint on the mail areas.  You can cover spills with another smoke wash, but it's much better to avoid having to do so if you can.  

Step eleven - block in the shield fronts.  Try not to paint over the shield bosses otherwise you'll lose that nice smoke colour.

Step twelve - do your browns.  Block in the shield backs (if you didn't do them before), the spear shafts, the sandals, hair and any belts on the figure.  You can also do the scabbards now, for which I usually employ a slightly different colour, reddish brown.  For things which have a lot of sculpted detail such as sandals or hair, I will sometimes use a very thin coat, even a wash, to bring out the details.

Step thirteen - do your first flesh highlight.  How much you cover will depend on whether you're planning on doing a second highlight or not.  Try to suggest some muscle definition by putting blobs on bicep and tricep, one on elbow and hand, a line on the thumb if you can, two lines on forearm, blob on knee, two on upper leg, one on shin, two on calf, etc.  Faces require a skill of their own, but I tend to hit and hope - sweep across the forehead, dab nose, dab each cheek, slash across the back of the neck; perhaps adding a touch to the ears if they are visible.  I'm not a great painter of faces, so don't take my method as gospel here - check the work of others to see what works for you.

Step fourteen - do the helmet crests.  I usually go for red, blue, white or black and use a base and a highlight (though I don't highlight black).  Helmet crests done well are an easy way to really lend some pop to a figure, so it can be worth going for the highlight, even if you are getting a bit sick of painting by this stage.

Step fifteen - do your metallics.  Slap some bronze on the helmets, the shield bosses, the greaves and the sword hilts.  Leave a little bit of the smoke wash to show through at edges and joins.  Some people like to further highlight their bronze but I prefer to use the smoke wash as a shade and the bronze coat as its own highlight.  Use a silver for sword edges, spear tips and, if you want variety, for the odd helmet or shield boss here and there.

Step sixteen - highlight your tunics.  Hit the high points, suggest folds and try to make the figure pop.  A dry brush can be useful here, depending on you much sculpting detail there is on the figure.

Step seventeen - do your final flesh highlight (if there is one) and do any other highlighting that takes your fancy.  You can add a touch to belts, scabbards, shields or anything, really.  Highlighting really does make a difference if you have good colour matches and some patience.

Step eighteen - do a protective wash.  I like to give my figures two coats of Future / Klear to protect the figure from handling damage.  I don't know if it makes much difference, but I feel better for trying.  The gloss coat also unites the colours and sets things up well for the final step.   The Klear coat here can also have a little black or brown added to it to bring out some extra definition in the figures if you think they could use it.

Step nineteen - give everything a matt spray.  The matt will bring all the colours into line, and while it may dull things down a little, overall I like the effect.  If you don't like the colours to be all flat, you can do a quick highlight of the metallics to get a little shine.

Note that you can swap the order of these steps around and even skip some steps altogether, but this is my standard method of painting Romans.  Note also that my results are not top notch, mainly because I paint in bulk, don't have a good method of highlighting black and can't be bothered highlighting shields or adding transfers.  If you are prepared to take more care and go the extra mile with highlighting you'd be able to use this method to get better results than I got.


Monday, March 25, 2013

Gauls in progress

With the Spanish now out of the way I've decided to get started on my 15mm Gauls.  First up I'm doing the Gallic cavalry, since they were already prepped and ready to go.

I'd undercoated in light gray last year, and have over the last week blocked in the horses, tack and saddles in various shades of brown or black, stained the swords, spearheads, shield bosses and helmets with a black/Future wash, painted the backs of the shields, greened the bases and blocked in hair, beards and flesh with Turner's Grayish Brown.

Next up will be to stain the armour with a Tamiya smoke and black wash.  Then it will be flesh highlights, swords and spears, and time to start on the serious business, the fancy trousers.  I want to do that part right so have been soliciting photos and advice on TMP and will be going though the archives of fellow bloggers for colour and pattern ideas.  If anyone reading this has painted Gauls, I'd love you to comment with a link to some photos of your work so that I can steal from and admire it in equal measure!

I'm going to put together a spreadsheet to post here when I've worked out which colour combinations to use.

So here they are then, the wild Xyston horse (with some QRS cataphracts in the background) in their current state:


And who'd have thought they would so kindly include a 15mm Iggy Pop?


Friday, August 10, 2012

Now we're getting somewhere...

Latest progress with the 6mm Americans.  Vehicles have been drybrushed with Tamiya buff (XF-57) or Tamiya desert yellow (XF-59), given a protective coat of Klear and a spray of matt varnish.  Tracks have been given a going over with a Tamiya weathering stick and the vehicles mounted on their bases ready for flocking.

The M113s will need troops added, but we're definitely starting to see some progress and should get things done in time for the big game next week...


And the weathering stick, for those who've not seen one before.

Tuesday, July 24, 2012

First 6mm vehicles

I've done a test run of the painting technique for the winter verdant MERDC camouflage scheme I'm aiming to perfect for my '70s and '80s Americans.  I picked out five of the M113s, safe in the knowledge that there are forty more to go, so if these paint jobs turn out to be duds I should be able to hide them amongst the masses!

First off, I base-coated them with  Mr. Hobby Color Spray No. 70, Dark Green.

I then added the field drab, for which I used Grayish Brown from the Turner Acryle Gouache range.   I've been reliably informed that the colour should be more of a yellow stone, but the only suitable match I have for this is a Gunze Sangyo (Mr. Color) paint (H71), and I struggle to get good results with these in summer so preferred to err slightly with the colour in order to gain with the coverage.

Next up was the sand.  I used the Mr. Color Off White (69) for this and it went on so badly in the humidity here that it confirmed going with the Turner for the field drab was the smart move.  I think next round I'll use a Turner white in place of the Mr. Color, or else really go to town with the retarder.  The white came out quite blobby and patchy and it doesn't have the sharp edges the Turner allowed me to get.

I then used a Gundam marker to put on a little black here and there.  I don't expect it to show up, but it makes the nerd in me feel better to have put some on...

Next was a very light dry brush using Tamiya Buff  (XF-57) and an ink wash mix of about two parts Devlan Mud to three parts water.

Last, I used Tamiya Flat Earth (XF-52) on the tracks.  I'm not happy with this and think I probably need to give the tracks a wash of Tamiya Smoke and then drybrush on a lighter colour for the mud effect, as the flat earth is a bit too close to the colour I'm using for field drab.

Anyway, that's where we are up to now.  After the tracks are fixed up these will have a coat of matt varnish to seal the models and get rid of the gloss patches.

So there we are.  Any comments, criticisms or advice readers care to give would be much appreciated!


Wednesday, July 11, 2012

Preparing to paint my Americans

With a large bunch of 6mm Americans sitting here to be painted up as the 3rd Infantry Division (kindly organised for me late last year by Luke Ueda-Sarson) I've started doing a bit of research on how to go about the task.

The first thing I need to look at is colour schemes.

The infantry wore OG-107 utilities at this period, so they will be undercoated an appropriate drab green and washed and highlighted as needed.  The colour should look something like this, though there would be variation due to wear and tear, exposure to sunlight, etc.

Image from this website: http://armynavyuniforms.com/index.php?main_page=page_2

The vehicles however used the MERDC patterning - a much tougher proposition.  I will need a forest green, field drab, and black camouflage design, as described here, in proportions of 45%, 45%, 5% and 5% respectively.  Colours are from the Urban's Colour charts site.

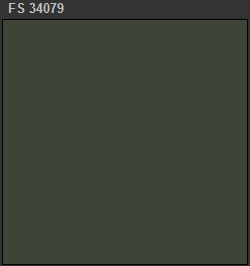
 This is the forest green.


And this one is also mentioned in some sources.
 This is the field drab.


 This is Rhys Batchelor's recommendation for the field drab colour.


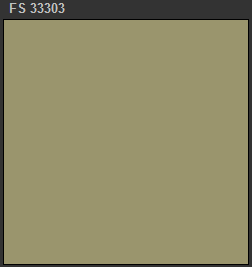
 This is the sand colour...
...and another variation on the sand colour.


And of course, the black.


The panzerbaer website here is a great resource for Cold War vehicles, as this image taken from the site shows:

Image URL: http://www.panzerbaer.de/colours/a_relaunch/us_merdc_apc_m113.htm

As are these sites recommended by chaps on the Spearhead yahoo group: merdccamo and armouredacorn.

Thanks to tips from various websites I also managed to track down a very useful PDF which gives paint patterning details for most of the vehicles I'll be needing to do, so there's no excuse now; I just need to match colours to locally available paints and get cracking!

Hopefully there will be more to follow on this in the not-too-distant future...


Related Posts Plugin for WordPress, Blogger...