Prufrock's Wargaming Blog

Prufrock's Wargaming Blog
Showing posts with label scenarios. Show all posts

Sunday, October 16, 2016

Action at Chaeronea: the background

Now that I have my Companions and Thessalians painted up I thought that I would celebrate by getting Alexander to the table. I don't have enough Greeks or Persians ready to give him battle yet, but I thought I could cheat a little, and a quick browse through the Lost Battles scenarios gave me just what I needed.

We present, therefore, an action at Chaeronea, in which the old lion, Philip of Macedon, using his army from Chaeronea 338 BC, challenges the army of P. Decius Mus and P. Sulpicius Saverrio - plucked from the battlefield of Asculum, 279 BC, and deposited in place of the Chaeroniac Greek coalition - to a fight for possession of the field and the glory that accompanies it.

Allow me then to introduce the Macedonian army.

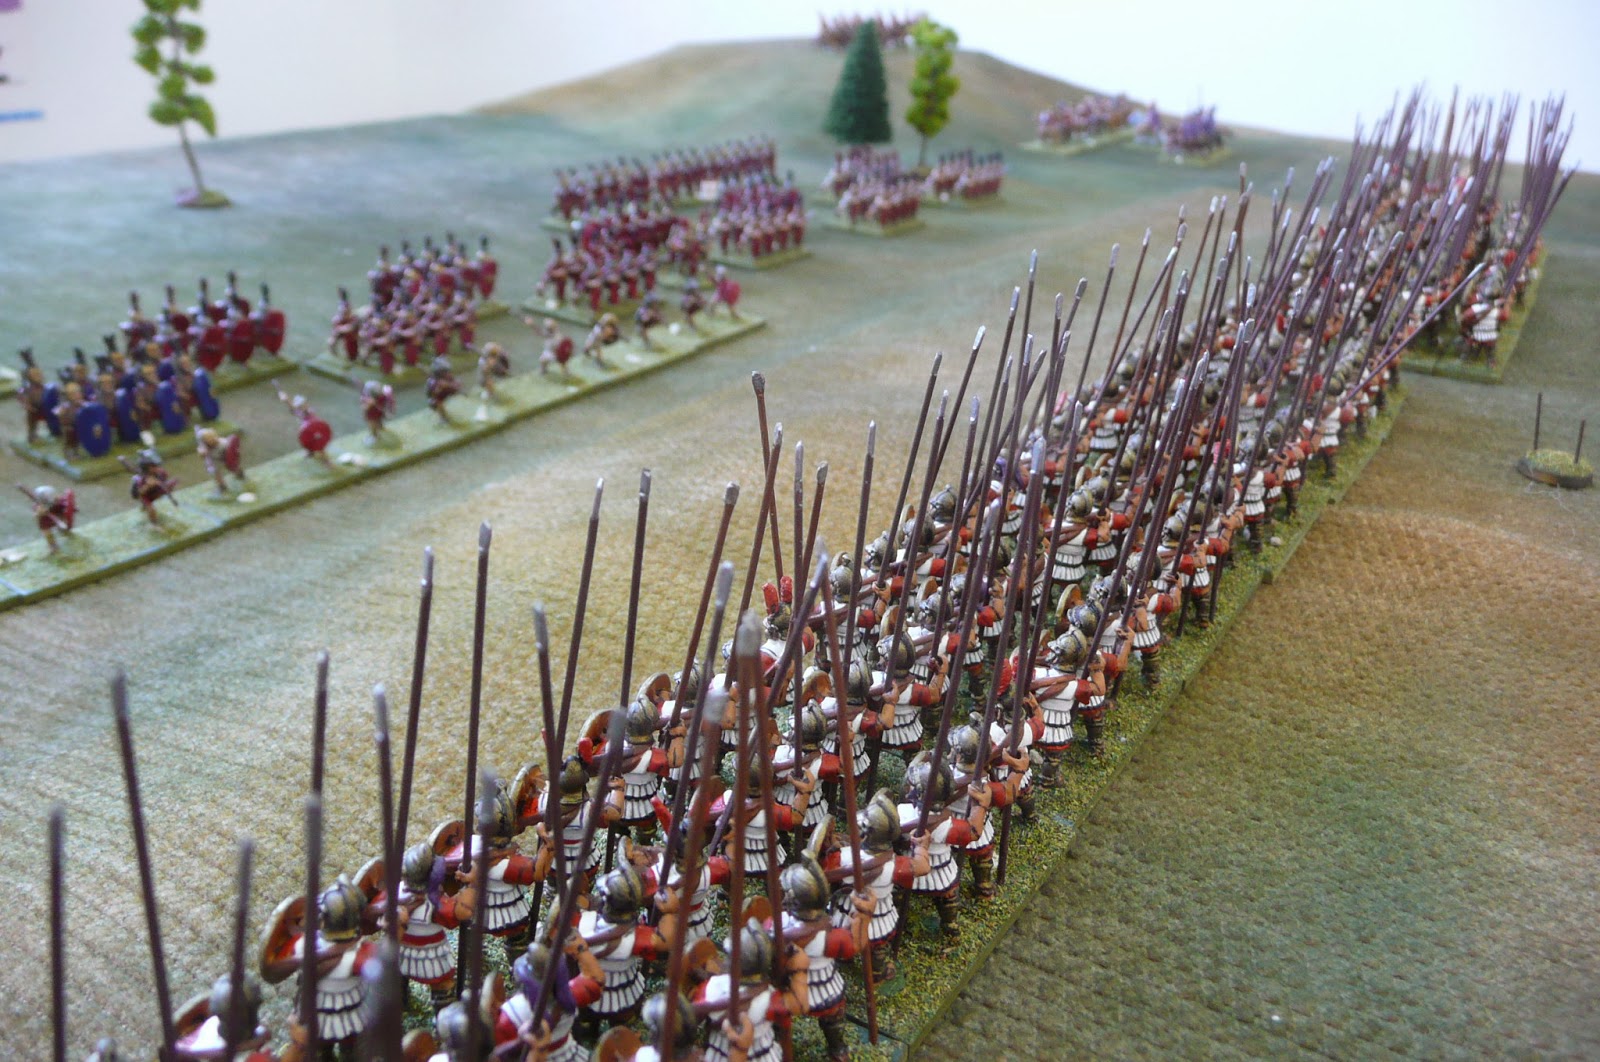
Philip himself will lead the Agema as an inspired leader commanding veteran heavy infantry. He also has two other veteran infantry units in the hypaspists. My figures are sarissa-armed, but for this encounter they will be classed as heavy infantry, not phalangites. These veterans will normally hit Romans with a 9 on 2d6, but under favourable conditions can reduce the required to-hit score to an 8. Under exceptional circumstances they can hit on as little as 6. In addition, their narrow frontage is a big advantage: they only take up half the frontage of a normal unit, so it becomes possible to get more attacks in as well.

Very handy!


The main body of the army consists of ten units of average quality phalangites (the foot companions). They will normally hit legionaries on a 9, but can pair units together to make an attack that will hit on an 8. If given a combat bonus by a general, they can bring that down to a 7.

They are formidable infantry to face on the tabletop.


In support are two units of average heavy infantry and two units of average light infantry. The light infantry will be used to blunt the enemy's initial attacks and then fall back behind the main line, thereafter popping up occasionally to take pot-shots from a suitable distance. The heavy infantry will be used to protect the phalangites and allow them to concentrate on attacking in depth.

Both types will generally hit on a 9.


Last, but most deadly of all, are a young Alexander and his cavalry Companions. Two units of veterans and one unit of average cavalry (Thessalians) give the army real punch. With Alexander (classed as an average leader) leading from the front, the cavalry will hit enemy horse on a 4, and score a double hit on an 8. They are less effective against foot frontally, but attacking from flank or rear they will carve up legionaries as well.

There are not many of them, however, so the decision to commit them to the charge will be a key moment in the battle.


The Macedonians have a very solid core of foot, with strike power in their veteran infantry and cavalry. They have various options for deployment, but will be at their best formed in depth. I would feel more comfortable if they had a unit of light cavalry, but they should still give the Romans plenty to think about.

Turning now to those Romans, we introduce the army as it was at Asculum.

We start with six units of Latin Allies, classed as average legionaries, with supporting light infantry of levy quality. Also shown is Sulpicius, an uninspired Roman commander.

Legionary class troops are stubborn. Not only do they refuse to rout until the situation is extremely dire, but they are pretty good at blunting frontal attacks by enemy infantry as well.

The commander is poor quality, however. An honest trier no doubt, but poor.


Next up are seven units of Roman legionaries, again classed as average, again with supporting light infantry rated levy.

There is no real difference between the Roman citizens and the Latin allies. They are also stubborn, and, like the Latins, will hit enemy infantry on a 9.


We come then to the cavalry. The Romans, surprisingly enough, have nominal cavalry superiority here. Four units worth 12 points against 3 units worth 11. They do not have an Alexander leading them though - just a Publius Decius Mus.

Under perfect conditions they will hit enemy cavalry on a 5, and may well prove a tough nut to crack.


The Roman legionaries will put up a hard fight, but in a straight up slugging match they will likely be worn down by the Macedonians who will get in more attacks per turn. If however they can prevent Alexander getting in behind them and can get into their stride early against the phalanx, their superior morale might just see them do all right.

****

And so we have the armies. To conclude, it's worth noting for the record that the Macedonians have a total fighting value of 83, of which 18 points are tied up in their commanders. The Romans have a total FV of 77, only 6 points of which are in commanders. It will be a tough fight. A lot will depend on how the Macedonians use their strike troops, and much will also depend on the battlefield terrain.

Speaking of which, here the battlefield is. Looking from the northwest, with the town of Chaeronea on the hill in the foreground, the Macedonians will be deploying on the left and the Romans on the right. The hills, watercourses and marsh will make this tricky terrain to fight over, and it will be challenging to both armies to best use their strengths and attack enemy weaknesses.


With the preliminaries out of the way, it is now time to go and fight the actual battle (see here for the report).

Game on, as the kids say these days!

Thanks for reading so far.

Saturday, August 30, 2014

Alexander versus Hannibal

On TMP a while ago someone posited a what-if scenario pitting Hannibal's army from Cannae against Alexander's from Gaugamela.

Trebian from Wargaming for Grown-ups gamed out the battle using the AMW rules and I decided I'd like to try the same with Lost Battles.

The catch is that I don't really have the right cavalry or mercenary foot for Alexander's army, but I've decided that I may as well just do the battlet anyway. Who will really care if the Prodromoi are played by Thracian lights and the Companions are from another era? (don't answer that - it's a rhetorical question!)

I'm going to use Alexander's army as writ in Lost Battles, and have adjusted Hannibal's units to allow them to fit into a troop multiple of 6 rather than the multiple of 8 that is used at Cannae. In practice, this means that Hannibal's army gets three units more than it has in the Lost Battles roster for Cannae.

How do the forces stack up?  Let's take a look.

Both Alexander and Hannibal are 40,000 strong in infantry, but Hannibal has numerical superiority in the cavalry arm, fielding 10,000 to Alexander's 7,000.

Alexander has two units of Hypaspists, classed as veteran heavy infantry, and three units of foot companions, classed as average phalangites. The mercenary and Thracian foot become six units of average heavy infantry and the reluctant Greeks are classed as levy heavy infantry. The Agrianians and archers merge into one unit of veteran light infantry while the Cretans and Illyrians combine into one average unit.

The Thessalians and Companions become five units of veteran heavy cavalry, the Greeks Thracians and mercenaries make another average unit, and the Prodromoi and Paeonians make up a single unit of average light infantry.

Alexander joins the Companions as a brilliant leader and Parmenion controls the foot as an average commander.

Turning now to Hannibal, his Libyans are represented by five units of veteran heavy infantry, his Celts and Spanish by seven units of average heavy infantry, and his assorted light foot become two units of average light infantry.

The Spanish cavalry take the field as two units of veteran heavies, the Celts and remaining Spanish make up three units of average heavies and the Numidians provide two units of average lights (the cavalry numbers are a little fudged here - I've gone with three units of average heavy cavalry, but the third unit could equally well be classed as light cavalry).

Hasdrubal commands the cavalry as an average leader and Hannibal prowls the infantry line as a brilliant commander.

Both sides therefore have twelve units of heavy foot, two units of light foot and seven units of cavalry, with Hannibal fielding two as light cavalry to Alexander's one.

Both sides are exactly equal in fighting value with 94 points each. Hannibal has better quality in the infantry and Alexander the edge in cavalry.

My crystal ball tells me that Hannibal will deploy fairly symmetrically, as at Trebbia, whereas Alexander will refuse a flank and try to stack one wing.

It should be an almighty tussle!!

Monday, February 24, 2014

Alexander II of Epirus in Italy

On the Lost Battles yahoo group there is a member named Carolyne (Megalostrata) who is playing a campaign derived from Phil Sabin's Empire.  She usually uses DBMM to resolve the battles, but last week she posted details of the latest engagement and it sounded so interesting I decided to use it as the basis for a game of my own.

The situation is that Alexander II of Epirus, Pyrrhus's son, has joined forces with the denizens of Magna Graecia to take advantage of a Rome weakened by a just-concluded Punic War. If successful, this brave endeavour will establish once and for all the independence of the Greek city states of Southern Italy.

Alexander has brought over 15,000 phalangites, 15,000 mercenaries and 4000 horse to combine with the Tarentines.

In Lost Battles terms, his army looks like this:


  • 25,000 phalangites organised into six average (Macedonian) and two levy (Tarentine) units. 
  • 7,500 Thracians and Illyrians, or three average heavy infantry units.
  • 5,000 peltasts, or two heavy infantry units.
  • 2,500 slingers, or one light infantry unit.
  • 4000 Greek cavalry, organised as two guard veteran and two average units.  Alexander and his general, Nearchus, each have a veteran unit under their personal command. 
  • 2000 Tarantine cavalry, organised as one veteran and one average unit.


The total fighting value of this force is 70.

The Romans in response send a somewhat thrown-together force comprised of 4 legions plus alae, and an additional legion and ala picked up en-route.


  • 30,000 heavy infantry organised into twelve legionary units.
  • 12,000 light infantry in two levy units.
  • 4,000 cavalry organised as one veteran and three average units.


With the addition of the consul Gauis Genucius Clepsina as an average commander, the total fighting value of this force is 71.

Alexander has a gentle hill on which to deploy, while the Romans have a wood in their right centre and a steep hill on their left flank.


Turn 1 (deployment turn).

The Romans deploy with the infantry in the middle three zones, pushing forward the velites in the centre and through the wood.  The cavalry is divided into a weak left and a strong right.

Alexander deploys his phalangites on the hill with the peltasts and thureophoroi in support. Nearchus leads the bulk of the cavalry against the Roman right while Alexander himself goes to the right with a view to taking the heights on the Roman left and turning the flank.

Romans on left and Greeks on the right.

Turn 2.

The Romans push forward all along the line and dress the cavalry for contact.

Roman advance.
Alexander moves forward aggressively on the right, while the slingers cause some damage (1 hit) to the unscreened legionaries who are approaching the Greek infantry. The Greek foot advance to the edge of the hill and Nearchus readies his command to receive a charge or, if one is not forthcoming, to initiate one himself.

Greek cavalry advances.
Turn 3.

The Romans attack all along the line.  They drive off the slingers (1 hit), disorder the Tarantines (1 hit) and sow confusion amongst the peltasts holding the left of the Greek line (2 hits).  On the right an unnamed tribune leads an effective charge against Nearchus who pays for his caution by seeing his Tarentine light horse and the mixed Greek cavalry unable to withstand the Roman attack (2 hits).  Only tiredness prevents the Romans from following up their advantage further (they just miss scoring another hit due to the negative modifier for charging from a distance).

Roman success in the charge.

The cavalry battle it out.


The peltasts are met with missiles from the woods.

The phalanx must be driven off this hill!

Nearchus and Alexander lead the Greek ripostes as the cavalry fights continue to build in intensity. The uphill assault is treacherous, but the equites holding the hill have been shaken (1 hit).  On the other end of the line Nearchus's second line of horse cut into the Roman line and fight them to a standstill (2 hits).

In the centre the phalanx is proving to be an intimating opponent as the velites and the hastati wrestle its moral and physical weight (2 hits in the centre).  On the left of the infantry line the experienced Thracians hold the line against the advancing Romans and the velites fall back under a volley of spears (1 hit).

The cavalry fight continues.

Turn 4.

The cavalry on the hill hits back at the Tarentines with Alexander, driving them back down the slope (1 hit).  The legionaries of the left make a concerted effort against the far end of the Greek line, and as they work their way into the gaps opened up by their pila and the uneven ground the troops supporting the Macedonians begin to give way (2 hits).

Elsewhere the combats have devolved into exchanges as the troops conserve their energy, but not so in the cavalry attack, where the Romans drive in again on Nearchus and his men. They hold, but barely (1 hit).
Lines engaged.


Alexander now commits himself and his guard to the attack and they carry the hill, breaking through on the right (1 hit - a shatter).


Breakthrough on the right!
The centre, seeing the success of the king, pushes against the Roman line, with dramatic results. The fresh phalangites in depth push back the Romans like rag dolls, and their line - so determined just moments before - is now on the brink of collapse (3 hits, now all the Romans in the central zone are spent).

Nearchus urges his Macedonian guard cavalrymen to remember their fame in war, and they return to the combat with renewed vigour.  This time all but the veteran Italian cavalry break in the face of the Greek spears (3 hits - 2 shatters).

Everywhere now the battle favours Alexander.  What can Clepsina do to turn the tide?

The Romans are falling apart under the pressure.

Turn 5.

The veteran cavalry on the right fall upon the flank of one overly-enthusiastic unit of pursuers, shattering them and driving them from the field (1 hit - 1 shatter), but there are three more units to deal with and the odds against the Italians are long.

Clepsina decides to pull back his demoralised centre and force the phalanx to come down off its hill to continue the fight.  He cannot retreat them all, so the rest of his men hold in place to cover the withdrawal.

Clepsina pulls back

Nearchus and his men now overcome the last of the Italian cavalry and rush on to outflank the Roman right.

Nearchus attacks.

Alexander comes around behind the Roman left and threatens Clepsina's centre.  The central phalanx follows up the retreating Romans while the rest of the line attacks.  The Macedonians left on the hill now turn the tables on their Roman tormenters with a furious attack that leaves the legionaries confused, disorganised and demoralised (2 hits, 1 of them an all-out-attack, all units in the zone are now spent).

The thureophoroi press similarly hard and the Romans are only just holding on (1 hit).

The Roman line fragmented and under pressure.
Turn 6.

The consul organises his men to face the enemy as best he can.  The triarii from the right join him to stiffen the resistance.  Elsewhere the pockets of Roman troops flail against the enemy with no success.

Clepsina tries to reorganise the line.


Alexander leads the attack against the milling infantry and Clepsina rides to meet him. After a brief and bloody clash Clepsina falls (1 hit, Clepsina dies in a rally attempt - 1 shatter, 4 rout) and the end is nigh for the Romans.

Alexander leads the charge and the last Roman resistance begins to crumble.

Elsewhere the Macedonians attack down the hill (1 hit, all out attack) and this is enough to cause panic and the Roman flight now becomes general.

Last rites.

Roman remnants.

The day is lost!


Alexander has won an astounding victory, and all Italy will tremble at the news!

VPs.

Rome: 1 shattered (6vps), 8 average spent (24vps), 1 veteran spent (4vps), 2 levy spent (4vps).

Epirus: 5 average shattered (30), 1 veteran shattered (8), 1 average commander killed (12), 7 average routed (28), 3 average withdrawn (9), 2 levy routed (6) + 3 points on handicap.

38 vs 96 is a great victory for Alexander.

This was a thoroughly enjoyable game and it was interesting to see Rome really struggle against the phalanx.  The lack of command points to spend on combat bonuses and the ability of the phalangites to use their depth to advantage (+1) saw a very one-sided combat in the centre, and that is what ensured that Rome would lose.


Saturday, March 31, 2012

Pyrrhic campaign battle maps: Heraclea and Beneventum

Here are two battle maps I've put together for a Pyrrhic campaign that Luke is coming down for on Sunday (images are taken from the Lost Battles VASSAL module).

This is Heraclea, with the Romans entering from the bottom of the board:


And this is Beneventum, with the Romans beginning in their camp: 


These battles will bookend Asculum, which will take place on a flat plain.  In both cases the terrain is of course highly speculative, but a wargamer has to be prepared to make the odd executive decision at times!

Wednesday, March 14, 2012

Lost Battles Scenario for Cissa, 218 BC.

I've been putting together a scenario for Cissa, 218 BC to test whether Lost Battles can manage what is a bit of a curious battle.

Hanno, who was in command north of the Ebro, was greatly outnumbered but still elected to engage Gnaeus Scipio (uncle of Africanus) rather than wait for the arrival of Hasdrubal and his reinforcements.

Polybius (III.76) and Livy (XXI.60) both have Hanno's force at 10,000 infantry and 1000 horse, said to be taken from Hannibal's own army as he headed for the Alps. Polybius notes Hannibal's army - from which Hanno's force was detached - was 'well trained', but even so it seems ambitious of Hanno to want to take on such a superior force when help was close at hand (whether he knew that Hasdrubal was on his way is of course another matter).

The exact figure for the Romans is more problematic. The brothers Scipio had been assigned a force of two legions with the usual complement of Roman horse plus 14,000 allied infantry, 1,600 allied cavalry, and 60 quinquiremes. After Hannibal bypassed their position on the Rhone, Publius sent Gnaeus on to Spain with the bulk of the army while he himself hurried back with a small force to join the troops in Italy.

Gnaeus subsequently landed near Emporiae and began making such a nuisance of himself that Hanno felt compelled to engage him somewhere north of the Ebro, inland from Tarraco, and near a town called Cissa or Cissis.

If we allow Gnaeus 20,000 foot and 2000 horse then that leaves a small escort for Publius and a detachment for camp/port guard duty. Both Livy and Polybius mentioned Gnaeus' gathering of Iberian allies, so the numbers may in fact be higher. If we confine ourselves to the original force we still have around 16,000 heavy infantry and 4000 light infantry, if usual proportions are assumed.

At a troop multiple of 2 these would become 16 units of average legionaries, 2 units of levy light infantry and 4 units of average cavalry. Even with Gnaeus as an uninspired commander that still gives a fighting value of 81.

Hanno's force would need to be almost entirely veteran to match them, but that seems unlikely given the thrashing he got historically, so we would have to go with a split. 1 ALI and 4 AHI would leave 5000 as veterans, resulting in 10 units of VHI. Two units of average cavalry and Hanno as an uninspired commander would give a total fighting value of 64. Ten units of veterans seems too  many,but to make many more of them average would be going too far below the guideline of c.20 units per side. We could perhaps go with 2ALI, 4AHI, 8 VHI and 2 AHC to give 16 units and reduce the FV to 59. Since the battle saw 6000 Carthaginians killed and 2000 taken captive the latter might be a fairer reflection!

The Carthaginians should probably have a camp on table as its sacking is mentioned in the sources, so if we have that in the rear centre, clear terrain elsewhere, and go for an attack limit of 3 (got to throw the dog a bone somewhere...) we have a rough scenario.

One thing to consider might be to replace a couple of units of legionaries with some Iberian allies, and assume the legionaries to have been left on the coast to guard/man the quinquiremes. This would reduce the Roman FV advantage slightly and might better accord with the reality.

The biggest incongruity is the large number of veterans in Hanno's force.  Given their performance it goes against the grain to categorise them as veterans, but it must be done to allow the battle to fit Lost Battles' parameters. It could, therefore, provide a useful test of the system.

(Also posted on the Lost Battles Yahoo Group)

Wednesday, August 17, 2011

Mago's last battle scenario (following Jim Webster)

Amongst the recent influx of new members on the Lost Battles yahoo group, I recognised a name from Slingshot - Jim Webster. This reminded me that I'd been meaning to convert his recent discussion of Mago's final battle in Insubria into a Lost Battles scenario. Jim's article, "The Italian Campaign of Mago" (Slingshot 276) gives an account of Mago's expedition to Italy and the battle there that resulted in the younger Barca's defeat in 203 and the subsequent evacuation of his army from the mainland. Incidentally, I can't actually find an accepted name for this battle. Wikipedia calls it "The Po Valley Raid", but given that there appear to have been four legions involved as well as a good 20-odd thousand Carthaginians, calling it a 'raid' might be a little insulting! Has anyone an answer to this?

Anyway, this OOB relies on Jim's research and conclusions, which are themselves based on Livy's account of the battle. Livy's treatment can be found in Book XXX.18 of his "History of Rome". Here is the relevant excerpt (Canon Roberts's translation) taken from the electronic text centre, University of Virginia:

********

During this summer P. Quintilius Varus the praetor and M. Cornelius the proconsul fought a regular engagement with Mago. The praetor's legions formed the fighting line; Cornelius kept his in reserve, but rode to the front and took command of one wing, the praetor leading the other, and both of them exhorted the soldiers to make a furious charge on the enemy. When they failed to make any impression upon them, Quintilius said to Cornelius, "As you see, the battle is progressing too slowly; the enemy finding themselves offering an unhoped-for resistance have steeled themselves against fear, there is danger of this fear passing into audacity. We must let loose a hurricane of cavalry against them if we want to shake them and make them give ground. Either, then, you must keep up the fighting at the front and I will bring the cavalry into action, or I will remain here and direct the operations of the first line while you launch the cavalry of the four legions against the enemy." The proconsul left it to the praetor to decide what he would do. Quintilius, accordingly, accompanied by his son Marcus, an enterprising and energetic youth, rode off to the cavalry, ordered them to mount and sent them at once against the enemy. The effect of their charge was heightened by the battle-shout of the legions, and the hostile lines would not have stood their ground, had not Mago, at the first movement of the cavalry, promptly brought his elephants into action. The appearance of these animals, their trumpeting and smell so terrified the horses as to render the assistance of the cavalry futile. When engaged at close quarters and able to use sword and lance the Roman cavalryman was the better fighter, but when carried away by a frightened horse, he was a better target for the Numidian darts. As for the infantry, the twelfth legion had lost a large proportion of their men and were holding their ground more to avoid the disgrace of retreat than from any hope of offering effectual resistance. Nor would they have held it any longer if the thirteenth legion which was in reserve had not been brought up and taken part in the doubtful conflict. To oppose this fresh legion Mago brought up his reserves also. These were Gauls, and the hastati of the eleventh legion had not much trouble in putting them to rout. They then closed up and attacked the elephants who were creating confusion in the Roman infantry ranks. Showering their darts upon them as they crowded together, and hardly ever failing to hit, they drove them all back upon the Carthaginian lines, after four had fallen, severely wounded.

At last the enemy began to give ground, and the whole of the Roman infantry, when they saw the elephants turning against their own side, rushed forward to increase the confusion and panic. As long as Mago kept his station in front, his men retreated slowly and in good order, but when they saw him fall, seriously wounded and carried almost fainting from the field, there was a general flight. The losses of the enemy amounted to 5000 men, and 22 standards were taken. The victory was a far from bloodless one for the Romans, they lost 2300 men in the praetor's army, mostly from the twelfth legion, and amongst them two military tribunes, M. Cosconius and M. Maevius. The thirteenth legion, the last to take part in the action, also had its losses; C. Helvius, a military tribune, fell whilst restoring the battle, and twenty-two members of the cavalry corps, belonging to distinguished families, together with some of the centurions were trampled to death by the elephants. The battle would have lasted longer had not Mago's wound given the Romans the victory.

********

Returning now to Jim's take on this, the reference point is a Roman army under P. Quintilius Varus and M. Cornelius Cethegus consisting of 4 legions plus allies. At a Lost Battles troop multiple of 4, this force could come out like this:

24,000 heavy infantry - 12 units of average legionaries.

c.10,000 velities - 2 levy and 1 average light infantry units.

c.5,000 cavalry - 5 average heavy cavalry units.

Quintilius Varus (uninspired commander; perhaps even uninspired leader) with the cavalry and Cornelius Cethegus (average leader) for a total fighting value of 79.

Mago's force could look something like this (again, these are Jim's numbers and my guestimates are just to fit them into the LB scheme):

12,000 veterans from Spain - perhaps 4 units of average heavy infantry and 4 units of veteran heavy infantry.

4,000 Africans - 2 units of average heavy infantry or 1 heavy and 1 light.

7 elephants and 2,000 light infantry - 1 African elephant unit with accompanying skirmishers.

8,000 Ligurians & 4,000 Gauls - mixing these contingents together we could say 2 average heavy infantry, 1 levy heavy infantry and one levy light infantry.

1,000 Spanish cavalry - 1 average heavy cavalry unit.

1,600 Numidian cavalry and c.400 Gallic cavalry - 2 average light cavalry units.

With Mago as an average commander (though I would perhaps think about making him an inspired commander to account for the positive morale influence Livy attributes to him in this battle) this would give a fighting value of 62 (or 68 if Mago is an IC).

So far so good. This OOB can be tweaked easily enough, but is hopefully a reasonable start given what is known of the forces involved and the way Livy reports the salient features of the battle. It would be possible to use a troop multiple of five and allow both sides more veteran units, but I'm not sure that the account warrants that (though playtesting might).
The terrain is, as Jim intimates, one of the the most difficult elements of the battle to attempt a reconstruction of, as there is not very much to go on. He suggests that Mago picked a site with restricted frontage so as to negate the Roman advantage in numbers, and posits terrain on the flanks to effect this. Regarding the reserve lines, no special considerations need to be made here, as Lost Battles already effectively accounts for reserves through the zone attack limits and the gradual attrition caused by units becoming spent and rotating out of the lead position.

As two legions with ala deployed side by side might take up around 1500-1600 metres frontage, we could probably go with 600m zones, giving us a battlefield 3kms across, an attack limit of three, and ample space for the other two legions to wait for their turn on the front line. To further restrict things as per Jim's vision we could add an impassable hill on one flank and perhaps another (normal) hill in the Roman wing zone of the opposing flank to interfere with the Roman cavalry deployment and give Mago time to bring the elephants in to support the cavalry on that flank if he so desired.

Alternatively, we could make the zones 500 across, do away with the impassable hill altogether, and consider the attack limit of three to be an adequate enough representation of a constricted battlefield as it is.

There does not seem any call for weather, fatigue, or surprise to have any special impact on the battle. Key zones should probably be in the centre as usual, though if the impassable hill battlefield is used the key zones could be shifted one zone farther away from that. Mago should certainly have the first move, and if he were classed as an inspired commander would have enough commands available to set up a strong defensive position with either battlefield configuration. Even as an average commander he would be able to do a fair bit with a deployment turn of 12 commands.

Well, there we go for a start. Thanks very much to Jim for an interesting article on such an overlooked battle.
This has also been posted on the yahoo group, though in an insufficiently proof-read form, I regret to say!

Tuesday, February 8, 2011

Heraclea

After a recent enlightening discussion on the Lost Battles yahoo group, I was helped by the excellent and knowledgeable fellows there to finalise a test OOB for a refight of Heraclea.  The other night I managed to get the battle finished, and now it's time to flex the fingers and write up the report.

I'd decided to try making both sides surprised, putting a stream across the roman baseline, and giving the Romans first move to reflect Plutarch's account of the battle which can be found here in his life of Pyrrhus (16 onwards being the relevant sections).

I went with the numbers Plutarch gives as having set out on the trip across to Italy even though some may have been lost in the storm.  As regards Pyrrhus'somewhat reluctant Tarentine allies, it seemed best to make their foot generic heavy infantry rather than Macedonian-style phalangites to accord with the passage in Polybius (18.28.10).

(As for Pyrrhus he employed not only Italian arms but Italian forces, placing cohorts of these and cohorts composed of men from the phalanx in alternate order in his battles with the Romans.)

I went with 4000 Tarentine foot, enough for one levy heavy infantry unit, which is a slight reduction from the 6000 that Jeff Jonas proposed in the very useful OOB he did for his Warhammer Ancient Battles scenario, here.  If you are reading this Jeff, your scenario was a great jumping-off point, so thank you very much for posting that.

For the Roman forces I went with four legions plus allies to allow Laevinus to outnumber Pyrrhus' men (as Justin's Epitome of the Philippic History of Pompeius Trogas reports he did) without things getting ridiculous. 
Here then are the orders of battle.

Pyrrhus:

The 3000 men of the advance guard become 1 veteran phalanx unit and 1 average phalanx unit.
The 20,000 foot he brought over with him become 10 average phalanx units.
4000 Tarentine foot and 1000 Tarentine light horse (both figures basically plucked from the air) become 1 levy heavy infantry unit and 1 average light cavalry unit.
3000 heavy cavalry become 4 units of veterans and 1 average unit.  Pyrrhus is attached to his guard as an inspired leader.
2000 archers become one unit of average light infantry.
500 slingers and 20 elephants become one unit of Indian elephants with skirmish support.

The total fighting value of the approximately 30,000 foot, 4000 horse and 20 elephants is 80.

Laevinus:

The 27,000 or so heavy foot of the four legions and allies becomes 14 average legionary units.
The 10,000 or so light foot become 2 units of levy light infantry and about 2000 camp guards.
The 5000 or so heavy cavalry become 5 units of the same.
Laevinus is rated as an uninspired commander.

The total fighting value of the approximately 35,000 foot and 5000 horse is 78.

The zones were set at 800 metres across, giving an attack limit of 4.  Just to explain the 'surprised' rule in Lost Battles, the main differences between a normal deployment and a surprised one are that surprise limits the number of units that can deploy in a turn to four, with heavy infantry and elephant units counting as two units in the first turn, and the army fighting value for command generation purposes is limited to the units actually on the field at the start of the turn.

So then, to the action!

As you would expect, both sides send forward skirmishers and cavalry on the first move.  The Romans concentrate troops in all three central zones, with Laevinus and two units of Roman cavalry in the rightmost.  Pyrrhus responds by sending three cavalry units and a light infantry unit forward: the former force to counter Laevinus; the latter to protect the key zone in the centre.  

Pyrrhus' light infantry feel a little exposed...

The second turn sees Laevinus roll a 1 for command, giving him a miserable 2 commands plus 1 exemption to work with.  He spends 2 to deploy four legionary units in the centre, and uses his exemption to launch a cut-price attack on Pyrrhus' zone, scoring a hit.  In return, Pyrrhus double-moves some phalangites and two more units of cavalry to secure his presence in the centre.  In the attack from his own zone he shatters one unit of Roman cavalry and leaves the other spent.

Towards the end of turn two Laevinus begins to get a trifle nervy.

Laevinus rolls another 1, giving him 4 commands and an exemption.  He brings on another 4 units of legionaries and retires with the spent cavalry behind the safety of their shields.  Due to an accounting error he does not have enough commands to bring up support for the velites... 

"Why did I not count up my on-table fighting value correctly?" laments Laevinus.

...which proves costly as Pyrrhus now launches attacks in the centre and the centre-right, shattering both units of velites/leves. He declines to advance in the centre, but does advance the cavalry of the centre-right.

In the distance the phalanx begins to mass in the zone behind Pyrrhus.

Laevinus now gets a decent roll for his commands, brings on another two units of legionaries, and sends two units of equites into the far left wing zone, threatening to encircle the cavalry that advanced after defeating the Roman light infantry.  Pyrrhus pulls the cavalry back at a cost if three valuable commands, and elects to make an outflanking move of his own on the other wing.


We should have stayed here all along, grumble the cavalry. That way our support might have caught us up.

Laevinus now brings on two more units of legionaries in the centre left and his last unit of cavalry to defend the rear from the marauding Pyrrhus.  With a few more commands at his disposal his men are encouraged enough to score four hits on the phalangites on the Pyrrhic left, leaving the entire zone spent and dangerously close to ruin.

Determined attacks by the legionaries throw Pyrrhus' infantry off balance. 


An uncomfortable experience for the cavalry as the maniples move into line.

With his infantry line in danger of folding, Pyrrhus' earns again his storied epithet, 'the One'.  He decides that he will attack this turn and try to bring on reinforcements on the next.  It is a gamble, but his men do experience some success on the left.


The phalangites take a deep breath and pray that reinforcements will arrive soon...

Laevinus urges his men foward to break the phalangites opposite them, but they cannot score any shatters.  Elsewhere they have more success as the centre and centre left all score hits.  The consul now brings on his last undeployed units (the triarii, naturally!) to support his beleaguered cavalry in their efforts to ward off Pyrrhus' attempt at encirclement.  The cavalry score a hit on Pyrrhus' supporting veterans, and suddenly even these fellows are starting to feel the pressure.  Their reply though is magnificent: two hits; and knowing that the Thessalians have begun to come up in support, Pyrrhus does not feel the need to exchange cloaks and headgear with anyone quite yet.


It has come to the triarii...

Around this time Pyrrhus is faced with a problem: after rolling another 1 for command he can only bring up troops to support one part of his line.  The left or the right?  He chooses the right, and relies again on his staunch phalangites to hold on for another turn on the left. 

Laevinus is not idle - his men on the right shatter a unit of phalangites, continue to score hits elsewhere, and outflank the Pyrrhic centre-left.


Oh, dear. 

Things are not much better for Pyrrhus' infantry here, either.

Pyrrhus is able to bring up some fresh reinforcements in the left and the centre, including the long-awaited elephants, but it is now the right that is in trouble, despite its earlier reinforcement.  There is some encouragement though: all the units in the the Roman centre are now spent, and Laevinus' zone on the Roman left has only one fresh unit remaining.


I think we've seen you fellows somewhere before?

On turn 8 Rome begins by shattering a unit of phalangites and completes the 'spending' of Pyrrhus' centre and centre-right, but without being able to do as much damage as Laevinus would have hoped.  Pyrrhus is still unscathed, and the rest of the infantry line totters but holds.

Pyrrhus' line on the verge of collapse.

With the Thessalian cavalry now up in the line, Pyrrhus gives them their head and in a dramatic attack they shatter the stubborn triarii: the rear of Laevinus' lines is now exposed!  Elsewhere the attacks are prosecuted with vigour, but the disorder in the ranks prevents a breakthrough.


Those Thessalians are worth their weight...

It is now the Roman's turn to stall.  They can manage no shatters, but they do score a hit on the elephant unit, which brings them back into contention on their right.  Now though they are surrounded, and it does not look as promising as it once did.
Don't look behind you, gentlemen...

On turn 9 Pyrrhus attacks in the centre, using as many combat bonuses as he can.  The breakthrough is made, and with more than four Roman units shattered and the central zone with enemy to front and rear, the morale roll sends the rest of the units in the zone packing.  The centre, and with it the Roman key zone, has been won.  Now, all they need to do is shatter one more unit... but they cannot manage it.

Moving first on the last turn, the Romans finally cause a shatter and a morale failure on the Pyrrhic right.  Only the veteran cavalry stand, but they too are shattered in the next attack, and so a breakthrough by one side in one part of the line is matched by the other in another.  Laevinus however is unable to score a shatter on the zone opposing him, so the Pyrrhic army still has a chance to win the day. 


The situation at the of the Roman move in the tenth and last turn.

With all depending on breaking Laevinus' zone no combat bonuses are spared.  Two hits are scored, and Laevinus, summoning all his powers of inspiration, attempts to rally his men.  Two hits... and two rallies!  He succeeds, his men remain on the field, and the battle is a draw.

After such a dramatic battle, with so many changes in fortune, a draw seemed to be a good result.  Honour was satisfied on both sides.

When it came time to count up the points, I found that Rome had won a close battle on points by 84-68.  Rome probably won the game in the last turn when it routed the Pyrrhic left; but Pyrrhus might have won it back had it not been for the heroic performance of Laevinus in rolling two glorious 11s, in defiance of the odds (though obviously in accordance with the will of the gods).

A great game, finished in fine style! 

Tuesday, November 9, 2010

Magnesia: preparations.

Magnesia is one of those great battles of ancient times that like Cannae, Zama, Issus and Pharsalus (to name but a few) tends to fill the wargamer with both excitement and trepidation, for there is a certain epic quality about it to which one would like to do justice. Ideally, the battle must firstly be a spectacle which evokes something of the grandeur of the troops massed on the field for combat; secondly, the result and the steps that take us to that point must be believable and internally consistant; thirdly, it must be an intense and immersive gaming experience. If we are lucky, the pageantry, game events and emotional responses may occasionally combine to conjure a satisfying 'objective correlative' of the battle (to twist T.S. Eliot's famous term) which leaves participants with a heightened awareness of the historical events, how they meshed together, what some of the key moments might have been, and the thrill of having taken part in a suitably grand game on a grand subject.

Naturally, this is a tall order. Nonetheless, after having spent the last month painting up scythed chariots, horse archers and heavy cavalry to fill some rather gaping holes in my figure collection, I felt game to give the battle a try.  As is usual for me, I turned to Lost Battles for the rules as they frequently imbue proceedings with an air of the epic: processes and results both lend themselves well to imaginative embellishment as a narrative emerges from the actions being played out on the table top.

The real battle went something like this: the Romans had decided that they didn't want Antiochus III making trouble for them in Greece or anywhere else, so an army under the command of Lucius Scipio, younger brother of the famed Africanus, was sent to deal with him.  Antiochus gathered a huge host in anticipation of the decisive encounter and for its own part Rome welcomed the aid of Eumenes of Pergamum.

The armies were encamped not far apart, and after some days of aggressive Roman intent epitomised by the moving forward of their camp an increasingly nervy Antiochus signalled that he would give battle.  The Romans deployed with their left flank of just 120 horsemen resting on the river Phrygius, the two legions in the centre and the alae on either side of them.  Eumenes and his picked cavalry were on the right, supported by peltasts and the bulk of the Roman and Italian horse. 

Opposite Eumenes were deployed scythed chariots and a mixture of foot and horse, some of which were cataphracts.  In the Seleucid centre was the phalanx, formed 32 men deep.  With elephants placed in the intervals between the pike blocks and the men formed up in such great depth, the centre must have been a forbidding sight. Antiochus himself commanded the right with his household cavalry, more cataphracts, and another mixture of horse and foot.  Light missile cavalry on the extreme right completed the Seleucid array. 

Converted to Lost Battles terms, the orders of battle (at a troop multiple of 6) look like this:


Romans.

Foot:

Six units of veteran legionaries and two units of average legionaries for a total of  16,000 hastati, principes and triarii. 

Two units of average light infantry for a total of 6000 velites.

Two units of average heavy infantry (Greeks, Macedonians, Thracians) for a total of 6,000 heavy foot.

One unit of veteran light infantry (Cretans, Trallians) for a total of 1500 light missile troops.


Mounted:

One unit of veteran Roman heavy cavalry and one unit of average Italian heavy cavalry for a total of 2,250 men.

One unit of Pergamene heavy cavalry commanded by Eumenes himself, for a total of 750 men.


Generals:

Lucius Scipio is rated as an average commander and Eumenes is rated as an average leader.


Seleucids.

Foot:

Six units of average and one unit of levy phalangites for a phalanx numbering 24,000 men.

Two units of levy heavy infantry for a total of 12,000 assorted heavy foot.

Three units of levy light infantry for a total of 18,000 light foot of dubious quality.


Mounted:

Two units of average and one unit of levy cataphracts for a total of 6,000 men.

One unit if veteran household cavalry commanded in person by Antiochus, one unit of average guard cavalry, and one unit of levy cavalry for a total of 5,250 men.

One unit of average light cavalry for a total of 1500 Dahae and Tarentine missile cavalrymen.

One unit of scythed chariots representing 150 machines.

One unit of Indian elephants and escorts, representing 30 beasts and 1500 accompanying skirmishers.


General:

Antiochus is rated as an average leader.

The battlefield is made up of 20 zones arranged 5 across and 4 deep, each zone being 1000 yards across and 1000 yards deep.  Both camps are present on the battlefield, with the Roman camp in their rear centre zone and the Seleucid camp in their left rear centre zone.  The Phrygius river cuts through two zones, the Roman left wing and left flank, and the rest of the battlefied is considered flat terrain.

Below are some pictures of the armies at deployment.  The first shot shows the battlefield from behind the Seleucid right wing zone.


The second shot shows the Seleucid rear right centre, with the phalanx and two units of cataphracts in front of the camp.  Antiochus leads his household cavalry in the next zone foward, supported by a detachment of light infantry.


The Roman infantry is deployed across two zones, with the velites forward of the main line.  The allied Greeks and Eumenes with the cavalry extend the line two zones further.


This shot here shows the Seleucid left, with levy troops and a unit of the guard cavalry supporting the potentially fearsome scythed chariots.  A unit of Galatian heavy cavalry is in the foreground, angled away from the main line.  Across the battlefield can be seen elements of Eumenes' command, though he himself is not visible in shot.


When the battle commenced Eumenes ordered his men to kill, maim and panic the horses of the chariots with missiles and noise, whereupon he took advantage of the disruption they had caused in their own ranks, charged home and put the Seleucid left to flight. With one flank now exposed the centre lacked essential support.  As the legions closed  it began giving ground and in the confusion the elephants with their support troops were driven into the men of the phalanx, exacerbating the disorder and preventing either troop type from fighting effectively, much less co-ordinating their strength.

Meantime - and in stark contrast to the problems besetting the left and the centre - the right under Antiochus advanced strongly, drove off the small cavalry flank guard and put some of the allies to flight. Elements of Antiochus' force briefly threatened the Roman camp, but resistance there stiffened in timely fashion and with his centre now collapsing Antiochus fled the field.

This (very) brief overview of the course of the historical battle tells us that the key elements of the battle from the wargamer's perspective could be thought to be as follows:

1) Eumenes' panicking of the scythed chariots.
2) The defeat of the scythed chariots causing a wider morale crisis on the Seleucid left.
3) The battle between the phalanx and the legion in the centre.
4) Antiochus' success on the right, and the timing of the advance on the Roman camp.
5) The collapse of the Seleucid centre leading to Antiochus' decision to flee.

Well, I've said about all I can say on the subject of preparations.  So, stay tuned, and the next post will look at the battle on the table top itself.

Thursday, September 23, 2010

Dertosa Scenario for Lost Battles

After reading Patrick Waterson's article on Dertosa in the latest Slingshot (issue 271) I decided to come up with a Lost Battles scenario based upon Patrick's reconstruction of the battle.

The gist of Patrick's interpretation is that Hasdrubal was attempting to pull off a Spanish version of Cannae. That is, he was hoping to annihilate the army of Publius and Gnaeus Scipio by fixing it in place in the centre, encircling it with the cavalry of the left wing, and finally crushing it with wrap-around attacks to be carried out by the Carthaginian veteran infantry on each flank.  Unfortunately for Hasdrubal, all did not go to plan.  The Spanish allies to whom he had entrusted care of the centre ran off at the earliest opportunity, which encouraged the Numidian cavalry of the right wing to do the same.  Despite a brave performance by the rest of the infantry the Carthaginians were soundly beaten.

The situation is unusual, for not only did Hasdrubal seem to have little idea his Spanish allies were lacking motivation, but they also turned out to be very unmotivated indeed, and ran at the first onset.  One of the big questions of the scenario becomes how best to model this in Lost Battles.  What follows are details of an initial basic scenario for Dertosa that uses no special rules or add-ons.  Depending on results, the scenario may require finer tuning.

Ground scale: 500 metres per zone
Manpower Multiple: x3
Attack Limit: 3
Terrain: The battlefield is a flat plain, and while a case could perhaps be made for including a Carthaginian camp on table to aid deployment, I elected not to do so.

Rome:
12 x ALE for a total of 18,000 hastati, principes and triarii.
3 x ALI for a total of 4500 light-armed troops.
3 x AHC for a total of 2250 heavy cavalry.
AC (Publius Scipio); UC (Gnaeus Scipio).

This makes for a total of 22,500 foot, 2250 cav and two commanders for a fighting value of 75.

Carthage:
4 x VHI for a total of 3000 veteran heavy infantry.
4 x AHI for a total of 6000 other heavy infantry.
3 x LHI for a total of 9000 unreliable Spanish allies.
1 x LLI and 1 x ALI for a total of 4500 light troops, including Balearics and assorted Spanish lights.
2 x AEL for a total of 30 (21 in the real battle) elephants and a few hundred hangers-on.
3 x AHC for a total of 2250 heavy cavalry.
1 x LLC for a total of 1500 Numidians and 'Moors' of doubtful loyalty.
1 x AC (hapless Hasdrubal).

This makes for a total of around 23,000 foot, 3750 cav, 30 elephants and one commander for a fighting value of 62.

Below is a possible deployment based upon Patrick's reconstruction, but limited by command points.  These graphics are from John Acar's excellent VASSAL module for Lost Battles (click on the picture for a larger view):

Related Posts Plugin for WordPress, Blogger...