Prufrock's Wargaming Blog

Prufrock's Wargaming Blog

Wednesday, July 17, 2013

Cannae concludes

On turn six the Carthaginians began by using the cavalry to attack the Roman rear.

The Gauls score one hit on the Roman centre...


and Hasdrubal muffs his chance.


But the Numidians atone for their reluctance last turn by shattering Varro's guard.


Things look very ominous for Rome.


The morale die is cast with the army at -3: -1 or four or more units shattered; -1 for two or more uninspired generals withdrawn; -1 for having enemy to front and rear.

But these are legionaries.  They get a +1 for being heavy infantry, and a further by reason of their virtus.  A high morale roll will see them through.


But it doesn't come - for the second time in the battle they roll a one, and the entire force streams off the field!


And so it comes time to tally the results.

The Romans start with a fighting value of 70 compared to the Carthaginians' 84, so they have a handicap of 42.  They have left eleven average quality Carthaginians units and one veteran spent, which adds 37 points to their tally.  They total 79 points.

The Romans have fled early, which is a mixed blessing.  Carthage has scored only five shatters, for a total of 30 points, but the Carthaginians have not suffered any themselves.  They can add another 30 points from routed units and 21 from units withdrawn (withdrawn units being fresh units who rout in sympathy).

So the victory points stand at 79 for Rome and 81 for Carthage, giving Hannibal a very tight victory.  If Rome had scored just one more hit during the battle, the points victory would have gone the other way.

This game is yet another mark in favour of Phil Sabin's excellent handicap system, which gives both sides a good chance of victory, even though in the field battle the odds may be stacked.

While there were a number of key moments in the game, the timing of Carthage's success was always slightly ahead of the 'battlefield clock', and this allowed enough depresssion of Roman morale to cause a rout before the fragile Carthaginian front began to fold under pressure.  But as the point results show, it was very close.  Ifs indeed!

It was a great game, and after a long time between (lost) battles, it has proved a timely reminder of the gaming I've been missing.


Tuesday, July 16, 2013

Cannae carries on...

Turn four begins with Hasdrubal charging into the waiting triarii.  He has the advantage of momentum and numbers, but if he cannot break though now then the triarii will hit back hard, and may even shatter a unit.  He therefore decides to lead the attack himself, and puts everything into it.


... and the dice are kind.  The double hit shatters the triarii and there is nothing left to oppose Hasdrubal's advance.


Despite the great mass of the legions appearing to still be in fine fighting fettle, the Roman rear is now vulnerable.


On the right, the Numidians take their turn.


After the three hits they scored with their mightily effective skirmishing, Varro's wing is also in trouble.


It has been a decisive turn for Carthage, and as the heavy cavalry envelop the infantry line it is hard to see how Rome can come back from this.  The only thing in their favour is that - the Roman right aside - the infantry is still in pretty good shape.  The question is, if they can break through, will it be in time?


So Varro leads off with urgency and scores a hit on the Numidians, who are now all spent.  If Varro can survive the counter attack and score another hit next turn, it might be enough to put the Numidians to flight and go some way towards turning the tide.


The legionaries now get into their work, and as they grind their way forward they begin to inflict some serious damage.


Five hits by the Romans this turn have brought them back, but they will need staunch defense next turn and will require a breakthrough soon - in  Hannibal's zone if at all possible, as it is all spent bar one unit of Gauls.

Rome's success is dependent on ifs; Carthage's on whens.


Turn five sees Carthage drive in on the Roman right.  The appearance of the Carthaginian veteran infantry from behind the Gallic host incites panic.  They score a hit, and on a morale roll of one rout the remainder of the wing.


The heavy cavalry continues its advance, even going so far as to fall in behind Varro's cavalry.


But the infantry attacks are ineffective and most of the Romans still in the line are fresh.


On its own turn Rome attacks first in the centre, scoring one more hit.  It is not enough to force a shatter in Hannibal's zone, but his units there are now all spent, so he will have to make a decision next turn on whether to stand - risking heavy losses and personal injury - or to fall back and give up his key zone.


Varro makes another gallant attack, but the dice speak for themselves...


And so, at the end of turn five, the Romans have lost four units shattered and another four to rout, with Paulus among them.  Surely they cannot last much longer?


The Grail Arrives...

Look what's just come thundering down the pike!


I've been hunting for this for a long time, and I'm going to get a lot of enjoyment out of it.  Many thanks to Tom S - auttiecat on TMP - who hooked me up.

Sunday, July 14, 2013

Cannae continues

In the breaks in the cricket, Cannae continues from the earlier post...   Here Hasdrubal unleashes the Gallic cavalry who immediately score a double hit, destroying the equites opposing them and opening up the flank.


The infantry skirmish in the centre without doing any damage, but the rest of the Gauls advance into contact.


Hannibal now declares his flip flop* and moves again.  He can only mount attacks from the zones he didn't attack from in the previous turn, but these each score two hits on the ends of the Roman infantry line.  The heavy cavalry of Hasdrubal's wing continues its advance until halted by the triarii.


On the Carthaginian right the Numidian light cavalry holds back to avoid allowing the Roman infantry to extend the line.


In their turn the Romans turn the triarii to meet the threat and these score a hit, knocking Hasdrubal's Gauls off their stride.  If they can hold for another turn they may be able to do some real damage to the Carthaginian cause.


On the left Varro accepts the inevitable and charges the Numidians.  Despite the negative modifiers for charging at distance, a hit is scored.


The infantry score another hit on the right...


And one more on the left.


The Romans appear to have absorbed the worst of the flip-flop attacks and are hitting back well.

* For those unfamiliar with Lost Battles terminology, a flip-flop turn allows a 'brilliant' general to reverse the turn order, effectively allowing an exploitation turn.  Attacks cannot be made from the same zone in two successive turns, so flip flops are usually used to attack after moving into contact or after making a breakthrough.


Friday, July 12, 2013

Cannae commences...

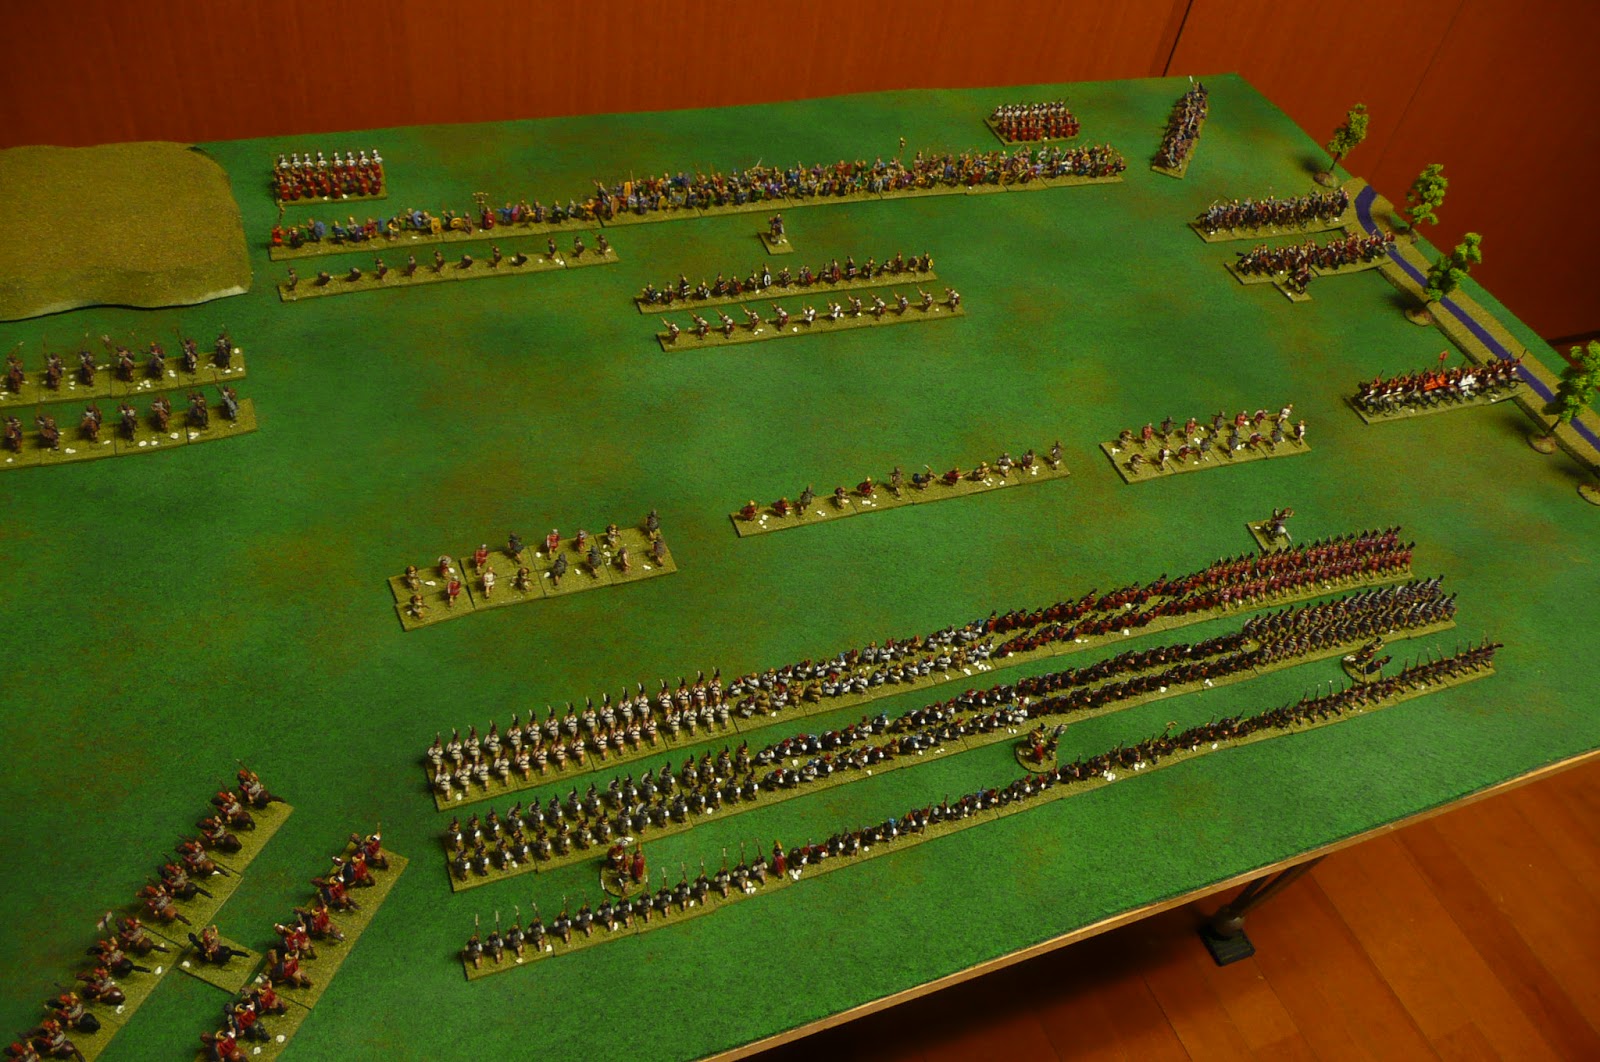
I've got a solo game of Cannae on the go using Lost Battles.  I'm not making much progress (due mainly to cricketing distractions), but here are a couple of shots of the 'historical' deployment anyway.


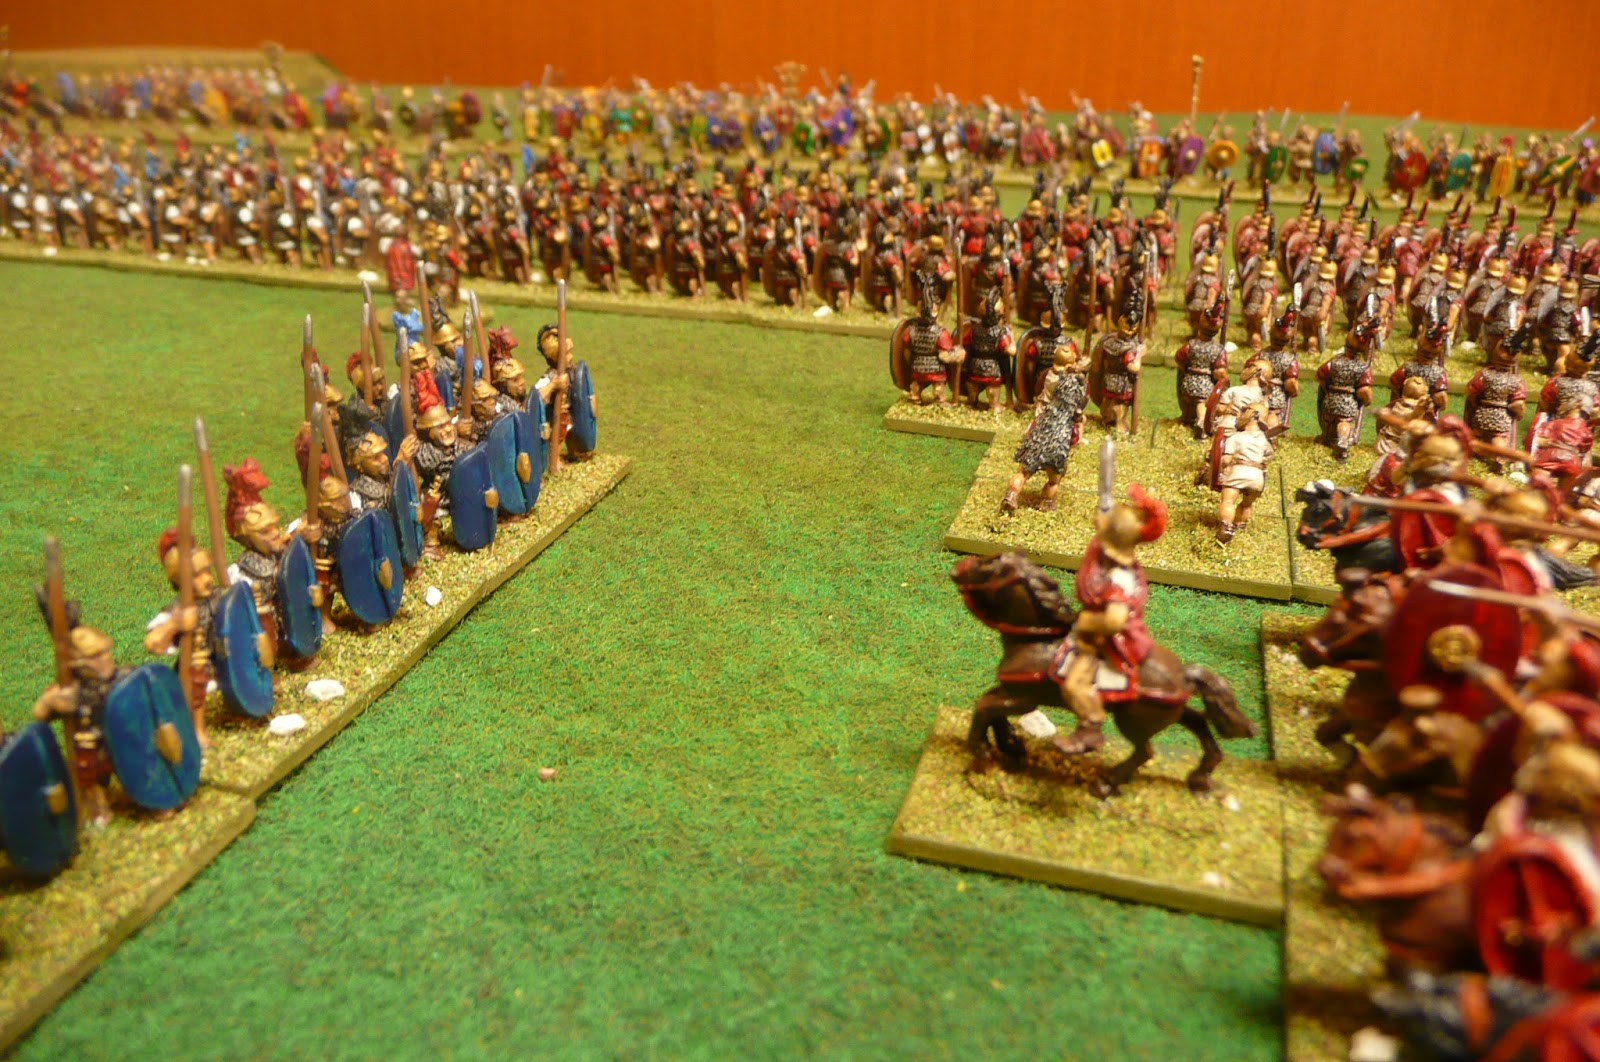
And after the Romans' first turn, in which they score a couple of hits on the enemy and advance the infantry, while - in a nod to hindsight - leaving one unit of triarii to react to any potential cavalry breakthrough.


Saturday, June 29, 2013

6mm painting guides: WWII infantry

German infantry.

Undercoat the figures Mr. Hobby Color Spray No. 117, RLM76 Light Blue.

Paint weapons black.

Paint helmets Hobby Color H32 Field Gray 1

Mix two different washes, one based on Field Gray XF-65, and the other on a H32.  Apply washes in different strengths to different figures.  Finish up with a strong XF-65 wash and use that to paint the bases of the miniatures.

Dab flesh areas with Turner Acryl Gouache Apricot.

Paint gas mask cases H36 Dark Green.

Paint entrenchment tool handles and pistol holsters Turner Burnt Sienna.

Paint jackboots, officers' gloves and entrenchment tool holders black.

Highlight trousers and officer caps in Turner Neutral Gray 5 or Tamiya XF54 Dark Sea Gray.


US infantry.

Undercoat the figures Mr. Hobby Color Spray No.70, Dark Green.

Paint weapons black.

Dab flesh areas with Turner Apricot.

Paint helmets XF-62 Olive Drab.

Paint webbing XF 60 Dark Yellow

Paint webbing, entrenchment tool handles and pistol holsters Turner Burnt Sienna.

Paint trousers XF-49 Khaki.

Paint every 3rd or 4th tunic as a  jacket using XF-57 Buff.


(Figures are all from the Heroics and Ros ranges)

Tuesday, June 25, 2013

Sunday Crossfire

Luke and Pat came down for a game of Crossfire on the weekend and we ended up getting through two battles.   I umpired, but probably did more to confuse things than to clarify them!

The table was not of a very high standard as I don't have dedicated 6mm terrain (yet), but being gentlemen, Luke and Pat tried to downplay that as best they could.

The scenario we used was taken from Steven Thomas' site, and pitted a company of attacking US troops against two platoons of Germans.

The first game was a bit of a write-off for the German player because I read the victory conditions wrong and the US had an easier time of taking the objective than they should have.  That said, I don't think the result would have changed; the boldness of the attacker rushing the objective under cover of smoke paid off against the defender's concern to reinforce his north flank and defend the objective with fire rather than occupancy.

All photos courtesy of Pat Hirtle.
In this shot (looking from the east) we can see the objective in the middle ground with a platoon of Germans lined up on the crest to its right as the Americans in the distance steel themselves to make their assault.


This shot (looking from the north) shows the result of the attack - the Americans have taken the hill, and although they've been somewhat cut up in the north, the diversionary attack drew off the German reserve and left no one available for a counter-attack.

For the second game the German employed a more central defence.  He occupied the hill with a squad, platoon commander and forward observer, put a platoon in reserve behind it, a squad covering the field to the south, another the crest to the north, and the HMG in a field to the rear covering the approaches from the south east.

This game was much tighter.  The American rushed the field to the south of the hill and got badly mauled by the single squad of Germans behind it.  The defenders pinned one squad with reactive fire, suppressed another, and then killed the close-assaulting third squad and platoon commander in close combat.  Not a bad effort from those men.


This photo shows the attack through the field: a textbook approach confounded by the dice heroism of the German squad.  Their heroism was not enough so save them from later American fire, however!  But leaderless and exposed, the remaining two squads from the American platoon now began to take fire from the German HMG.

Meanwhile, the American commander remained undaunted by the close-combat prowess of the Germans, and ordered his second platoon to assault the hill in identical fashion.  This time his close assault was more successful.


Here you can see the Americans attack, again under cover of smoke.  The Germans were quickly swept away by the assault, but the defenders behind the hill then began to lay down some effective fire.

Although time was running out for retaking the hill, the Americans were very near their breaking point, and on the last initiative of the game the Germans were left with the task of killing two suppressed squads to win.  The first squad was killed, but the second, on the last roll of the game, survived the fire of the deadly HMG.

It was a torrid battle, and I think really showcased how well Crossfire works.  The rules are fairly simple, but the results are believable - as are the way that we get to them - and the players are able to concentrate on gaining (or squandering!) advantage through tactics rather than by applying the rules better than the other fellow.

That said, there were a few murky areas in the rules when we got into some unusual situations, so some house ruling might be required here and there.  We were also a little iffy about how direct fire with mortars worked (though I may have read the rules wrong here) so a wee tweak or two might be in order with this, but we shall see.

Thanks to my comrades in (miniatures) arms I now see that Crossfire should work fine for solo play as well, so I'm looking forward to a few more sessions, and perhaps even a campaign.

So, a great day had, and many thanks to Luke and Pat for making the trip down.

But I really do need to get some better terrain...

Related Posts Plugin for WordPress, Blogger...