Well, last night I began my latest project - a series of armies for DBA. The Anglo-Danes have had their first flesh coat applied, and hopefully some steady work over the next month or so will see this army finished. The Anglo-Danes are a bit of a test for me as I've never painted an army specifically for DBA before. If it proves to be a quick and enjoyable process then I might order a few more of them (if the six I have already turn out to be inadequately representative of the period, as I'm sure they will...).
It's good to be painting again after a wee break.
Prufrock's Wargaming Blog

Tuesday, December 21, 2010


Friday, December 17, 2010
Raphia multiplayer PBEM: part three
This is the third post in a series on our multiplayer PBEM refight of Raphia. The first post is here and the second is here.
By the end of the fourth turn the Seleucids had swept away the Ptolemaic left and turned in to attack the centre while Antiochus with his cavalry had galloped around to attack the reserve. On their own left, the Seleucids were under considerably more pressure. With their leftmost zone reduced to two units, one of which was spent, and their centre reduced to five units with only one fresh, they were beginning to look a little fragile in this quarter of the field.
With time running out, the Ptolemies needed a quick victory in the centre and on the right to allow them to turn to deal with Antipater's rampaging elephants and Antiochus' veteran heavy cavalry. The question is, would it happen, and if so, would it happen in time?
Here is the board situation at the start of turn 5:

Turn 5.
The Ptolemies rolled a one for command, giving them five command points to use. Ephecretes began on the left, attacking Themison in his left rear zone. Three hits were scored, shattering all the units there and clearing the zone. With his last order Ephecretes sent his average light cavalry in to take the enemy camp and in so doing threaten the morale of the Seleucid centre.
Andromachus used his two commands to attack Nicarchus' phalangites, scoring two hits and causing a unit to shatter. In the morale test that followed the entire Seleucid centre gave way and Andromachus advanced one spent levy unit into the now cleared zone.
Things had gone very well for the Ptolemies to this point.
After the Ptolemaic turn the board looked like this:

With the battle now at a crucial stage, all depended on whether the Ptolemaic morale could remain steady in the face of the Seleucid counter blow.
The Seleucids had 9 commands to play with and these were pumped into as many bonuses as possible.
First, Antipater's zone was activated for a total of 5 commands. A unit of the Indian elephants was put into the lead and given a command bonus; the phalangites were paired and also given a command bonus; finally, the other elephants were to attack last and at a minus for going over the attack limit.
Antipater's attack:

The lead elephant, needing a 6 to hit, rolled a 6. As it was spent, it could not all-out attack and so no hit was made.
The paired phalangites, also needing a 6 to hit, rolled a 4.
The remaining elephant needed a 9 to hit but rolled a 7.
No hits scored!
The second zone activated was the Seleucid key zone. With 1 command the light infantry was ordered to turn and attacked the spent levy phalanx unit. For 2 more commands it was given a combat bonus.
The light infantry attack:


By the end of the fourth turn the Seleucids had swept away the Ptolemaic left and turned in to attack the centre while Antiochus with his cavalry had galloped around to attack the reserve. On their own left, the Seleucids were under considerably more pressure. With their leftmost zone reduced to two units, one of which was spent, and their centre reduced to five units with only one fresh, they were beginning to look a little fragile in this quarter of the field.
With time running out, the Ptolemies needed a quick victory in the centre and on the right to allow them to turn to deal with Antipater's rampaging elephants and Antiochus' veteran heavy cavalry. The question is, would it happen, and if so, would it happen in time?
Here is the board situation at the start of turn 5:

Turn 5.
The Ptolemies rolled a one for command, giving them five command points to use. Ephecretes began on the left, attacking Themison in his left rear zone. Three hits were scored, shattering all the units there and clearing the zone. With his last order Ephecretes sent his average light cavalry in to take the enemy camp and in so doing threaten the morale of the Seleucid centre.
Andromachus used his two commands to attack Nicarchus' phalangites, scoring two hits and causing a unit to shatter. In the morale test that followed the entire Seleucid centre gave way and Andromachus advanced one spent levy unit into the now cleared zone.
Things had gone very well for the Ptolemies to this point.
After the Ptolemaic turn the board looked like this:

With the battle now at a crucial stage, all depended on whether the Ptolemaic morale could remain steady in the face of the Seleucid counter blow.
The Seleucids had 9 commands to play with and these were pumped into as many bonuses as possible.
First, Antipater's zone was activated for a total of 5 commands. A unit of the Indian elephants was put into the lead and given a command bonus; the phalangites were paired and also given a command bonus; finally, the other elephants were to attack last and at a minus for going over the attack limit.
Antipater's attack:

The lead elephant, needing a 6 to hit, rolled a 6. As it was spent, it could not all-out attack and so no hit was made.
The paired phalangites, also needing a 6 to hit, rolled a 4.
The remaining elephant needed a 9 to hit but rolled a 7.
No hits scored!
The second zone activated was the Seleucid key zone. With 1 command the light infantry was ordered to turn and attacked the spent levy phalanx unit. For 2 more commands it was given a combat bonus.
The light infantry attack:

The light infantry needed 8 to hit and shatter the levy phalanx. The roll? 2!
This left it all up to Antiochus, who put his own guard unit in the lead and attacked using his exemptions.
Antiochus' attack:

The lead veteran heavy cavalry with two combat bonuses going up against levy phalangites in an edge zone required a 4 to hit once or an 8 to hit twice. The result was a 10, shattering the unit in one grand charge and causing a morale test!
With another high morale roll needed by the Ptolemies, the die finally failed to oblige. On a score of 1 all but three units ran away, with those remaining three counted as withdrawn (as a mercy - technically we should have kept going).
So, a magnificent victory for the Seleucids! The pressure they put on the Polycrates' left told, and despite the best efforts of Andromachus and Ephecretes, Nicarchus and Themison stuck it out for long enough for Antiochus and his men to carry the day.
The final points tallies were 116 to 65, giving Antiochus and friends a victory by 51 points, which equates to a major victory. Antiochus will surely be feasting in Alexandria very soon!
Thanks to all of the fellows involved for making this such a great game to be a part of and hopefully there will be many more battles to follow.
(BTW, if anyone is curious about Lost Battles and might be interested in taking part in another such game, do join the Lost Battles yahoo group at this link and ask for more information there.)
Sunday, December 12, 2010
Raphia multiplayer PBEM: part two.
It's time for an update on our multiplayer PBEM game of Raphia. Much has happened since the first installment here. To quickly recap, the second turn finished with the Seleucids having made an impressive attack on their left through Antipater and having pulled a fast move in turning their central phalanx left to bring as much force to bear as possible on Ephecretes' fragile wing. This made it even more urgent for the Ptolemaic centre under Andromachus to push on with the attack.
Here is the board at the commencement of turn 3 (Seleucids in Black; Ptolemies in Red):

The command roll for the Ptolemies was favourable - a four. This gave enough commands to activate all the command groups for attack and also to remedy some poor initial communication from the commander-in-chief on the subject of keeping a central reserve.
The action began on the right with Ephecretes launching an attack on Themison's wing using four commands. The first attack by the phalangites scored a hit on Indian elephant. The attack by the flanking light cavalry finished off the job and shattered it, but the other units survived unscathed.
In the centre, Andromachus was alloted five commands. One was used to about-face a levy phalanx unit and send it into the rear zone as a reserve; the others were used to mount an attack on Nicarchus' centre, now facing away from the attack. The leading unit prosecuted the with with zest, shattering Nicarchus' lead unit of levies, but despite having things in their favour the rest of the phalangites were reluctant to take the attack to the enemy with vigour and no more hits were scored.
Polycrates commenced his attack on the left by ordering his heavy cavalry to charge at Antiochus' zone, but the assault was not a success. The attack with the centre left was similarly ineffective, with the troops perhaps understandably unwilling to close with the Indian elephants. Nonetheless, with two units shattered this turn the Seleucid fighting value was reduced by 6, taking them into the 50s and reducing the commands available to them by 1.
It came now to the Seleucids to respond and their command roll was also four, giving them a total of nine commands.
Themison began on the left, using two commands and leading off with his heavy cavalry. They were perhaps all a little dismayed by the loss of their (totemic?) elephants because neither the cavalry not the infantry were able to inflict any hits.
Nicarchus in the centre fared a little better, using four commands and managing to displace the lead unit of phalangites. Unfortunately, they were not able to make any further inroads. Ephecretes no doubt heaved a sigh of relief, but Antiochus would surely not have been so pleased had he been aware.
Perhaps happily for Antiochus, he was in the thick of things himself. Antipater's zone again attacked Ptolemy and his men, and again the elephants performed with distinction. The first unit scored a double hit, and Ptolemy, in attempting to rally his men, was killed. The morale of the men held up, but the second elephant unit, determined not to be outdone, also scored a double hit, clearing the zone entirely!
Although morale held up again, Antiochus swept away the remnants of the Ptolemaic left by personally leading a wild charge which immediately shattered the heavy cavalry opposing him.
What seemed only moments before to have been an opportunity lost by the unwillingness of the left and centre to press home their attacks had now become a triumph due to the inspired charge of the elephants and of Antiochus himself. Somehow, the Ptolemies had lost 22 points of fighting value - fully a third of their army (and our gallant Phillip G) - in one turn!
With their fighting value reduced to forty, much gritty work was needed.
"And then there were two..."
Here is the board at the commencement of Turn 4. Observers may notice the absence of a Ptolemaic left!

The command roll for turn four was not a disaster, for which the shaken Ptolemaic commander-in-chief was immensely grateful (I have this on very reliable authority!). Eight command points did not seem too bad a tally given what could have been.
The right led off, with Ephecretes' phalangites launching an attack on Themison's zone. Using 4 commands, they managed three hits, including a double hit which shattered one of the units of levy phalangites. The light cavalry worried the flanks, but did no real damage.
In the centre, and not before time, Andromachus inspired his men to great deeds, with four hits made at a cost of two to themselves. This redressed the balance somewhat, steadied the centre and disordered the enemy phalanx enough that they would not be able to pair their units in attack.
With a command roll of one, the Seleucids did not begin the turn auspiciously, and that was how it remained. Themison's weakened zone again failed failed to make any headway against the enemy, and Nicarchus in the centre (now mostly spent) was unable to coordinate the attacks of the phalangites as well as he would have liked. The elephant was hit, but the anticipated decisive push against an outflanked Ephecretian phalanx did not come.
Antipater's command in the centre left now wheeled about to tear into the flank of Andromachus' phalangites, but turning to the attack reduced the force of the manoeuvre and only one hit was scored. In the meantime, Antiochus and his strike force of picked cavalry raced from the scene of their second triumph on the left into contact with the Ptolemaic reserve.
So, with four turns finished and the Ptolemies in grave difficulties, the the final blow has still not yet fallen. There is a faint glimmer of hope for the Ptolemies: if they can pull out another big turn they might still be able to win the field, but one feels that it's now or never for them.
Here is the board after turn 4:
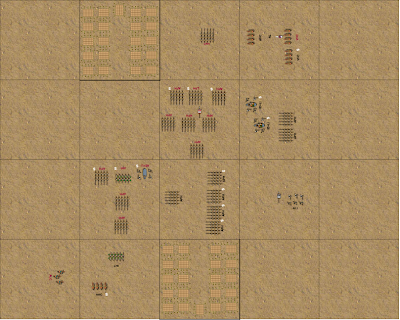
Stay tuned for the next installment (which can be now be found here).
Here is the board at the commencement of turn 3 (Seleucids in Black; Ptolemies in Red):

The command roll for the Ptolemies was favourable - a four. This gave enough commands to activate all the command groups for attack and also to remedy some poor initial communication from the commander-in-chief on the subject of keeping a central reserve.
The action began on the right with Ephecretes launching an attack on Themison's wing using four commands. The first attack by the phalangites scored a hit on Indian elephant. The attack by the flanking light cavalry finished off the job and shattered it, but the other units survived unscathed.
In the centre, Andromachus was alloted five commands. One was used to about-face a levy phalanx unit and send it into the rear zone as a reserve; the others were used to mount an attack on Nicarchus' centre, now facing away from the attack. The leading unit prosecuted the with with zest, shattering Nicarchus' lead unit of levies, but despite having things in their favour the rest of the phalangites were reluctant to take the attack to the enemy with vigour and no more hits were scored.
Polycrates commenced his attack on the left by ordering his heavy cavalry to charge at Antiochus' zone, but the assault was not a success. The attack with the centre left was similarly ineffective, with the troops perhaps understandably unwilling to close with the Indian elephants. Nonetheless, with two units shattered this turn the Seleucid fighting value was reduced by 6, taking them into the 50s and reducing the commands available to them by 1.
It came now to the Seleucids to respond and their command roll was also four, giving them a total of nine commands.
Themison began on the left, using two commands and leading off with his heavy cavalry. They were perhaps all a little dismayed by the loss of their (totemic?) elephants because neither the cavalry not the infantry were able to inflict any hits.
Nicarchus in the centre fared a little better, using four commands and managing to displace the lead unit of phalangites. Unfortunately, they were not able to make any further inroads. Ephecretes no doubt heaved a sigh of relief, but Antiochus would surely not have been so pleased had he been aware.
Perhaps happily for Antiochus, he was in the thick of things himself. Antipater's zone again attacked Ptolemy and his men, and again the elephants performed with distinction. The first unit scored a double hit, and Ptolemy, in attempting to rally his men, was killed. The morale of the men held up, but the second elephant unit, determined not to be outdone, also scored a double hit, clearing the zone entirely!
Although morale held up again, Antiochus swept away the remnants of the Ptolemaic left by personally leading a wild charge which immediately shattered the heavy cavalry opposing him.
What seemed only moments before to have been an opportunity lost by the unwillingness of the left and centre to press home their attacks had now become a triumph due to the inspired charge of the elephants and of Antiochus himself. Somehow, the Ptolemies had lost 22 points of fighting value - fully a third of their army (and our gallant Phillip G) - in one turn!
With their fighting value reduced to forty, much gritty work was needed.
"And then there were two..."
Here is the board at the commencement of Turn 4. Observers may notice the absence of a Ptolemaic left!

The command roll for turn four was not a disaster, for which the shaken Ptolemaic commander-in-chief was immensely grateful (I have this on very reliable authority!). Eight command points did not seem too bad a tally given what could have been.
The right led off, with Ephecretes' phalangites launching an attack on Themison's zone. Using 4 commands, they managed three hits, including a double hit which shattered one of the units of levy phalangites. The light cavalry worried the flanks, but did no real damage.
In the centre, and not before time, Andromachus inspired his men to great deeds, with four hits made at a cost of two to themselves. This redressed the balance somewhat, steadied the centre and disordered the enemy phalanx enough that they would not be able to pair their units in attack.
With a command roll of one, the Seleucids did not begin the turn auspiciously, and that was how it remained. Themison's weakened zone again failed failed to make any headway against the enemy, and Nicarchus in the centre (now mostly spent) was unable to coordinate the attacks of the phalangites as well as he would have liked. The elephant was hit, but the anticipated decisive push against an outflanked Ephecretian phalanx did not come.
Antipater's command in the centre left now wheeled about to tear into the flank of Andromachus' phalangites, but turning to the attack reduced the force of the manoeuvre and only one hit was scored. In the meantime, Antiochus and his strike force of picked cavalry raced from the scene of their second triumph on the left into contact with the Ptolemaic reserve.
So, with four turns finished and the Ptolemies in grave difficulties, the the final blow has still not yet fallen. There is a faint glimmer of hope for the Ptolemies: if they can pull out another big turn they might still be able to win the field, but one feels that it's now or never for them.
Here is the board after turn 4:

Stay tuned for the next installment (which can be now be found here).
Monday, December 6, 2010
Lost Battles board game up for pre-order
The long-awaited boardgame version of Lost Battles is now up for pre-order at the Fifth Column Games site here. It contains Lost Battles, Empire, and a number of other campaign games. If ancients is your cup of tea, get in fast!
Wednesday, December 1, 2010
Raphia multiplayer PBEM: background and first turn
The Battle of Raphia, fought in 217 BC between the Seleucid Empire and the Ptolemaic Kingdom, saw Ptolemy IV (Philopater) meet Antiochus III (the Great) to decide who would have control of the region of Coele-Syria. The map below shows the geopolitical situation in the Mediterranean at 218 BC. (except for VASSAL screenshots, all the following images are courtesy of wikimedia commons).

Our multiplayer email game of the battle sees the redoubtable Patrick W. acting as the commander-in-chief of the Seleucids, with Antipater's wing under his personal command. He is supported by Nicarchus (Padraig L.) in the centre, Themison (John A.) on the left, and Theodotus (Iden H.) as a counsellor.
Antiochus was not a man to be trifled with....

Under the Lost Battles rules, The Seleucid forces are represented thus:
The Right (commanded by Antipater):
2 units of Indian elephants equating to 80 beasts and 4000 men.
1 unit of veteran heavy cavalry with an average leader (Antiochus and his guard) for 1000 men.
A second veteran and an average unit of heavy cavalry representing 3000 men.
1 unit of average light infantry for 4000 men.
2 units of average phalangites equating to 8000 men.
The Centre (commanded by Nicarchus):
5 units of average phalangites and 1 unit of levy phalangites for 28,000 men.
The Left (commanded by Themison):
1 unit of Indian elephants representing 40 pachyderms and 2000 skirmishers.
2 units of levy heavy infantry equalling 16,000 troops.
1 unit of average heavy cavalry for 2000 men
The Ptolemies have myself as the commander-in-chief, Ephecretes (Yuri K.) taking the right, Andromachus (Chris G.) commanding the centre, Polycrates (Phillip G.) commanding the left, and Sosibius (Ian H.) providing wisdom.
In contrast to the steely Antiochus, Ptolemy looks as if he might prefer a good lunch to a battle...
 The Ptolemaic forces come out like this in Lost Battles:
The Left (commanded by Polycrates):
1 average commander (Ptolemy).
1 unit of veteran heavy cavalry and a unit of average heavy cavalry for 3000 men.
1 unit of African elephants representing 40 beasts and 2000 men.
1 veteran and 2 average phalanx units equating to 10,000 men.
The Centre (commanded by Andromachus):
6 units of average and 2 units of levy phalangites for a total of 40,000 men.
The Right (commanded by Ephecretes):
1 unit of African elephants representing 40 beasts and 2000 men.
1 unit of average light cavalry for 2000 men.
3 units of average phalangites equating to 12,000 men.
1 unit of average heavy infantry for 4000 men.
We used the historical set up, which is shown in the VASSAL screenshot below. Red units are Ptolemaic, black units are Seleucid. The Ptolemies move first in this scenario and the attack limit is 4.
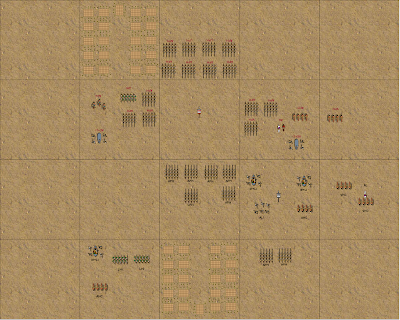


So, an eventful second turn of the battle! Go here to read part two of the report.

Our multiplayer email game of the battle sees the redoubtable Patrick W. acting as the commander-in-chief of the Seleucids, with Antipater's wing under his personal command. He is supported by Nicarchus (Padraig L.) in the centre, Themison (John A.) on the left, and Theodotus (Iden H.) as a counsellor.
Antiochus was not a man to be trifled with....

Under the Lost Battles rules, The Seleucid forces are represented thus:
The Right (commanded by Antipater):
2 units of Indian elephants equating to 80 beasts and 4000 men.
1 unit of veteran heavy cavalry with an average leader (Antiochus and his guard) for 1000 men.
A second veteran and an average unit of heavy cavalry representing 3000 men.
1 unit of average light infantry for 4000 men.
2 units of average phalangites equating to 8000 men.
The Centre (commanded by Nicarchus):
5 units of average phalangites and 1 unit of levy phalangites for 28,000 men.
The Left (commanded by Themison):
1 unit of Indian elephants representing 40 pachyderms and 2000 skirmishers.
2 units of levy heavy infantry equalling 16,000 troops.
1 unit of average heavy cavalry for 2000 men
The Ptolemies have myself as the commander-in-chief, Ephecretes (Yuri K.) taking the right, Andromachus (Chris G.) commanding the centre, Polycrates (Phillip G.) commanding the left, and Sosibius (Ian H.) providing wisdom.
In contrast to the steely Antiochus, Ptolemy looks as if he might prefer a good lunch to a battle...

The Left (commanded by Polycrates):
1 average commander (Ptolemy).
1 unit of veteran heavy cavalry and a unit of average heavy cavalry for 3000 men.
1 unit of African elephants representing 40 beasts and 2000 men.
1 veteran and 2 average phalanx units equating to 10,000 men.
The Centre (commanded by Andromachus):
6 units of average and 2 units of levy phalangites for a total of 40,000 men.
The Right (commanded by Ephecretes):
1 unit of African elephants representing 40 beasts and 2000 men.
1 unit of average light cavalry for 2000 men.
3 units of average phalangites equating to 12,000 men.
1 unit of average heavy infantry for 4000 men.
We used the historical set up, which is shown in the VASSAL screenshot below. Red units are Ptolemaic, black units are Seleucid. The Ptolemies move first in this scenario and the attack limit is 4.
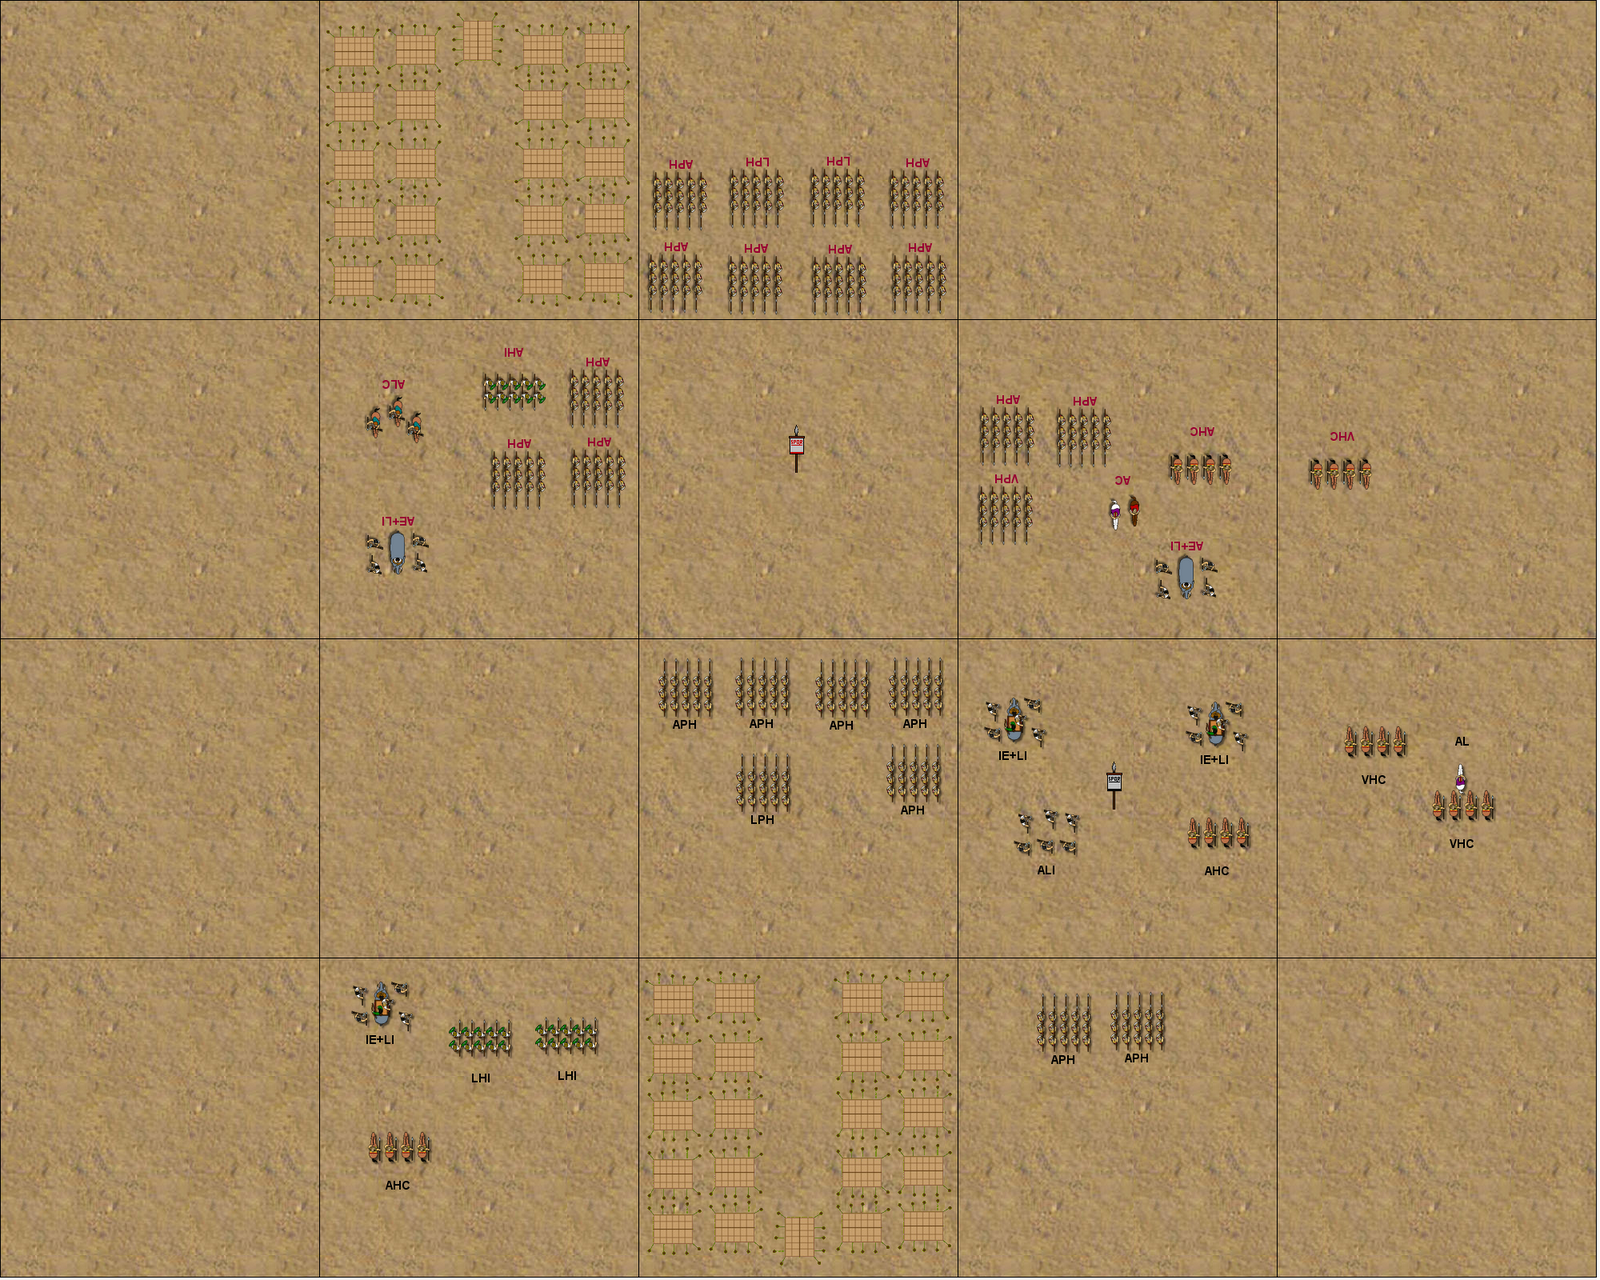
A quick note on rules...
We are using the normal Lost Battles rules with a few changes to cope with the PBEM and multiplayer nature of the battle. Players have been allowed a strategy session in which the battle plans are discussed, but once the moves start players are not permitted to discuss strategy or to share information about intentions (though we have been a little more relaxed about this first time around).
Commanders-in-chief allocate commands to the subordinate commanders (and some to himself, in Patrick's case) and the on-table commanders use those commands as they see fit. Orders are sent to the umpire who then resolves the turn, sending out a report and screenshot to all players.
This will continue until the battle is won or the ten turn limit is reached.
Second Turn.
The first turn of battle (actually the second turn of the game as deployment counts as a turn) saw a 6 rolled for commands, giving the Ptolemies a total of 12. Polycrates activated first with 6 commands and Ptolemy's exemptions, attacking with his veteran cavalry and scoring a hit with an all out attack which also left the Ptolemaic cavalry spent. This cost 2 commands.
Next he double-moved the average heavy cavalry into position behind the veteran cavalry, in the left wing zone. This also cost 2 commands.
Finally, he attacked the Seleucid right centre, leading off with phalangites. Two hits were scored, one on each elephant unit. This cost 2 commands and all of Ptolemy's exemptions.
Next, Andromachus activated in the centre rear, moving all his troops forward one zone at a cost of 2 commands.
Finally, Ephecretes double-moved his light cavalry to outflank the enemy wing and advanced his main line one zone, putting the average heavy infantry in the lead unit position. This cost 4 commands in total. The screenshot below denotes moves with black arrows, attacks with red arrows and hits with blue diamonds:

It was now the Seleucid turn. They rolled a 5 for commands, giving them a total of 11.
Themison activated first on the left, attacking with his elephants and the infantry in support. He scored one hit and used 3 commands.
Nicarchus in the centre used 1 command to wheel to the left to allow the Seleucids to concentrate their strength against Ephecretes' command in the following turn.
Antiochus attacked on the right, and although he fluffed his own attack the supporting cavalry didn't. The Ptolemaic veterans were shattered and Antiochus advanced into the now vacant zone, with only the AHC between him and the rear of the Ptolemaic army.
The average heavy cavalry now double-moved to join Antiochus for 2 commands, and the rest of the zone attacked Polycrates and friends. In their attack the elephants inflicted some terrible wounds with both scoring double hits, which left all the units in the Ptolemaic left centre spent and the battle only just begun. A glorious charge indeed!
To cement the advantage, the phalangites in reserve moved up to join Antipater in the centre right. This is a screenshot showing the situation at the end of the Seleucid turn:

So, an eventful second turn of the battle! Go here to read part two of the report.
Tuesday, November 9, 2010
Magnesia: aftermath
Following on from the first and the second post on Magnesia we now find ourselves dealing with the aftermath. I want to focus initially on the details of the losses and how they work out in terms of Lost Battles victory points, then go back to some of the key elements of the battle for the wargamer that I had talked about in the post on things preliminary, discuss those, and finish with a few points to ponder.
So, to the tallying of VPs. For readers who may not be familiar with Lost Battles, it is perhaps as well to mention now that the Seleucids start with a 30 VP handicap in their favour courtesy of the fact that they are the weaker force by 10 points of fighting value. Therefore, they were effectively 30 VPs ahead before the battle began.
Shattered: 1 levy cataphract unit and 1 levy heavy cavalry unit for a total of 8 points.
Routed: 1 scythed chariot unit and one levy light infantry unit for a total of 5 points.
Spent: 1 levy heavy infantry and 2 levy light infanty units; 3 average phalanx units; 1 veteran heavy cavalry unit, 1 average heavy cavalry unit and one Indian elephant unit for a total of 26 points.
Roman total points: 39.
Shattered: 1 average and 3 veteran legionary units; 1 average heavy and 1 veteran light infantry unit; 1 veteran and 1 average heavy cavalry unit for a total of 58 points.
Routed: 2 average light infantry units; 1 average and 3 veteran legionary units; 1 veteran heavy cavalry unit for a total of 32 points.
Withdrawn or lost: 1 average heavy infantry and one average commander for a total of 9 points.
Killed: 1 average leader for a total of 12 points.
Seleucid total points: 111 + 30 (the FV handicap) for a total of 141.
The Seleucids won by 102 points, thus notching up a 'stunning victory' - the highest possible category in Lost Battles - for Antiochus.
The emphatic nature of this result is not surprising given that the table top battle played out as an almost exact reverse of the historical battle! It should also be noted that spent or shattered veteran units are worth a lot more points than other units in the final tallies: a shattered veteran unit is worth 8 points to an opponent compared to 6 for an average unit and 4 for a levy unit. The Romans therefore with a higher number of veteran units have more points to give up, with a possible 168 VPs on the table (including the handicap) compared to a possible 122 that can be gained from the Seleucids.
The Romans therefore have a narrower window for success and a wider margin for failure.
Turning now to our earlier post's identication of key moments in the historical battle, let's look at how these played out on the table top.
1) Eumenes' panicking of the scythed chariots.
Under Lost Battles rules scythed chariots automatically rout once they are attacked. There is no need even for dice to be rolled, and their departure does not result in a morale test. Thus, the chariots fled as soon as Eumenes advanced to the attack, which was in the second turn of the game.
2) The defeat of the scythed chariots causing a wider morale crisis on the Seleucid left.
According to Livy, the routing of the scythed chariots disordered and shook the morale of the supporting troops. We did not see this happen under Lost Battles, and I wonder if perhaps there could not be a slightly different mechanism in place to allow this effect to occur as a direct result of the scythed chariots being in action.
3) The battle between the phalanx and the legion in the centre.
This was a good fight under these rules. The combination of elephants and phalangites was pretty potent when things were going well, though a double hit on the elephants at one point showed how things could quickly turn bad for the Seleucids if the Roman dice were right. The Romans had plenty of staying power in terms of morale, but were simply worn down by the sheer number of hits registered upon them. Lost Battles does a pretty good job (in my opinion) of simulating the legion v phalanx match up, and things would have gone better for the Romans if they had held back and let the Seleucids advance to close the gap between the forces, thereby giving the Romans the first strike. That this did not happen was because of misplaced confidence that Eumenes would follow up his strong start with equally aggressive attacks on subsequent moves and would soon be available to hit the phalanx on its flank. Then as the battle wore on it would perhaps have been sound practice for Scipio to have withdrawn his centre and Eumenes' flank so as to buy a little time and to allow the heavy infantry in the camp to be brought up as a reinforcement.
4) Antiochus' success on the right, and the timing of the advance on the Roman camp.
Antiochus did not gain dominance on his flank until the end of the battle after Eumenes had been killed and the Roman right dispersed. The king probably needed to have got himself onto the exposed Roman flank to really make use of his capacity to give the household guard a double attack bonus when in the lead position. This advantage turned out to be unnecessary in this fight, but it is a tactic that should probably be explored next time I undertake the battle.
5) The collapse of the Seleucid centre leading to Antiochus' decision to flee.
Again, this did not occur - quite the opposite in fact, as it was the collapse of the two wings that caused the Roman centre to flee.
Thoughts:
The overriding impression I got from this refight was that the dice were abnormally favourable for the Seleucids and at times execrable for the Romans. The Romans only scored fourteen hits in five rounds of combat, while the Seleucids scored twenty-five in the same time (though two were rallied), despite rolling fewer dice per turn. The number of double hits that the Seleucids registered was quite extraordinary, with four (one being an all-out attack) that I recall off-hand, and possibly one or two more as well. When one side is consistently rolling 10s, 11s and 12s and the other side is getting 4s, 5s and 6s then there's not much that can be done - though it does give me a good excuse to play the battle out again!
In terms of general tactics, the Romans did not maximise their chances. Neither did the Seleucids, but they did not need to as it turned out. The Roman commander should have held back his centre to get in the first attack and later withdrawn his under-pressure troops to force the Seleucids to chase him, hoping that he could catch them on the hop. Instead, the Romans gave up their great advantage - manoeuvrability - and through lack of proper caution in the face of the phalanx allowed themselves be drawn into a slugging match in the centre. As I was playing both sides, I have a lot to answer for...
Finally, and referring once more to my initial post, I must address the question of whether this was indeed one of those ideal refights of grand spectacle and compelling event, and whether it proved to be the thrillingly immersive table top experience that one might have hoped for.
In this answer I suppose I must equivocate. It certainly looked spectacular to my eyes - as I was setting up I couldn't help thinking that it was times like these that the many hours spent painting figures seemed worthwhile - yet while the sequence of events was believable, frustration did creep in over the one-sidedness of the dice rolls and this tended to strain the wires upon which disbelief is so carefully suspended. That said, even once the battle was surely lost for the Romans on VP count there was the possibility of redemption through Eumenes, and for two turns he could have routed the Seleucid left given decent dice. If he had rolled something other than 3s this might have been enough to allow Scipio to win the field; so the battle did not lack for moments of excitement, tension and decision.
It was certainly not the perfect battle, but it was a fine thing to do and as a culmination of many months of work it was quietly satisfying to be able to add Magnesia to the list of battles done with one's own figures. Still, incentive remains to keep striving for that ideal battle!
So, to the tallying of VPs. For readers who may not be familiar with Lost Battles, it is perhaps as well to mention now that the Seleucids start with a 30 VP handicap in their favour courtesy of the fact that they are the weaker force by 10 points of fighting value. Therefore, they were effectively 30 VPs ahead before the battle began.
Points gained by the Romans:
Shattered: 1 levy cataphract unit and 1 levy heavy cavalry unit for a total of 8 points.
Routed: 1 scythed chariot unit and one levy light infantry unit for a total of 5 points.
Spent: 1 levy heavy infantry and 2 levy light infanty units; 3 average phalanx units; 1 veteran heavy cavalry unit, 1 average heavy cavalry unit and one Indian elephant unit for a total of 26 points.
Roman total points: 39.
Points gained by the Seleucids:
Shattered: 1 average and 3 veteran legionary units; 1 average heavy and 1 veteran light infantry unit; 1 veteran and 1 average heavy cavalry unit for a total of 58 points.
Routed: 2 average light infantry units; 1 average and 3 veteran legionary units; 1 veteran heavy cavalry unit for a total of 32 points.
Withdrawn or lost: 1 average heavy infantry and one average commander for a total of 9 points.
Killed: 1 average leader for a total of 12 points.
Seleucid total points: 111 + 30 (the FV handicap) for a total of 141.
The Seleucids won by 102 points, thus notching up a 'stunning victory' - the highest possible category in Lost Battles - for Antiochus.
The emphatic nature of this result is not surprising given that the table top battle played out as an almost exact reverse of the historical battle! It should also be noted that spent or shattered veteran units are worth a lot more points than other units in the final tallies: a shattered veteran unit is worth 8 points to an opponent compared to 6 for an average unit and 4 for a levy unit. The Romans therefore with a higher number of veteran units have more points to give up, with a possible 168 VPs on the table (including the handicap) compared to a possible 122 that can be gained from the Seleucids.
The Romans therefore have a narrower window for success and a wider margin for failure.
Turning now to our earlier post's identication of key moments in the historical battle, let's look at how these played out on the table top.
1) Eumenes' panicking of the scythed chariots.
Under Lost Battles rules scythed chariots automatically rout once they are attacked. There is no need even for dice to be rolled, and their departure does not result in a morale test. Thus, the chariots fled as soon as Eumenes advanced to the attack, which was in the second turn of the game.
2) The defeat of the scythed chariots causing a wider morale crisis on the Seleucid left.
According to Livy, the routing of the scythed chariots disordered and shook the morale of the supporting troops. We did not see this happen under Lost Battles, and I wonder if perhaps there could not be a slightly different mechanism in place to allow this effect to occur as a direct result of the scythed chariots being in action.
3) The battle between the phalanx and the legion in the centre.
This was a good fight under these rules. The combination of elephants and phalangites was pretty potent when things were going well, though a double hit on the elephants at one point showed how things could quickly turn bad for the Seleucids if the Roman dice were right. The Romans had plenty of staying power in terms of morale, but were simply worn down by the sheer number of hits registered upon them. Lost Battles does a pretty good job (in my opinion) of simulating the legion v phalanx match up, and things would have gone better for the Romans if they had held back and let the Seleucids advance to close the gap between the forces, thereby giving the Romans the first strike. That this did not happen was because of misplaced confidence that Eumenes would follow up his strong start with equally aggressive attacks on subsequent moves and would soon be available to hit the phalanx on its flank. Then as the battle wore on it would perhaps have been sound practice for Scipio to have withdrawn his centre and Eumenes' flank so as to buy a little time and to allow the heavy infantry in the camp to be brought up as a reinforcement.
4) Antiochus' success on the right, and the timing of the advance on the Roman camp.
Antiochus did not gain dominance on his flank until the end of the battle after Eumenes had been killed and the Roman right dispersed. The king probably needed to have got himself onto the exposed Roman flank to really make use of his capacity to give the household guard a double attack bonus when in the lead position. This advantage turned out to be unnecessary in this fight, but it is a tactic that should probably be explored next time I undertake the battle.
5) The collapse of the Seleucid centre leading to Antiochus' decision to flee.
Again, this did not occur - quite the opposite in fact, as it was the collapse of the two wings that caused the Roman centre to flee.
Thoughts:
The overriding impression I got from this refight was that the dice were abnormally favourable for the Seleucids and at times execrable for the Romans. The Romans only scored fourteen hits in five rounds of combat, while the Seleucids scored twenty-five in the same time (though two were rallied), despite rolling fewer dice per turn. The number of double hits that the Seleucids registered was quite extraordinary, with four (one being an all-out attack) that I recall off-hand, and possibly one or two more as well. When one side is consistently rolling 10s, 11s and 12s and the other side is getting 4s, 5s and 6s then there's not much that can be done - though it does give me a good excuse to play the battle out again!
In terms of general tactics, the Romans did not maximise their chances. Neither did the Seleucids, but they did not need to as it turned out. The Roman commander should have held back his centre to get in the first attack and later withdrawn his under-pressure troops to force the Seleucids to chase him, hoping that he could catch them on the hop. Instead, the Romans gave up their great advantage - manoeuvrability - and through lack of proper caution in the face of the phalanx allowed themselves be drawn into a slugging match in the centre. As I was playing both sides, I have a lot to answer for...
Finally, and referring once more to my initial post, I must address the question of whether this was indeed one of those ideal refights of grand spectacle and compelling event, and whether it proved to be the thrillingly immersive table top experience that one might have hoped for.
In this answer I suppose I must equivocate. It certainly looked spectacular to my eyes - as I was setting up I couldn't help thinking that it was times like these that the many hours spent painting figures seemed worthwhile - yet while the sequence of events was believable, frustration did creep in over the one-sidedness of the dice rolls and this tended to strain the wires upon which disbelief is so carefully suspended. That said, even once the battle was surely lost for the Romans on VP count there was the possibility of redemption through Eumenes, and for two turns he could have routed the Seleucid left given decent dice. If he had rolled something other than 3s this might have been enough to allow Scipio to win the field; so the battle did not lack for moments of excitement, tension and decision.
It was certainly not the perfect battle, but it was a fine thing to do and as a culmination of many months of work it was quietly satisfying to be able to add Magnesia to the list of battles done with one's own figures. Still, incentive remains to keep striving for that ideal battle!
Magnesia: the battle
Following on from the previous post which detailed pre-battle information of interest, we can now move to describe the actual battle as it unfolded on the table top.
The Romans moved first and scored high with their command roll. This saw them advance the cavalry and attack in two zones on their right, attack in position with velites on their left, advance the legions to contact in the centre (with no attack) and bring up reinforcements in the left and right centres. Movements are illustrated with black arrows in the picture below.

Eumenes' initial attack (seen in the shot below) was a great success. The Italian cavalry automatically put the scythed chariots to flight and Eumenes's guard troops subsequently hit the levy light infantry hard, forcing Seleucus (not present on table, but commanding the flank in the real battle) to hurriedly bring his levy cataphracts up into the lead position.

To the right of Eumenes the veteran Roman cavalry charged home against their Galatian levy opposites, but the Galatians stood the initial attack with minimal disruption.
On the Roman left the velites' skirmishing was ineffective but they successfully covered the advance of the legion and ala of the Roman left centre. In the central zone, and encouraged by the success of Eumenes' assault, Scipio advanced his legionaries at the double to prevent the Seleucid centre from advancing and to pin it in place in expectation of a forthcoming flank attack.
On the right the peltasts and Cretan light infantry moved up to reinforce the cavalry who had made the first assault.
The Seleucids responded by rolling low for command, meaning that there could be no complicated manoeuvring. Starting from the left, the levy Galatian cavalry launched an all-out attack on the veterans opposite them, leaving both units only one hit shy of shattering. The levy cataphracts also managed a successful attack on Eumenes' zone, driving off the Italian cavalry, disrupting the peltasts in the process, and causing the Cretan infantry to be brought into the lead position. The shot below shows the situation on the Seleucid left after the attacks; out of view is the unit of Roman veterans, who are just in front of the Galatians in the foreground.

The attack in the central zone was similarly successful, with the levy light infantry sending the velites running for safety and the massed pike of the phalanx units disrupting some of the hastati.

Fortunately for Rome, on the right the velites successfully evaded the attentions of the light infantry and Antiochus' guard cavalry. Nonetheless, these half-hearted sallies allowed the right wing of the phalanx to be brought up into line without interference from the enemy.
On the third Roman turn the command roll was low, but with two generals there were still ample commands for the fighting that lay ahead. The veteran cavalry on the far right launched a determined attack on the Galatian levies and this time broke them, sending a shiver through the Seleucid left and allowing the Romans to advance onto the flank of Seleucus' zone. Despite this setback, the remaining troops on the left withstood any urge to flee.
Elsewhere, the Roman attacks were largely ineffective against the main infantry lines, managing only to disperse the levy light infantry and send them scurrying back behind the phalanx.
The Seleucid turn saw a better command roll, allowing the light cavalry to be brought into play against the Roman left.
A desperate attack was launched by the cataphracts and the guard cavalry against Eumenes, which succeeded in inflicting four hits. The peltasts shattered and carried off the Italian cavalry in rout. The situation for Eumenes - so promising just a moment ago - was now rapidly deteriorating.
The shot below shows the aftermath of the attack by the cataphracts and the guard cavalry. In the foreground can be seen the Roman veteran cavalry, on whose elan Eumenes' wing now greatly relies.

The elephants next commenced their attack in the centre with support from paired phalanx units, and the Romans could find no answer defensively to this combination of arms and types. The remainder of the hastati and the lead elements of the principes now began to buckle under the strain.

On the right Antiochus himself pressed the attack, driving off the velites while the phalanx got its blood up and the light cavalry positioned itself on the flank of the Roman left.
The Roman fourth turn presented Scipio with some unenviable choices: his centre was under increasing pressure from the phalanx and the elephants while Eumenes' zone was held together only by the force of his personality. On the plus side for Scipio, the veteran cavalry was in position to strike at the exposed flank of the Seleucid left and his own left was still in good shape; it having seen off a number of attacks and inflicted some hurt on the enemy while still keeping the legionaries fresh and ready for battle.
Scipio appears to have been a glass-half-full man, for he did not withdraw in the centre, and nor did he bring up reinforcements from his camp. He staked the battle on a calculated assault from the right on the fragile levies of Seleucus' zone, trusting to fortune and the skill of the Roman and Eumenes' veteran cavalry to break the wing speedily.
The Roman response was indeed swift and deadly: Antiochus paid for his rashness in taking the lead by having his guard cavalry hit, necessitating their withdrawal behind the phalanx. The elephants were at last hit in the centre and some fell back upon their own men, causing disruption in the phalanx. On the far right, the Roman cavalry did all that was asked of them, as did Eumenes' Pergamenes, with both the cataphracts and the heavy infantry support being severely struck. The guard cavalry and last fresh unit of Seleucus' zone was accordingly ordered into the lead position.
The following shot shows the situation facing the Roman centre and left during the fourth turn following the assault on Antiochus' household cavalry and immediately prior to the successful attack on the elephants.

The Seleucid turn saw every effort made to break Eumenes' command, but it availed them nothing. The Seleucid left, down to its last fresh unit, now had the attacks of three veteran units, including two cavalry units, to endure next turn.
The centre was also less effective this time around, scoring only one hit. The right was more successful however as the phalanx launched a frontal assault in conjunction with the horse archers' peppering of the Roman infantry from their open flank.
The shot below shows the situation as the phalanx on the Seleucid right engages the legionary infantry.

The Romans in their turn were now faced with a repeat of their earlier dilemma: should they retreat or push on with the attack? As it had been all battle, it was left to Eumenes to set the tone. He charged in again with his cavalry in the lead position and two combat bonuses to all but ensure success, only to baulk at the fatal moment. The Roman cavalry on the flank seeing this also wavered and failed to push their attack through. With the heavy cavalry so affected, the Cretans could hardly be expected to be immune from this crisis of confidence and they too failed to strike effectively.
Scipio in the centre was disheartened by the failure of his right to seize its chance, but his troops were oblivious as they worked away making further inroads into the phalanx opposing them. They scored two hits, but two more would still be needed before any units of the Seleucid centre would be in danger of shattering.
Like the right, the Roman left struggled to get to grips with the enemy. They were beginning to feel the pressure from the horse archers on their flank, and with one eye to their left they felt unable to press home frontal attacks with the urgency that the situation demanded.
So again the onus was on the Seleucids to tip the balance in their favour by forcing the issue on their left. The shot below shows the guard cavalry preparing to charge at Eumenes.

The guard cavalry charged true, landing a ferocious double blow. Eumenes tried to recover the situation by rallying his men but it was too late and he fell in the attempt. This triple blow was felt all across the field as the Roman right collapsed. As the next picture reveals, it was judged to be time to send the elephants to the lead and to press the issue in the centre.

The elephants scored a hit, as did the massed phalangites. Under this much strain the Roman centre crumbled, losing men both shattered and routed until only Scipio and two of his veteran units remained.
It was a similar story on the left, which had lost two units to rout before coming under attack itself. Under pressure from the phalanx and flanking archers it too was hit, and then even the veterans fled the field.
Scipio lasted one more turn in which time the veteran cavalry still in position on the flank managed to shatter the levy cataphracts, but it was all too late, and the centre broke as the Seleucid centre surged forward in victory.
******
So, there we have it - a dramatic reversal of the historical battle! Stay tuned for the final results and a review of the game which will follow soon in another post.
The Romans moved first and scored high with their command roll. This saw them advance the cavalry and attack in two zones on their right, attack in position with velites on their left, advance the legions to contact in the centre (with no attack) and bring up reinforcements in the left and right centres. Movements are illustrated with black arrows in the picture below.

Eumenes' initial attack (seen in the shot below) was a great success. The Italian cavalry automatically put the scythed chariots to flight and Eumenes's guard troops subsequently hit the levy light infantry hard, forcing Seleucus (not present on table, but commanding the flank in the real battle) to hurriedly bring his levy cataphracts up into the lead position.

To the right of Eumenes the veteran Roman cavalry charged home against their Galatian levy opposites, but the Galatians stood the initial attack with minimal disruption.
On the Roman left the velites' skirmishing was ineffective but they successfully covered the advance of the legion and ala of the Roman left centre. In the central zone, and encouraged by the success of Eumenes' assault, Scipio advanced his legionaries at the double to prevent the Seleucid centre from advancing and to pin it in place in expectation of a forthcoming flank attack.
On the right the peltasts and Cretan light infantry moved up to reinforce the cavalry who had made the first assault.
The Seleucids responded by rolling low for command, meaning that there could be no complicated manoeuvring. Starting from the left, the levy Galatian cavalry launched an all-out attack on the veterans opposite them, leaving both units only one hit shy of shattering. The levy cataphracts also managed a successful attack on Eumenes' zone, driving off the Italian cavalry, disrupting the peltasts in the process, and causing the Cretan infantry to be brought into the lead position. The shot below shows the situation on the Seleucid left after the attacks; out of view is the unit of Roman veterans, who are just in front of the Galatians in the foreground.

The attack in the central zone was similarly successful, with the levy light infantry sending the velites running for safety and the massed pike of the phalanx units disrupting some of the hastati.

Fortunately for Rome, on the right the velites successfully evaded the attentions of the light infantry and Antiochus' guard cavalry. Nonetheless, these half-hearted sallies allowed the right wing of the phalanx to be brought up into line without interference from the enemy.
On the third Roman turn the command roll was low, but with two generals there were still ample commands for the fighting that lay ahead. The veteran cavalry on the far right launched a determined attack on the Galatian levies and this time broke them, sending a shiver through the Seleucid left and allowing the Romans to advance onto the flank of Seleucus' zone. Despite this setback, the remaining troops on the left withstood any urge to flee.
Elsewhere, the Roman attacks were largely ineffective against the main infantry lines, managing only to disperse the levy light infantry and send them scurrying back behind the phalanx.
The Seleucid turn saw a better command roll, allowing the light cavalry to be brought into play against the Roman left.
A desperate attack was launched by the cataphracts and the guard cavalry against Eumenes, which succeeded in inflicting four hits. The peltasts shattered and carried off the Italian cavalry in rout. The situation for Eumenes - so promising just a moment ago - was now rapidly deteriorating.
The shot below shows the aftermath of the attack by the cataphracts and the guard cavalry. In the foreground can be seen the Roman veteran cavalry, on whose elan Eumenes' wing now greatly relies.

The elephants next commenced their attack in the centre with support from paired phalanx units, and the Romans could find no answer defensively to this combination of arms and types. The remainder of the hastati and the lead elements of the principes now began to buckle under the strain.

On the right Antiochus himself pressed the attack, driving off the velites while the phalanx got its blood up and the light cavalry positioned itself on the flank of the Roman left.
The Roman fourth turn presented Scipio with some unenviable choices: his centre was under increasing pressure from the phalanx and the elephants while Eumenes' zone was held together only by the force of his personality. On the plus side for Scipio, the veteran cavalry was in position to strike at the exposed flank of the Seleucid left and his own left was still in good shape; it having seen off a number of attacks and inflicted some hurt on the enemy while still keeping the legionaries fresh and ready for battle.
Scipio appears to have been a glass-half-full man, for he did not withdraw in the centre, and nor did he bring up reinforcements from his camp. He staked the battle on a calculated assault from the right on the fragile levies of Seleucus' zone, trusting to fortune and the skill of the Roman and Eumenes' veteran cavalry to break the wing speedily.
The Roman response was indeed swift and deadly: Antiochus paid for his rashness in taking the lead by having his guard cavalry hit, necessitating their withdrawal behind the phalanx. The elephants were at last hit in the centre and some fell back upon their own men, causing disruption in the phalanx. On the far right, the Roman cavalry did all that was asked of them, as did Eumenes' Pergamenes, with both the cataphracts and the heavy infantry support being severely struck. The guard cavalry and last fresh unit of Seleucus' zone was accordingly ordered into the lead position.
The following shot shows the situation facing the Roman centre and left during the fourth turn following the assault on Antiochus' household cavalry and immediately prior to the successful attack on the elephants.

The Seleucid turn saw every effort made to break Eumenes' command, but it availed them nothing. The Seleucid left, down to its last fresh unit, now had the attacks of three veteran units, including two cavalry units, to endure next turn.
The centre was also less effective this time around, scoring only one hit. The right was more successful however as the phalanx launched a frontal assault in conjunction with the horse archers' peppering of the Roman infantry from their open flank.
The shot below shows the situation as the phalanx on the Seleucid right engages the legionary infantry.

The Romans in their turn were now faced with a repeat of their earlier dilemma: should they retreat or push on with the attack? As it had been all battle, it was left to Eumenes to set the tone. He charged in again with his cavalry in the lead position and two combat bonuses to all but ensure success, only to baulk at the fatal moment. The Roman cavalry on the flank seeing this also wavered and failed to push their attack through. With the heavy cavalry so affected, the Cretans could hardly be expected to be immune from this crisis of confidence and they too failed to strike effectively.
Scipio in the centre was disheartened by the failure of his right to seize its chance, but his troops were oblivious as they worked away making further inroads into the phalanx opposing them. They scored two hits, but two more would still be needed before any units of the Seleucid centre would be in danger of shattering.
Like the right, the Roman left struggled to get to grips with the enemy. They were beginning to feel the pressure from the horse archers on their flank, and with one eye to their left they felt unable to press home frontal attacks with the urgency that the situation demanded.
So again the onus was on the Seleucids to tip the balance in their favour by forcing the issue on their left. The shot below shows the guard cavalry preparing to charge at Eumenes.

The guard cavalry charged true, landing a ferocious double blow. Eumenes tried to recover the situation by rallying his men but it was too late and he fell in the attempt. This triple blow was felt all across the field as the Roman right collapsed. As the next picture reveals, it was judged to be time to send the elephants to the lead and to press the issue in the centre.

The elephants scored a hit, as did the massed phalangites. Under this much strain the Roman centre crumbled, losing men both shattered and routed until only Scipio and two of his veteran units remained.
It was a similar story on the left, which had lost two units to rout before coming under attack itself. Under pressure from the phalanx and flanking archers it too was hit, and then even the veterans fled the field.
Scipio lasted one more turn in which time the veteran cavalry still in position on the flank managed to shatter the levy cataphracts, but it was all too late, and the centre broke as the Seleucid centre surged forward in victory.
******
So, there we have it - a dramatic reversal of the historical battle! Stay tuned for the final results and a review of the game which will follow soon in another post.
Subscribe to:
Posts (Atom)
