Note: If you want to skip to the decisive action and avoid the to-and-fro that led to it (absorbing to play but perhaps tedious to read), scroll down to turn 7.
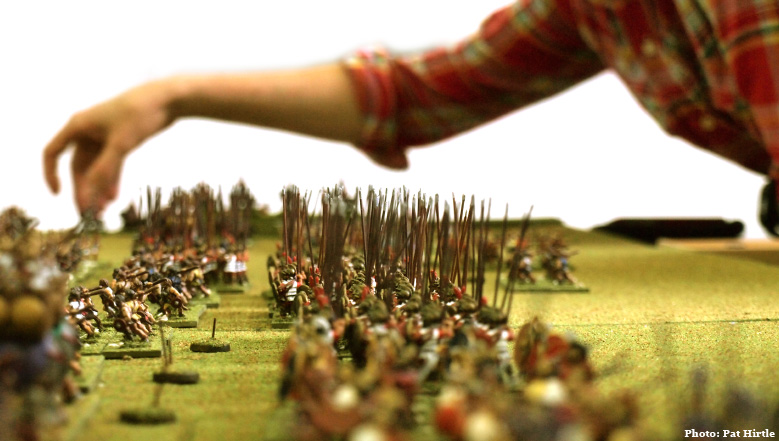
Turn 1.
The Romans move first, pushing their three units of light infantry forward to dominate the centre zones. The legions deploy into their baseline positions and the cavalry deploy symmetrically, two units per flank. On the right they prepare to defend the exit out of the marsh zone; on the left they plan to establish themselves on the hill before the town of Chaeronea.
 |
| The Roman infantry. |
The Macedonian phalanx debouches into the V between the two rivers. Alexander and the Companions push towards the marshy ground on the left by following the course of the Cephissus. Philip takes the Agema, the Hypaspists, the Cretan archers and the mercenary infantry and moves up the Haemon.
 |
| Alexander the Youthful. |
On the right the Thessalians and the light infantry move out to the flank and await heavy infantry support.
 |
| Both armies deployed. Viewed from behind the Roman left. |
Before we proceed, I should perhaps just mention some of the peculiarities of the terrain in this battle. The battlefield is divided into twenty zones (5 carpet squares wide by 4 deep), and attacking along a river line reduces the available attack frontage, so the zones with arrows as shown below are choke points through which attacks are made at half the normal force.
Hills and marsh zones are also movement obstacles for horse, costing cavalry twice as much movement effort as normal.

Turn 2.
Roman light infantry attack Philip's advance guard on the Haemon River and force the Cretans to retire behind the heavy infantry. The legions proper advance into their place behind the line of Roman skirmishers. On the left the cavalry under Decius Mus ascend the hill in front of Chaeronea and halt there to await the enemy.
 |
| Roman light infantry drive off Philip's skirmishers on the Haemon. |
On the right the cavalry position themselves to repel any attempt by the young Alexander to engage them across the marshy ground. Legionaries stay nearby to lend support in case it is needed. If it is not, they will reinforce the infantry line.
For the Macedonians, the phalanx moves forward to command the centre of the field, flanked on the left by Alexander and companions and on the right by Philip and his guard. Philip's attack on the advanced Roman light infantry is successful, driving them off in their turn to take refuge behind their own infantry line.
Alexander awaits developments, but on the Macedonian right the heavy infantry comes up to join the Thessalians and the skirmishers as the right prepares for an attack on the heights of Chaeronea.
 |
| Looking down the lines towards the river Haemon and the town of Chaeronea. |
Turn 3.
The Romans attack from right to left. They manage three hits on the phalanx across two zones, and it would've been five if not for a timely intervention of the gods to cancel a double hit. The cavalry remained in place on both ends of the line; unwilling to leave the high ground on one flank and unwilling to give up a good defensive position on the other.
Alexander remains in place on the left. On the right the Thessalians and support units move up to the base of the hill where Decius Mus waits.
So far the Romans have absorbed 5 hits to 4, but they appear to have blunted the phalanx and withstood the first shock. Another turn like this and accumulated attrition will cause the phalanx to lose much of its initial cohesion and effectiveness.
 |
| After turn 3: the light infantry have fallen back behind the main lines. In the foreground the Thessalians and their supports prepare to assault the hill on which Chaeronea and the Mus (sorry, NZ joke!) stand. |
Turn 4.
There are strong attacks all along the line by the Romans. Decius on the hill makes contact with the enemy light infantry, driving them off. Beside him two hits are scored on Philip's zone by the principes, forcing the king to attempt a rally on the second hit, which succeeds. The legions do more damage in the centre, scoring two more hits on the centre right, leaving it with only one fresh unit and putting the phalanx there in danger of quick collapse.
 |
| The centres clash. Philip on the right of centre is using his veterans (who attack on half the frontage of the Romans legionaries) to apply unrelenting pressure to the enemy line. |
Seeing the risk to the centre left, Alexander and one unit of the Companions come off the left wing to bolster the beleaguered phalanx. On the right the Thessalians score one hit of the three or four needed to defeat Decius. Following on from this, Philip's Hypaspists land another blow on the legionaries opposing them, and the phalanx manages to hurt the centre of the Roman line a little further.
 |
| Alex to the rescue (perhaps...)! |
Alexander joining the centre left risks exposes the remaining Companion unit to an attack by the Roman cavalry, but the Romans will be attacking through a choke point and the chances are good that the Companions will hold for a little while, and should give as good as they get.
Turn 5.
Four hits are scored along the line and another is rallied. The cavalry of the right advances into the marsh, committing itself to the attack now that Alexander has departed to reinforce the phalanx.
The Macedonians are under pressure right along the line, and are close to breaking in two of the three zones that are in contact.
They are not ready to give up just yet though; six hits see one legionary unit shattered and the Macedonians back on the attack. There is an agonising decision for Alexander: does he pull back to save the phalanx from losing units on the next turn, or does he stand in place, fight it out, and trust that Philip will win on the right? He elects to stand for one more turn and see how the battle develops.
 |
| Looking from behind the Roman right as the Companions and equites finally meet. |
In the centre zones the situation is very tense: Philip's zone has two units fresh, but the Romans only one. In the centre, the Macedonians have two units fresh, the Romans none. In Alexander's zone the Macedonians have one unit fresh (Alexander's Companion guard) and the Romans two, but with a fresh reserve available to bring up into the line.
Turn 6.
The cavalry on the Roman right break through immediately. A double hit shatters the Companions, with an appeal to the gods failing to prevent the Roman triumph (the same dice are attained on the re-roll!).
 |
| The equites see off the Companions - twice (the gods refused to assist the Macedonians!). |
The Macedonians are in terrible trouble, and Alexander, now outflanked, no longer has the option to pull back to preserve his troops. He must stand where he is.
On the other flank the story is similar: two more hits shatter a heavy infantry unit and have the Thessalians in danger of rout. They hold on, but the gods are clearly with Rome.
If the legions can just do their bit too...
But the final hammer blow is not struck. Mercifully for Alexander, the legions cannot score a hit on his zone, and in the centre zone the legionaries elect to withdraw to buy time and a delay the almost certain loss of more units to the still powerful central Macedonian phalanx.
The Macedonians respond by attacking again on the right. Just as all seems lost the Thessalians score a double hit with a magnificent charge. Decius Mus rallies one of his units, but dies in the attempt to rally another.
 |
| The Thessalian attack scores a double hit. Decius rallies the first, but falls attempting to rally the second. |
The subsequent morale test clears the zone, and the Macedonians are keeping themselves in the battle.
On the centre left (where, if you remember, things have been are progressing rapidly), Alexander takes upon himself the responsibility of breaking the legions before they break him. It's now or never.
Going into the lead position with his Companions he hopes to score a double hit and force a rout. Instead he scores just one hit. It is not enough to cause a shatter, and the Romans still have a fresh unit to bring up in support.
The Macedonians in the centre follow up the Roman withdrawal, but leave behind a unit to swing left to bolster the phalanx there.
 |
| The battlefield at the conclusion of turn 6. Note the the Roman centre has bowed back and the Macedonians are arrowing forward after following up. |
Turn 7.
At this most crucial of moments noble Sulpicius inspires his men to deliver a mighty blow. They score two hits on Alexander's zone, shattering one unit of phalangites and forcing Alexander's Companions to fall back behind the infantry. The Romans score no hits elsewhere, but the cavalry on the right turns to face the Alexander's zone, which they will be able to attack from the flank on the following turn.
 |
| The equites turn in upon Alexander's flank. Their next activation could well decide the battlel! |
But now the Macedonians have a turn ih which to assert themselves.
The right wing moves into position to isolate the Roman left centre.
Attacks in the centre shatter one unit and rout another.
 |
| The phalanx grinds on! |
Philip makes one successful attack which also carries off the Roman and Latin light infantry in rout.
 |
| Philip spurs his men to success. |
And the following Hypaspists, urged on again by their king, cause another shatter.
 |
| And again! |
In the morale test subsequent the zone routs (modifiers for spent, surrounded, and cumulative casualties cannot, it seems, be defied forever). The Romans are rocked by the timing of this setback, but the rest of the army will keep up the fight.
Philip moves into the vacant zone, which gives a further negative morale modifier to the Romans. From now on they will need the maximum roll every time they are forced to test morale.
 |
| The key zone is cleared; a further -1 to Roman morale. |
Thanks to this spectacular turnaround, Alexander has the unforeseen luxury of five attacks to score a hit and force a morale failure on the zone opposite him. The Macedonians also hold the Favour of the Gods token, so they can call for a re-roll on a failed combat roll if desired.
First attack: a hit.
 |
| Success! But Sulpicius refuses to despair of the Republic. |
Sulpicius bravely attempts a rally, but fails. One unit is shattered. The Romans - with trepidation - throw for morale... and score the maximum! The legionaries hold on - just - but the equites flee, and their chance to charge Alexander's open flank vanishes with them.
Attack 2... a miss.
Attack 3... a miss.
Attack 4... a miss.
Attack 5 (and last)... a hit!
Sulpicius attempts a rally, and succeeds, the hit is cancelled. Alexander looks on in disbelief - the the gods don't allow re-rolls on successful rallies. The Romans get through the turn.
At this point I took a break to catch my breath and to reflect upon what a great thing miniature wargaming is when you get a battle with as many twists and turns as this one.
Turn 8.
When I return, the Romans, having survived the previous crisis thanks to the heroism of Sulpicius, get one last chance to strike at the Macedonians before the inevitable collapse.
It begins well: they roll a 6 for commands, giving them in effect three combat bonuses to employ.
The two units of legionaries in the center attack first, causing one hit on the phalangites but no shatter.
Sulpicius attacks, and rolls a ten, shattering another unit of phalangites
Alexander has three choices as a result of the shatter. Normally he would consider a rally attempt, but with the Macedonian win so close, it is better to be conservative, for if he should die in the rally, the good work of the last turn to gain morale superiority would be undone. The second option is to use Favour of the Gods to call for a re-roll, but with 6 units in the zone to absorb the hits it seems better to take the loss and keep the re-roll as insurance against lousy attacking dice next turn.
So Alexander elects to accept the hit. A phalangite unit is removed, and the morale die is rolled.
The result is a 1.
With this last shatter taking the Macedonians to a 'cumulative loss' morale modifier, and with Alexander's unit spent, there is a sudden realization that Alexander is not doing too well. The spent and veteran statuses of his Companions cancel themselves out. With the negative for cumulative losses, Alexander's Companions buck; if they bolt, he must flee with them, and the whole zone will follow.
Have the Romans won? For a moment it appears so, but a second glance at the board shows that the Romans are now outnumbered in units by 2-1, which gives the Macedonians a +1 to their morale, and they hold steady.
The Roman have given their best, but it is not quite enough.
On the Macedonian turn the phalanx is unstoppable, and the Roman army, as bold as it has been, must accept defeat.
****
Well, what a thrilling game. The terrain made for some really interesting tactical problems, and the match up between two rising powers and two competing heavy infantry systems was thoroughly engaging.
Solo game though it was, I was originally marginally supporting the Macedonians, but as the battle wore on the gutsy fight put up by the Romans had me internally cheering their successes. I actually thought they had won on the eighth turn - miraculously given the situation - but the 'outnumbered by two units to one' modifier kept Alexander and friends on the field.
Decius and Sulpicius both managing to rally hits at crucial times was a great thing to see, and the way that the Favour of the Gods token influenced results at key moments makes Lost Battles - always an interesting solo experience - even better.
So, a deserved win to Macedon. They rallied back after being in all sorts of trouble and made this into a most memorable game.
It was a great tonic for me personally, as well. After a long time with very little play, not much inspiration, and 'aggravation bleed' around ultimately peripheral things, this was another timely reminder of why miniature wargaming is a hobby worth investing time and effort in.

Wow! Fantastic After action report Aaron! indeed, A lovely post, writing, read and photos. Glad the Macedonians had their day, perhaps the next "rematch" the Romans will return the favor :o)
ReplyDeleteever thought about you hosting a rematch game via by email, players will issue orders to their units etc and you do the issued order movements, die rolling etc..etc?
anyway...thank you for putting this wargame article/post together for us!..
cheers,
Hi Phil, many thanks for reading and for your kind words. As a matter of fact, I have done email games before and would be happy to run another one. Would you be interested in playing? If so, leave some contact info here (I'll note down and then delete it).
DeleteCheers,
Aaron
Nice report, as it started, I wondered whether you would prefer this over a similar Command and Colors game. by the time I got to the end, I had the impression that this was more 'battle-like' with better narrative. Would that be right?
ReplyDeleteHi Norm, thanks for dropping by. I really enjoy C&C:A (as you have guessed!) but find that it is best played against an opponent who is determined to do their best to win. Lost Battles plays out more like the historical accounts read, so as a solo exercise I think it's meatier, and, yes, IMHO is more battle-like and has better narrative.
DeleteI do enjoy C&C as well though!
Cheers,
Aaron
Great report Aaron! Enjoyed reading it all. Also glad it has provided to be a bit of an energizer.
ReplyDeleteThanks Shaun - nice to hear from you as always!
DeleteCheers,
Aaron
Really enjoyed that report, can't believe it's 4 years since I last played any ancients I really ought to do something about that.
ReplyDeleteCheers
Richard
Glad you liked it, Richard. 4 years sounds like a decent interval. Hope you've been filling it with plenty of other good things!
DeleteCheers,
Aaron
Aaron, this is one outstanding BatRep! Well done! I found myself switching allegiances more than once as I read your account of the battle.
ReplyDeleteThanks, Jonathan!
DeleteWell done sir! Second the comments and compliments offered by your, erm . . . , legion of fans.
ReplyDeleteI quite like Chaeronea and thought your historical modification was nicely done. Gives me pause to think about adopting the field for use with other armies. Something in the Dark Ages perhaps, or even a medieval contest?
Appreciate your sentiments about solo gaming as well.
Thanks for posting.
Cheers -
Chris
Hi Chris, are you Chris H who has been writing for Slingshot recently? If so, your battle reports were partly to blame for this one!
DeleteCheers,
Aaron
Yes, Aaron, that would be me.
DeleteEnjoyed your piece on Pharsalus in the recent issue. Coincidentally, that report and others inspired me to have another go at the battle. Just submitted the finished report to Mr. Innes. Fingers crossed.
Not that you asked, but I'm "working" on Bagradas, Gaza, and a portion of Raphia now. Have put a modified Chaeronea on hold for the present, but I can definitely see an Italian city state version, or even something with an Asian angle - perhaps some Samurai or Khmer?
Thanks for reading.
Chris
What were the scores in the end?
ReplyDeleteOh, and not all tedious to read!
DeleteCheers, Luke! I had to pack up quick smart so didn't record the scores. I could probably reverse engineer it, but would likely get something wrong. Would be a tight victory for Macedon, I would say. 10-15 points or thereabouts.
DeleteGreat report of a great game; tense, oh so tense, in the way LB battles can be.
ReplyDeleteCheers Andrew - they certainly can be tense!
DeleteAnother excellent battle report, Aaron. A great read and nail biter.
ReplyDeleteThanks, Bill. Much appreciated :)
DeleteAaron: Great looking figures and report of a classic battle. Thanks for checking up on me too! Warmest regards, Dean
ReplyDeleteSounds like a fantastic game, beautiful pictures and lines of troops!
ReplyDelete